How to buy your first telescope
Contents
Telescopes 101
Buying your first telescope is a big step, especially if you’re not sure what all those terms mean. So, to help you understand what to look for in a quality telescope, the editors of Astronomy magazine answer 11 of the most-asked questions.
1 I know telescopes make things appear bigger, but what exactly do they do?
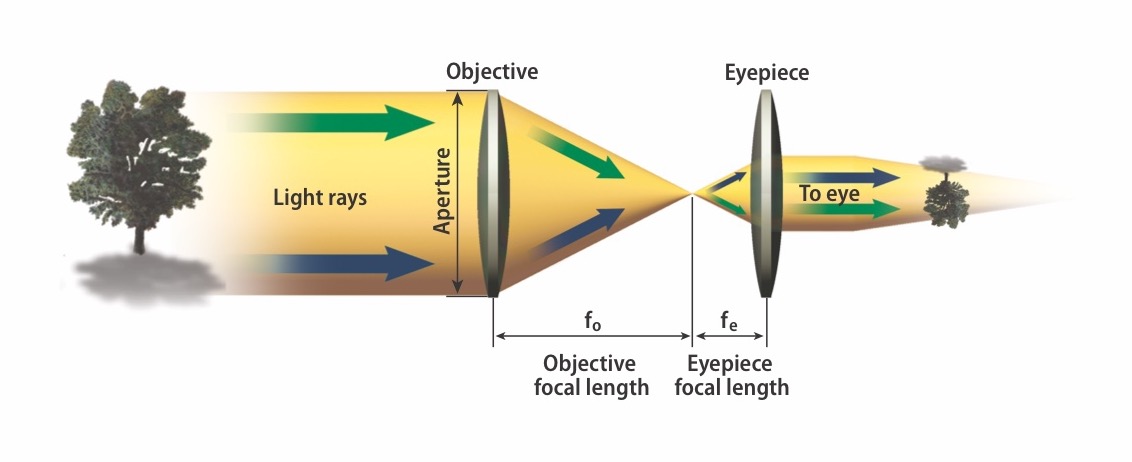
A telescope’s purpose is to collect light. This property lets you observe objects that are much fainter than you can see with your eyes alone. Italian astronomer Galileo Galilei said it best when he declared that his telescopes “revealed the invisible.”
2 Will my telescope be complete, or will I need additional items to make it work?
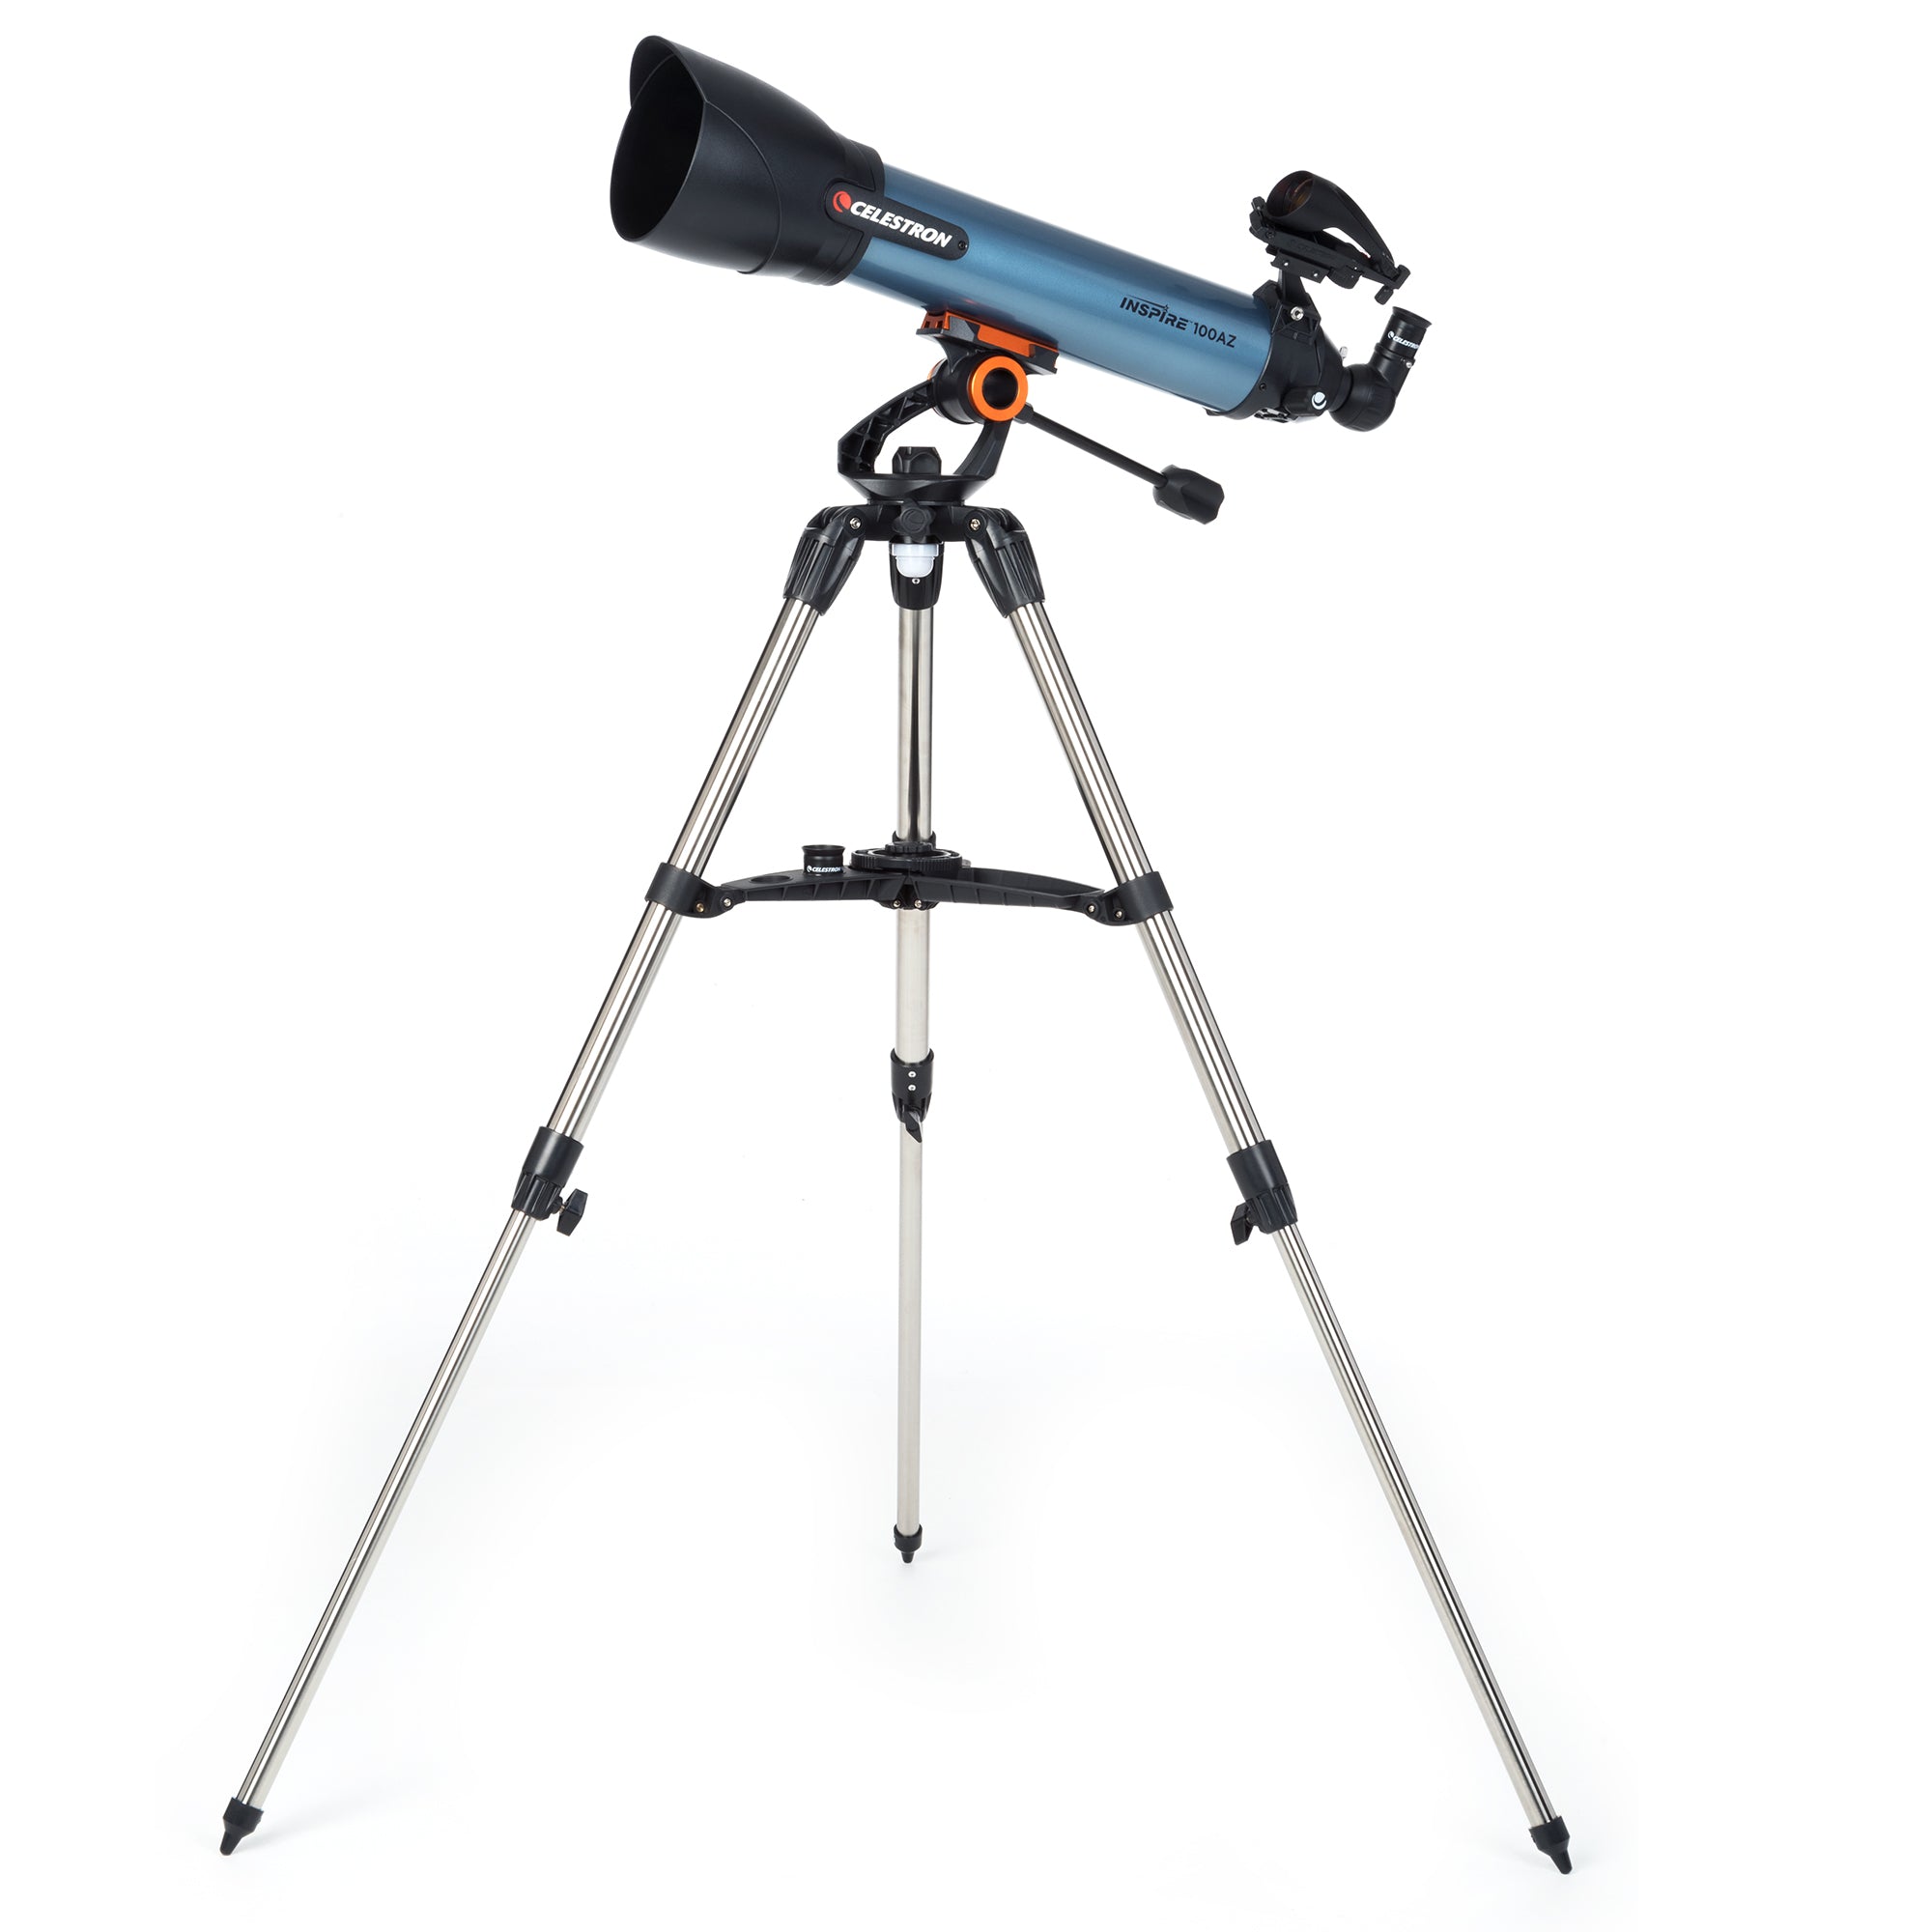
Most Celestron telescopes are complete systems, ready for the sky as soon as you unpack and assemble them. A few models are “optical-tube assembly only.” This means all you’re buying is the optics in the tube with no tripod or accessories.
3 I’m interested in observing. What should I do first?
Learn all you can about telescopes: what types are available, the best accessories, and what you’ll see through them. This article is a good start because you’ll see a wide range of options.
If a telescope interests you, visit Celestron.com to read more about it. You’ll also find telescope reviews online at Astronomy.com/equipment. You’ll learn what’s important to veteran observers when they use a telescope. You’ll also get a feel for mechanical quality, ease of use (including portability), and extra features.
4 Should I buy binoculars before I buy a telescope?
No. The view through binoculars — especially near a city — won’t be what you expect. They are, however, a valuable accessory at a dark site. Star clusters look great through them, as do the Milky Way, meteor trails, and the Moon. Learn more in the binoculars section below.
5 Why are objects through my telescope upside-down?
Because of the way a telescope focuses light, the top of what you’re looking at is at the bottom as it enters the eyepiece, and vice-versa. You can re-flip the image with an accessory called an “image erector,” but you’ll lose a bit of the object’s light. And for faint sky objects, you want the maximum amount of light possible to reach your eye. Besides, there’s no up or down in space, and with most objects, you won’t even know they’re upside-down.
6 Can I use my telescope for views of earthly objects?
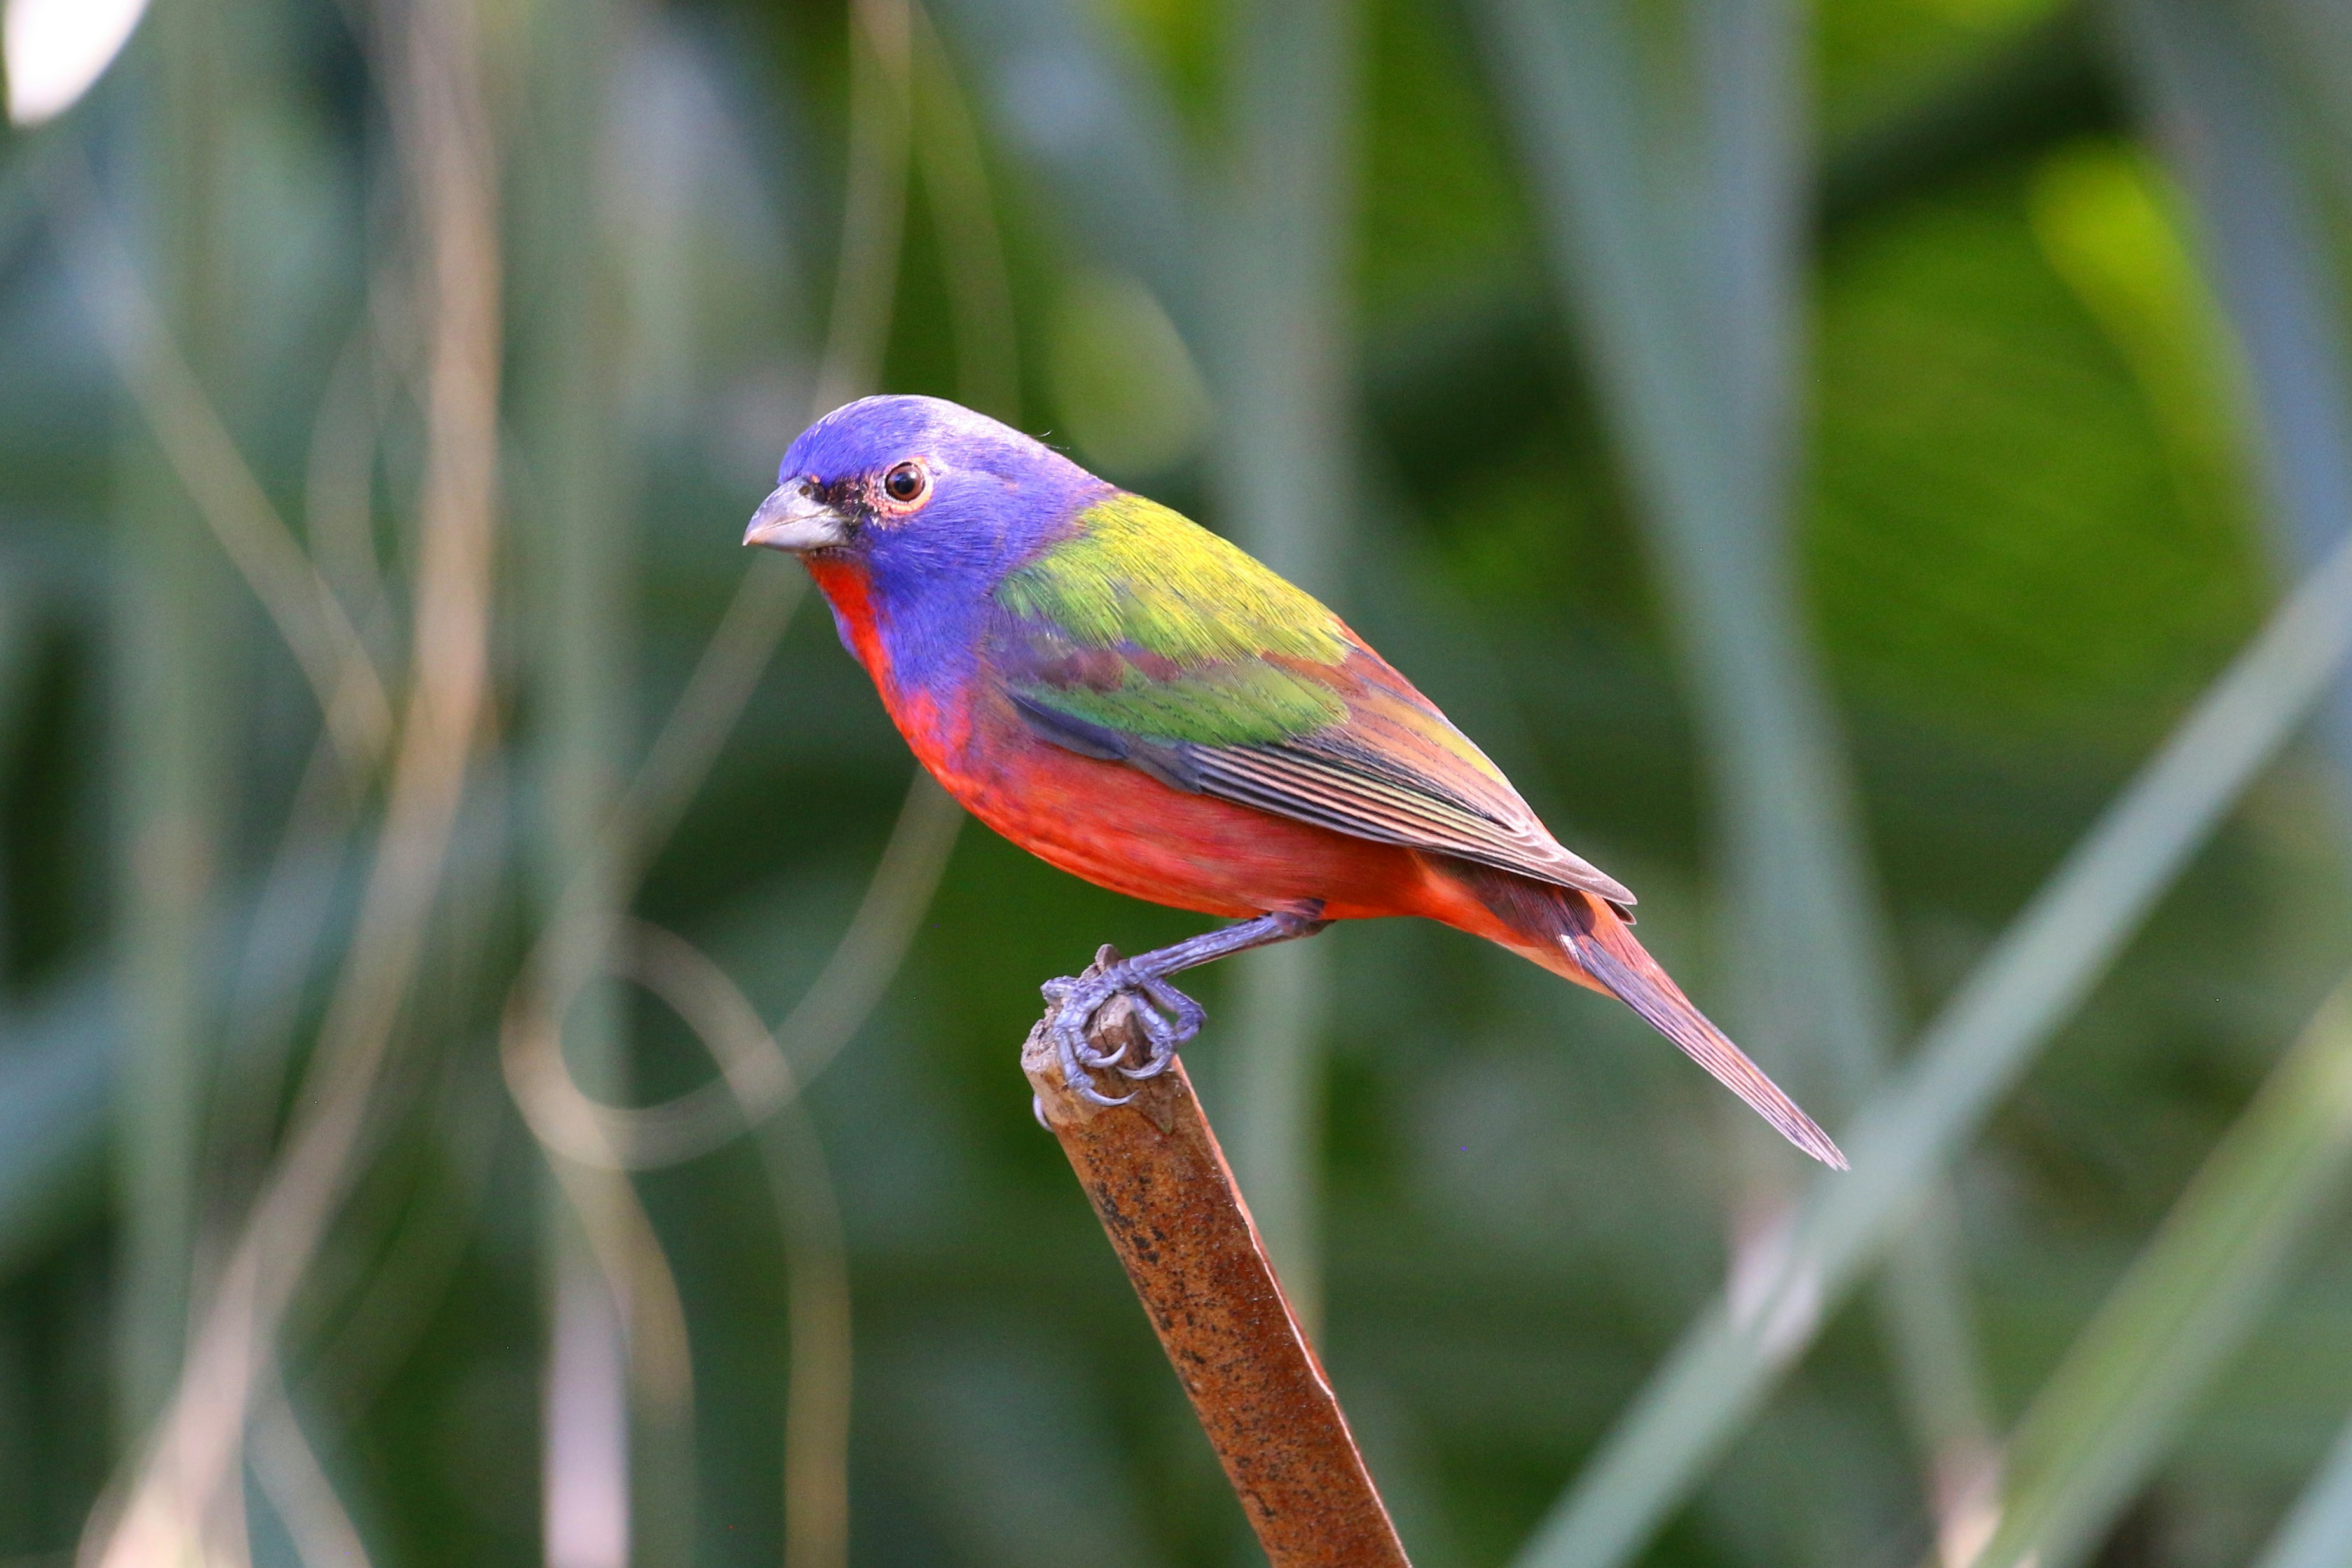
Absolutely! Many nighttime observers (usually those with smaller telescopes) also use their telescopes for bird-watching or other daytime nature-watching activities. Here’s where the image erector (see the previous answer) comes in most handy.
7 Is there a way for me to “test-drive” a telescope?
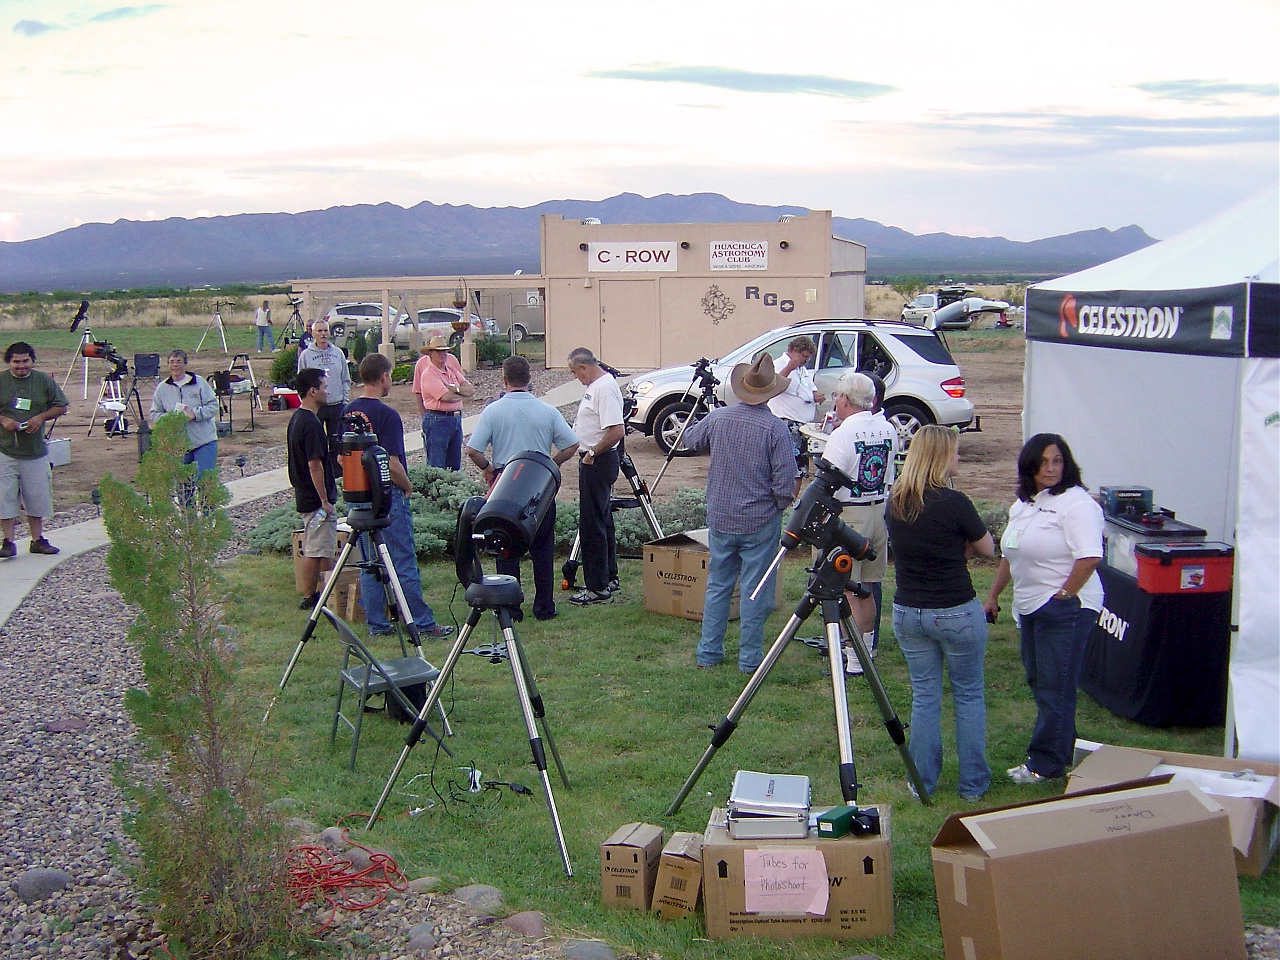
Yes. Look in your area for an astronomy club and visit one of its meetings, which usually occur monthly. There, you’ll find others who enjoy the hobby and are willing to share information and views through their telescopes. At one of the club’s stargazing sessions, you’ll be able to look through many different telescopes in a short period and ask all the questions you like.
8 Apart from quality optics, what’s the most important thing in a telescope system?
The mount, which is what the telescope’s tube sits on. You can buy the finest optics on the planet, but if you put them on a low-quality mount, you won’t be happy with your system. No telescope can function in high winds, but a poor mount will transfer vibrations even in a light breeze. So, be sure your scope sits on a high-quality mount.
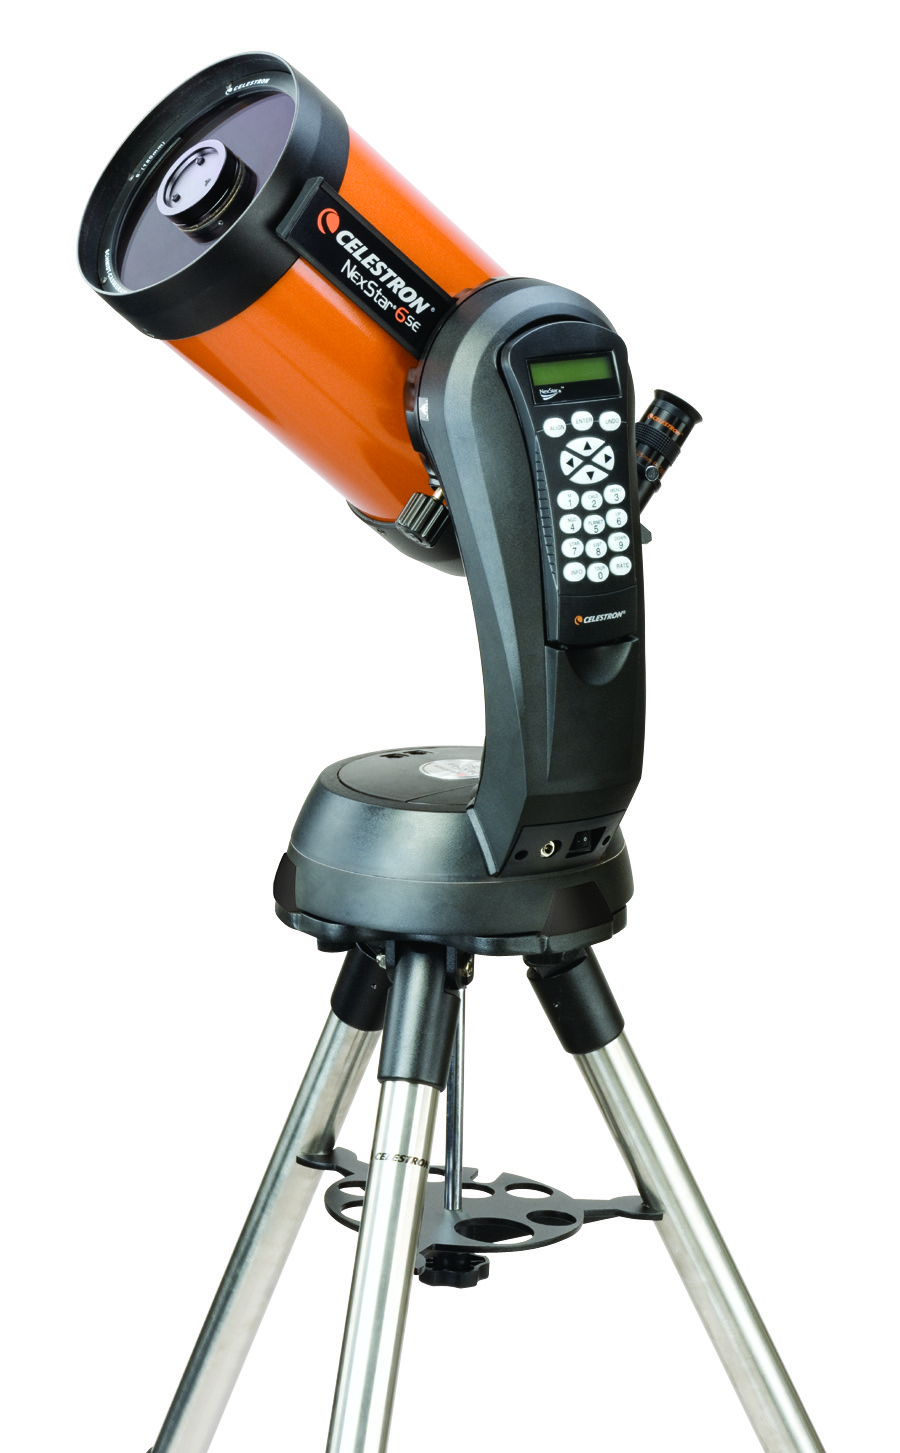
9 Is a “go-to” scope better than one without go-to?
Yes. A go-to telescope is one with a motor or motors controlled by a built-in computer. Once set up for an evening’s observing, a go-to scope will save you lots of time by moving to any sky object you select and then tracking it. Even experienced observers prefer go-to scopes because they leave more time to observe the sky.
10 If I use my telescope outside, does it need electricity?
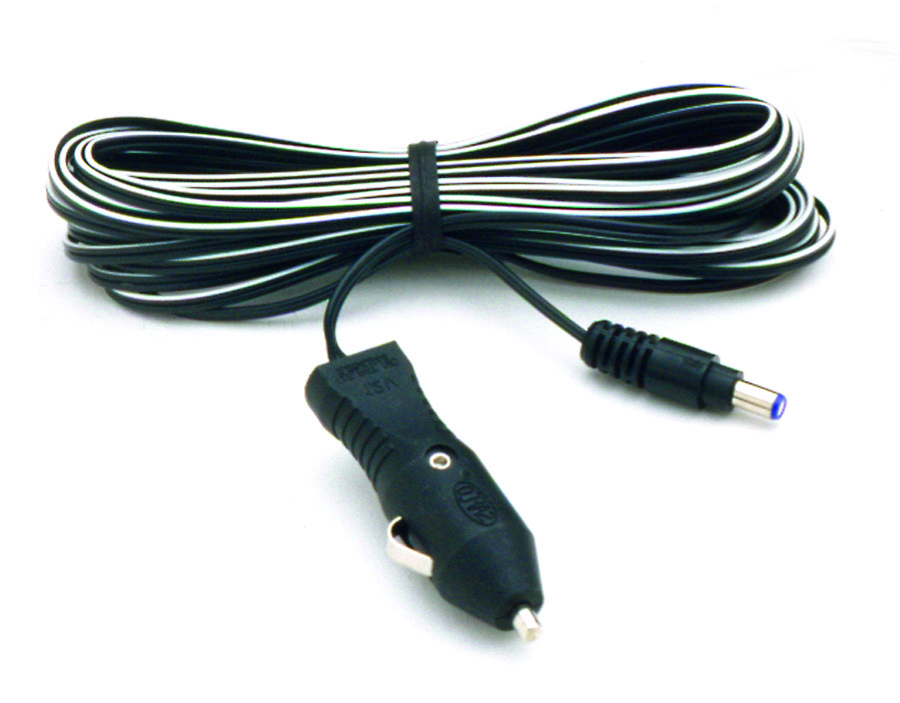
Only if it has a motorized drive. In most cases, telescope drives use direct current, which means you can use batteries (including the one in your car). Adapters available from the manufacturer will let you plug your scope into an electrical outlet.
11 What’s the best telescope for me?
It’s the one you’ll use the most. If it takes an hour to set up a scope, or if your scope is large, heavy, and difficult to move, you might observe only a handful of times each year. If, on the other hand, your scope is quick to set up, you may use it several times each week. A small telescope that’s used a lot beats a big scope collecting dust in a closet every time.
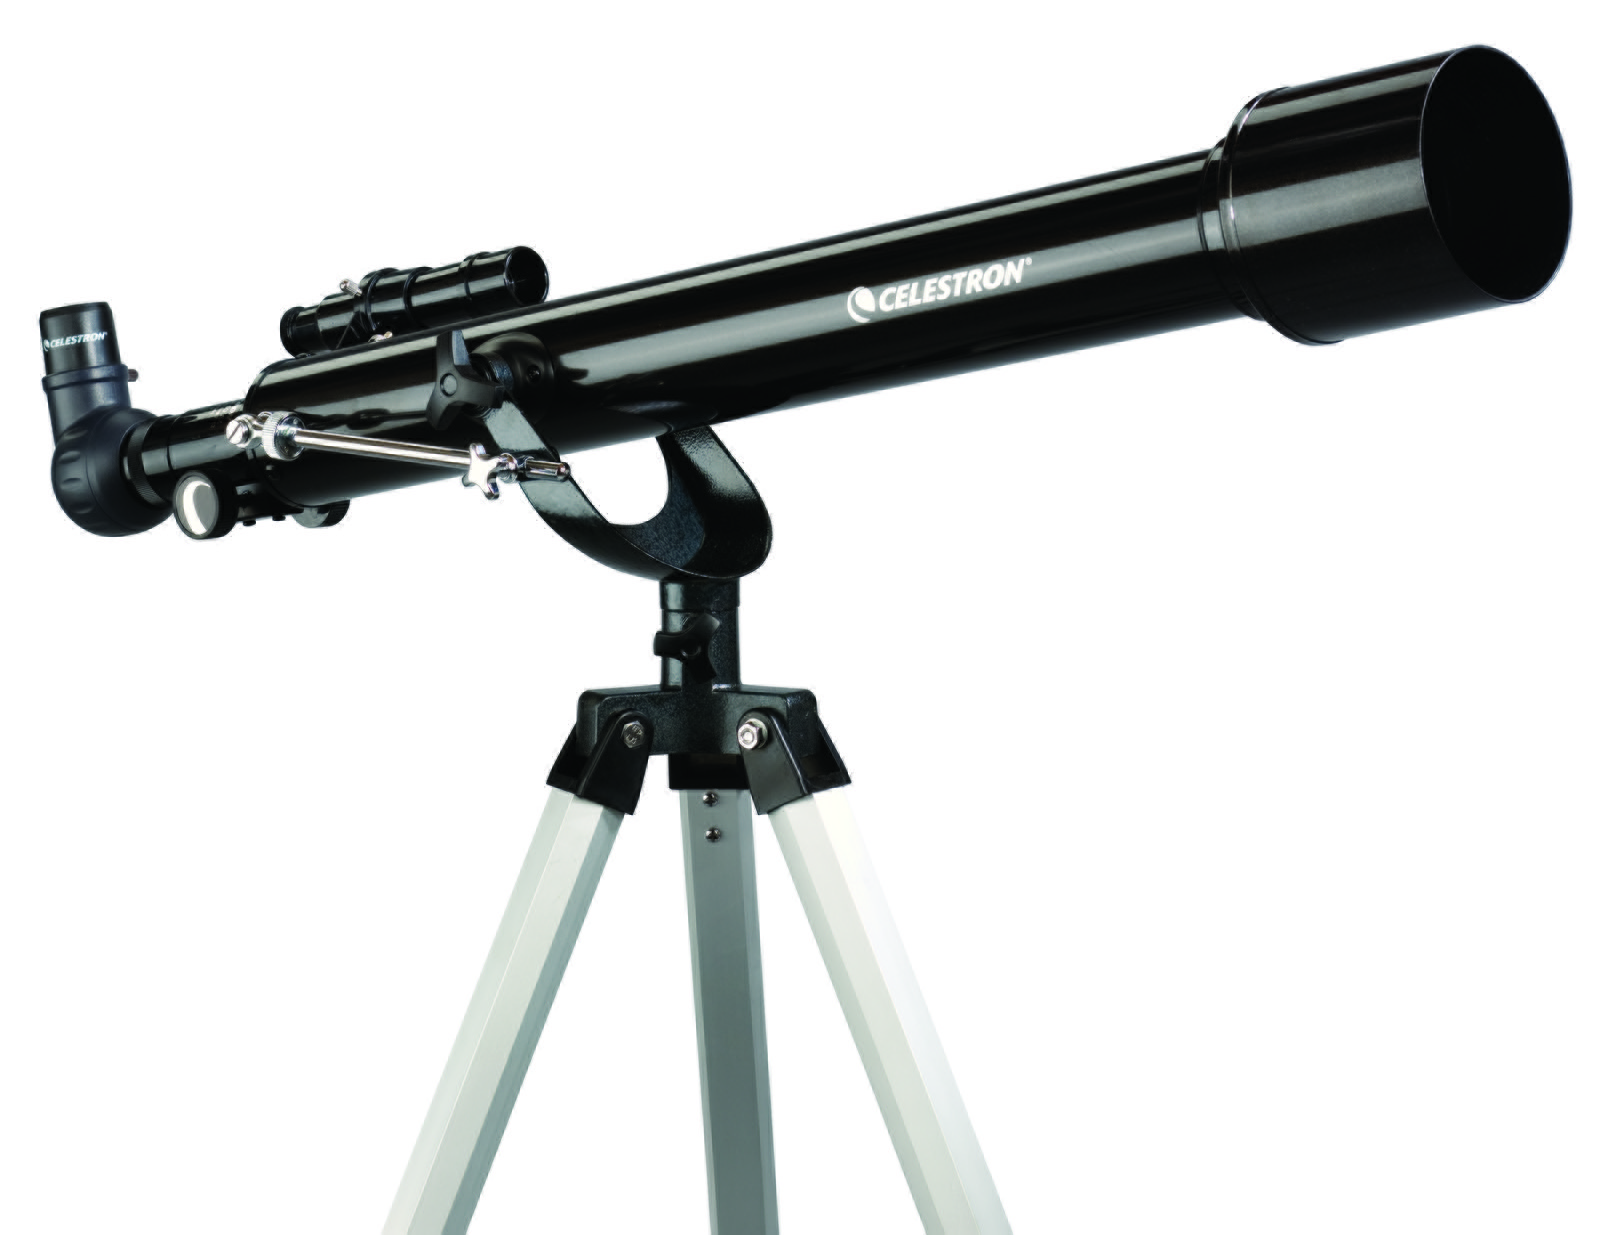
All about refractors
Where light is concerned, the word refract means “to bend.” A refracting telescope (usually called a refractor) does this with a carefully made lens system. If the surfaces of the lenses have the proper shape, the light will come to a focus. Placing an eyepiece at that “focal point” will let you see what you have pointed the telescope at.

Dutch eyeglass-maker Hans Lipperhey applied for the first patent for a telescope (a refractor), in 1608. His application described “an instrument for seeing faraway things as though nearby.” The tube magnified objects about three times. Italian inventor Galileo Galilei was the first to use the telescope to study celestial objects, and what he saw revolutionized astronomy forever.
Two words you’ll see when reading about today’s refractors are achromat and apochromat. Each is a lens system combining different types of glass. Achromat means “not color dependent.” Such a lens has two pieces of glass and does a pretty good job of bringing all colors of light to the same focus.
Apochromatic lenses are also available. They are the top of the line, and their front lenses combine up to four pieces of glass.
Into the 1960s, refractors topped all telescopes in terms of numbers sold. Then, as manufacturers began making large scopes of other designs, sales of traditional refractors fell. In recent years, however, refractor sales have made a dramatic comeback due to several factors you may want to consider when you buy a telescope.
First, the overall quality of refractors has risen dramatically. Second, better lenses have made shorter tubes possible. Finally, lighter materials mean small models now transport more easily. Not only does this simplify travel to your favorite viewing site, but it also helps you decide whether or not to set your scope up in the backyard for a quick view of the Moon or Jupiter.
3 things you should know
- Refractors use a lens system to produce images.
- Refractors require the least maintenance of all telescopes.
- Many small refractors are light enough to mount on a sturdy camera tripod, making them the ultimate grab-and-go scopes.
What to consider
- Nothing blocks any of the light passing through the lens, which makes image contrast better. Observers of planets and double stars (who need high contrast to resolve small details) say that refractors are best for such objects.
- Refractors are low maintenance. Lenses never require recoating like mirrors eventually do. Also, a lens usually doesn’t need adjustment — what telescope-makers call collimation. The lens does not get out of alignment unless the scope experiences a major trauma, like falling onto a hard surface.
- Because a refractor has a closed tube, it requires some time to adjust to the outside temperature when moved from a warmer or cooler house. Today’s thin-walled aluminum tubes conduct heat well, so they have reduced the cool-down time a lot. But you still have to take it into account.
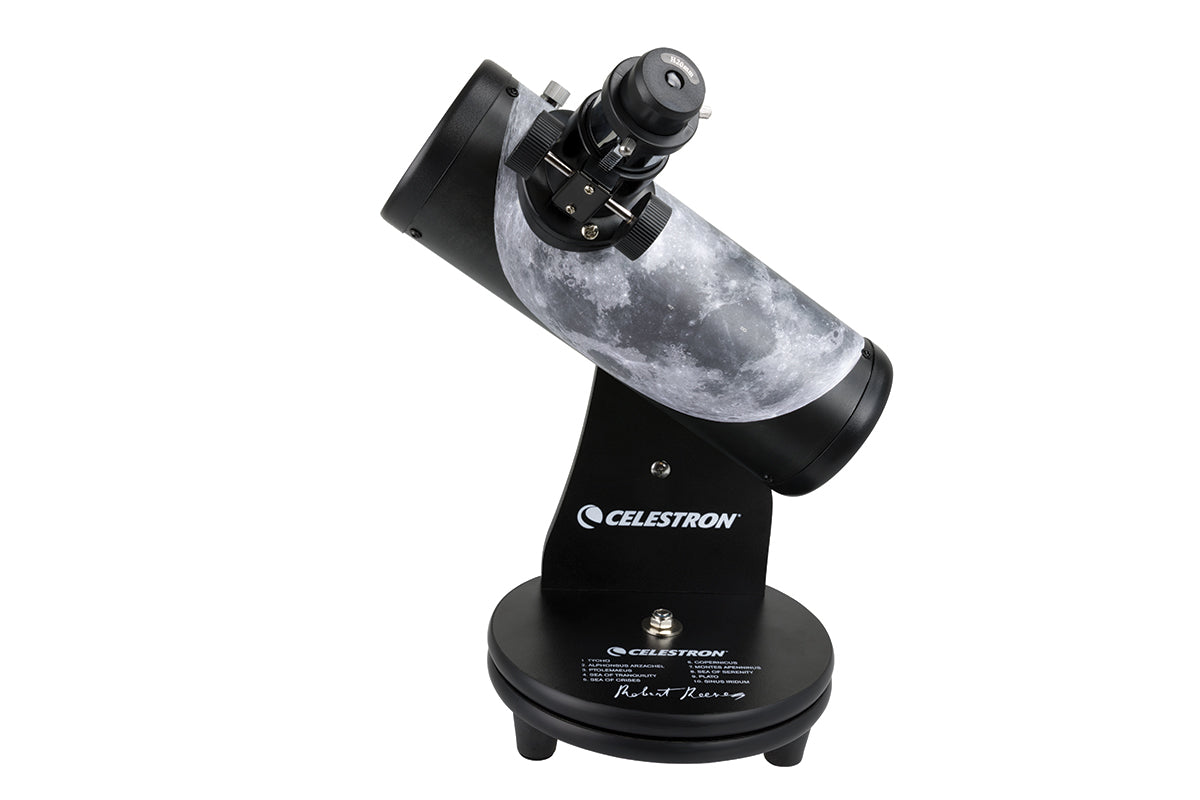
All about reflectors
Scottish astronomer James Gregory invented the reflecting telescope and published a description of it in 1663. Although astronomers and historians give him credit for the invention, Gregory never actually made the telescope.
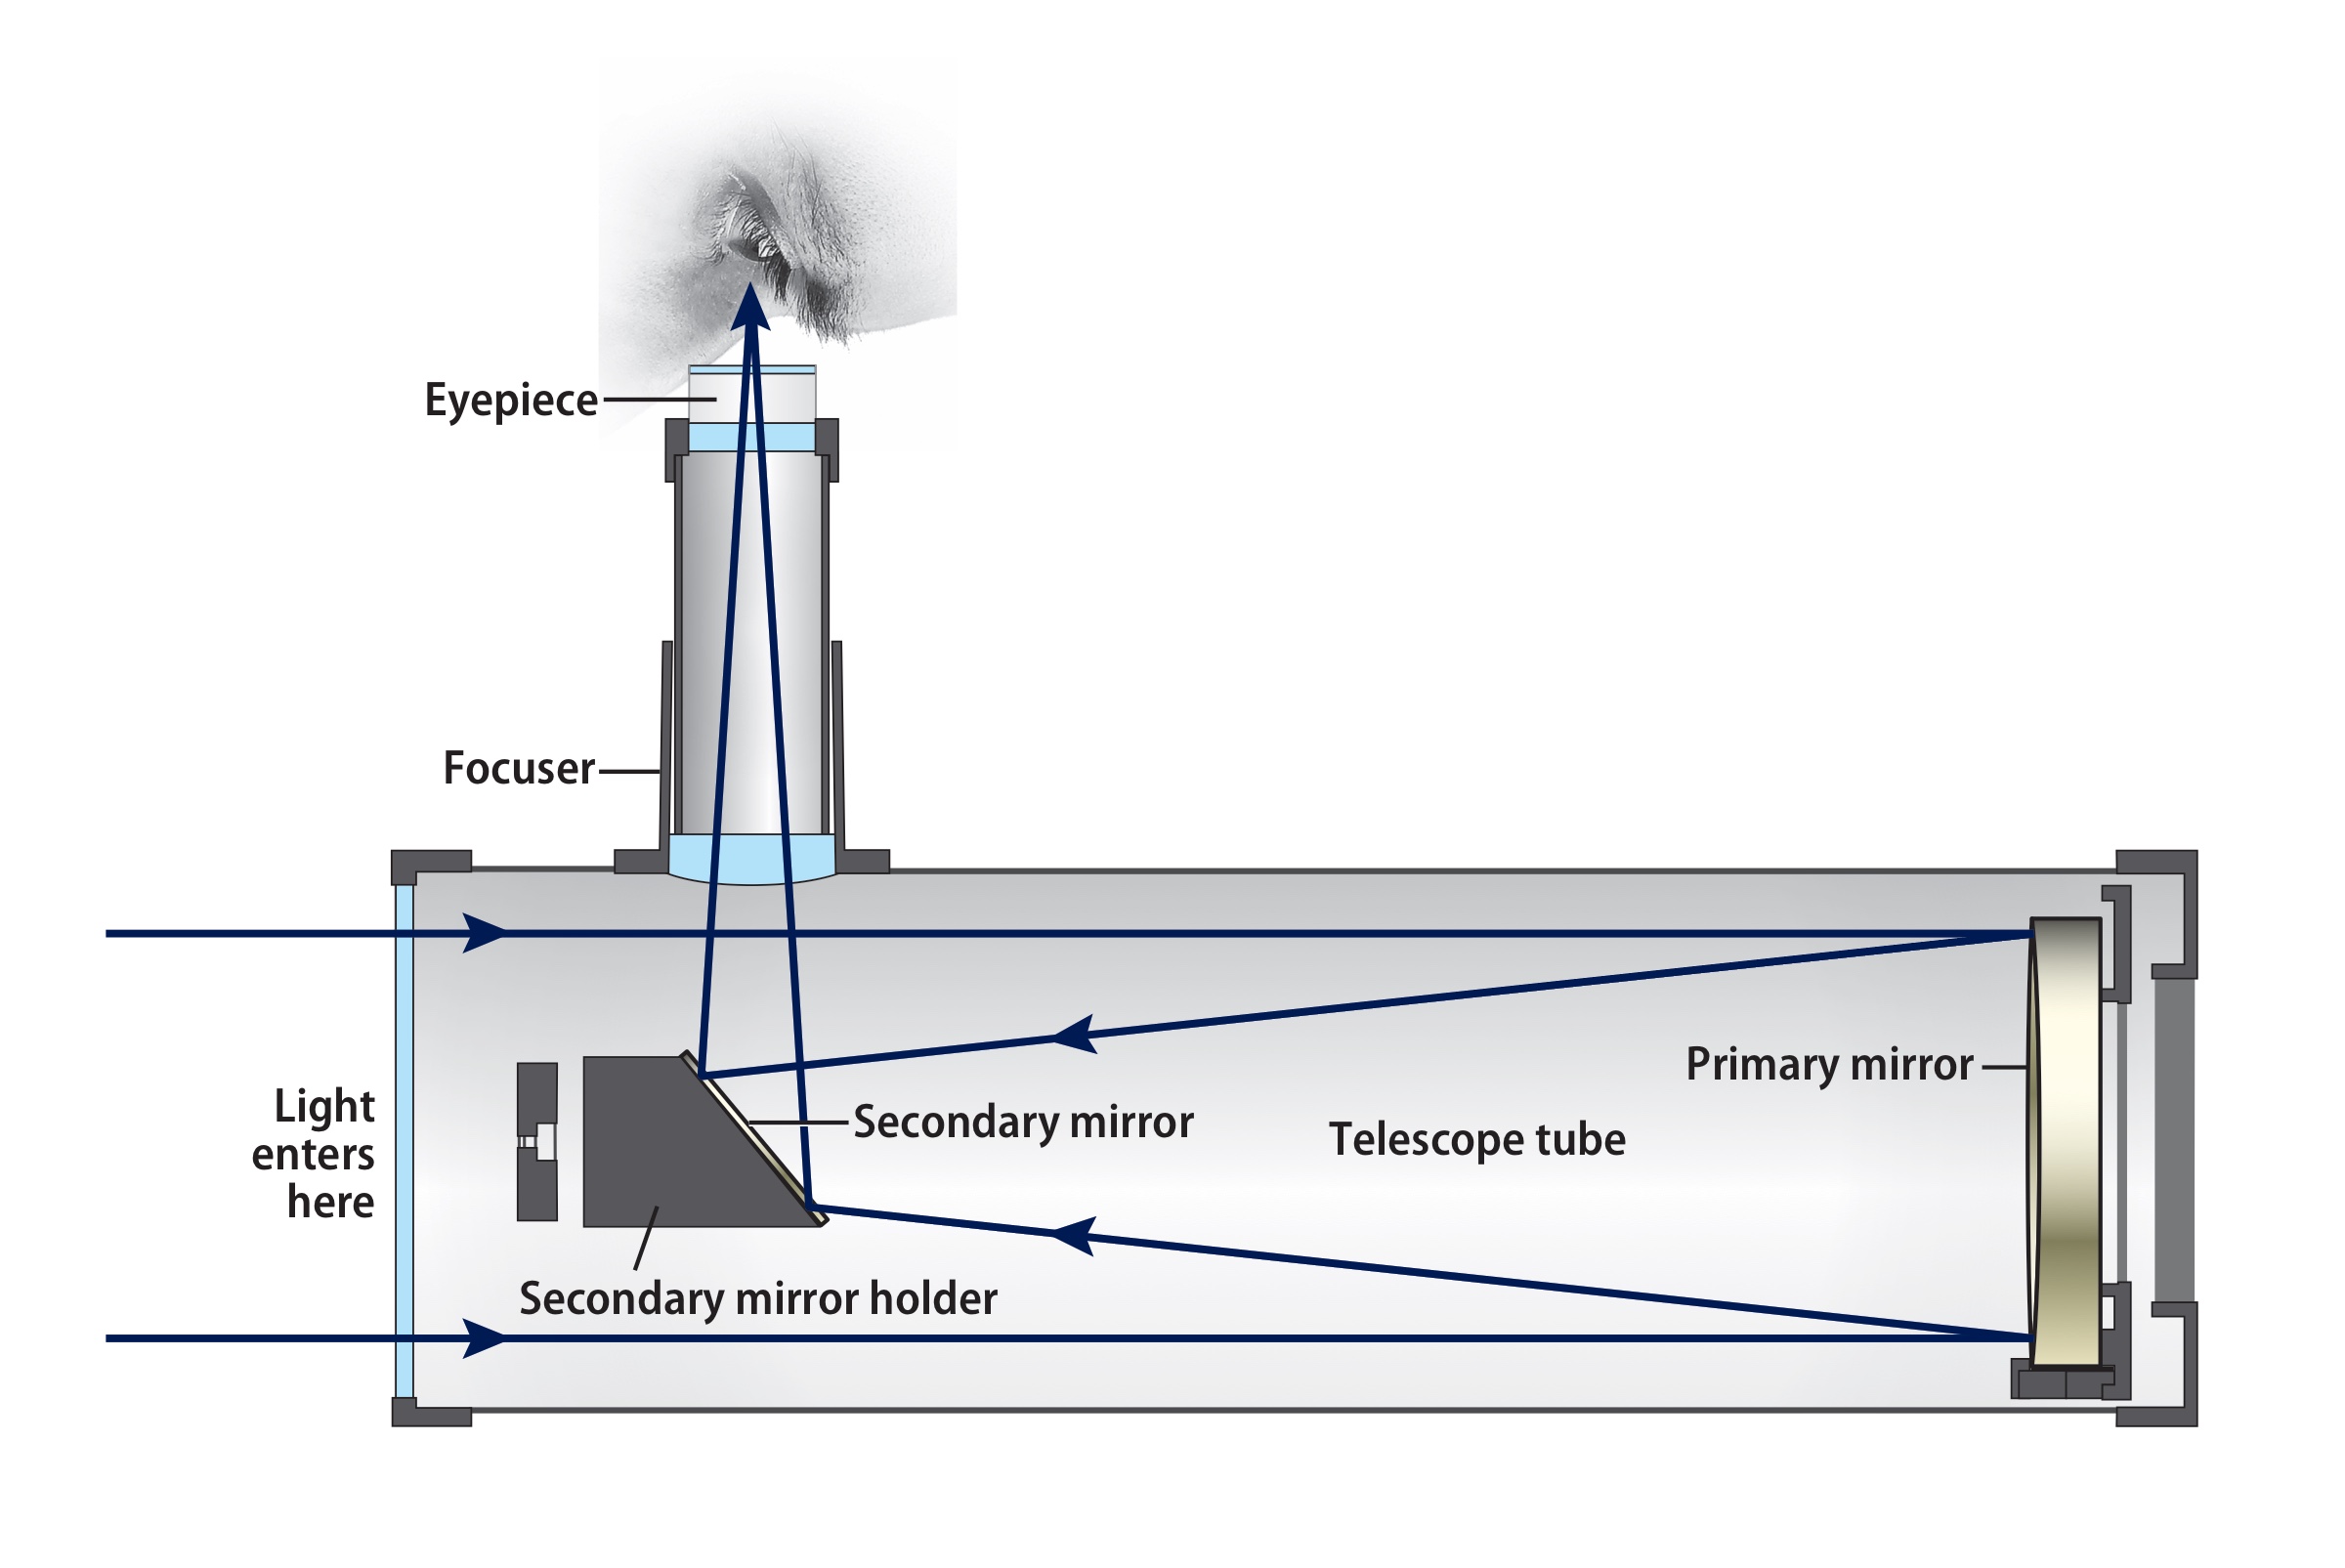
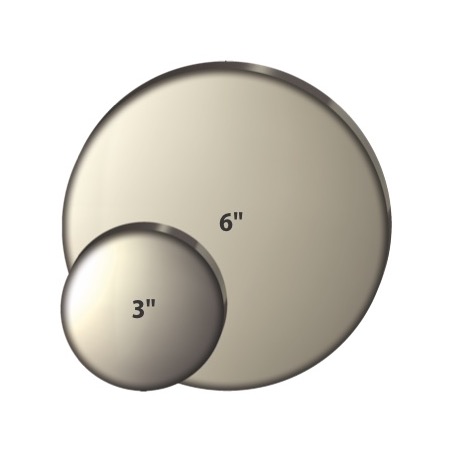
English mathematician Sir Isaac Newton constructed the first working reflecting telescope in 1668. It had a mirror 1.3 inches (3.3 centimeters) across and a tube 6 inches (15.2 cm) long.
Today, every Newtonian reflector contains two mirrors — a large, curved one at the bottom of the tube, called the primary, and a small, flat secondary near the top. Light enters, travels down the tube, hits the primary, and reflects to the secondary. That mirror then reflects it to the eyepiece.
Through half of the 20th century, amateurs built their own reflectors. Now manufacturers offer high-quality models, and they’re a bargain. Overall, reflectors are the least expensive telescopes, so if budget is a factor, you’ll want to look into buying a small reflector.
But the biggest amateur scopes are also reflectors. So, if moving a large, heavy “light bucket” isn’t a problem, maybe a 12-inch or bigger reflector is in your future.
3 things you should know
- Reflectors use a system of mirrors to produce images.
- A reflecting telescope offers the best “size per dollar” ratio.
- The largest amateur telescopes are reflectors.
What to consider
- Reflecting telescopes show no excess color. That means you won’t see color fringes around even the brightest objects.
- Inch for inch, reflectors are less expensive than other telescope types. When working with a mirror, manufacturers have to polish only one surface. An apochromatic lens has between four and eight surfaces, plus you’re looking through the lenses, so the glass has to be defect-free. All of this makes such lenses more expensive. Telescopes with apertures of more than 6 inches, with few exceptions, are all reflectors or compound telescopes.
- The placement of the secondary mirror creates an obstruction that scatters a tiny amount of light from bright areas into darker ones. Unless you’re looking at a planet or bright nebula under high magnification, you’ll never notice this.
- Newtonian reflectors suffer from coma, a defect that causes stars at the very edge of the field of view to look long and thin like a comet. Observers generally compensate for this by placing all targets at the center of the field.
- Because of how the mirror attaches to the tube, a reflector is sensitive to bumping or jostling when transported. To be sure all is well, many skygazers collimate their telescopes (adjust the mirrors) before each observing session.
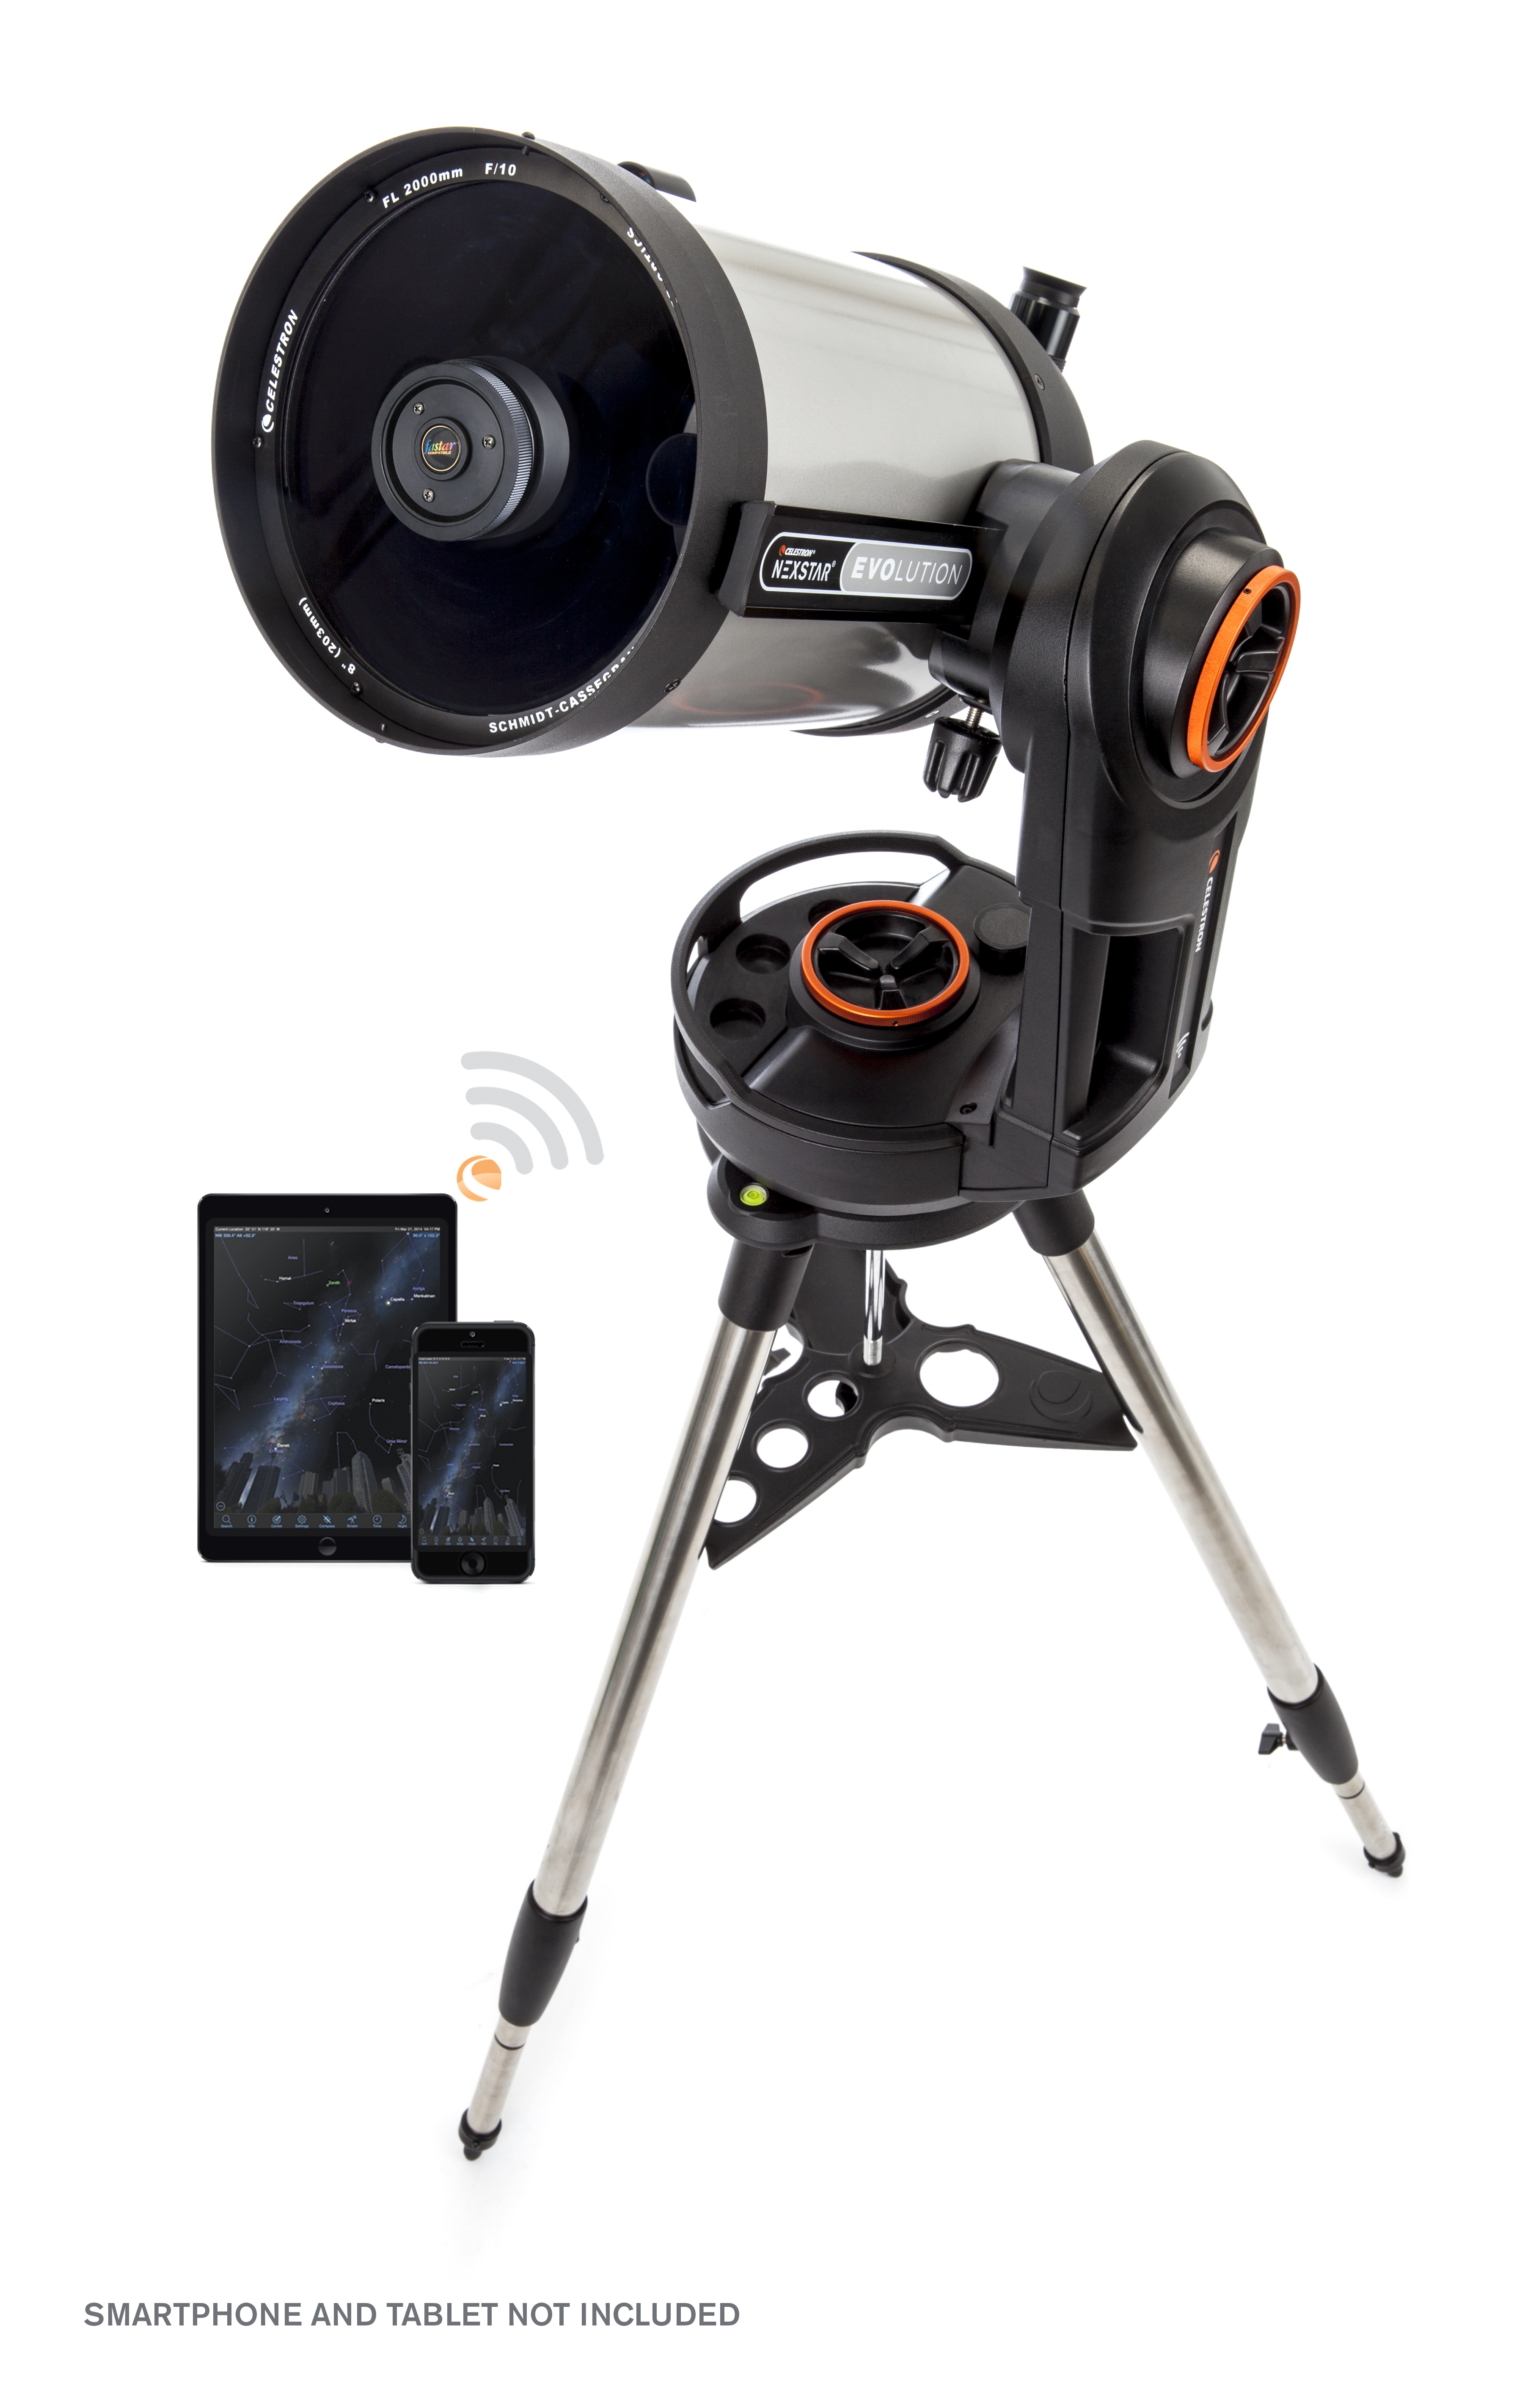
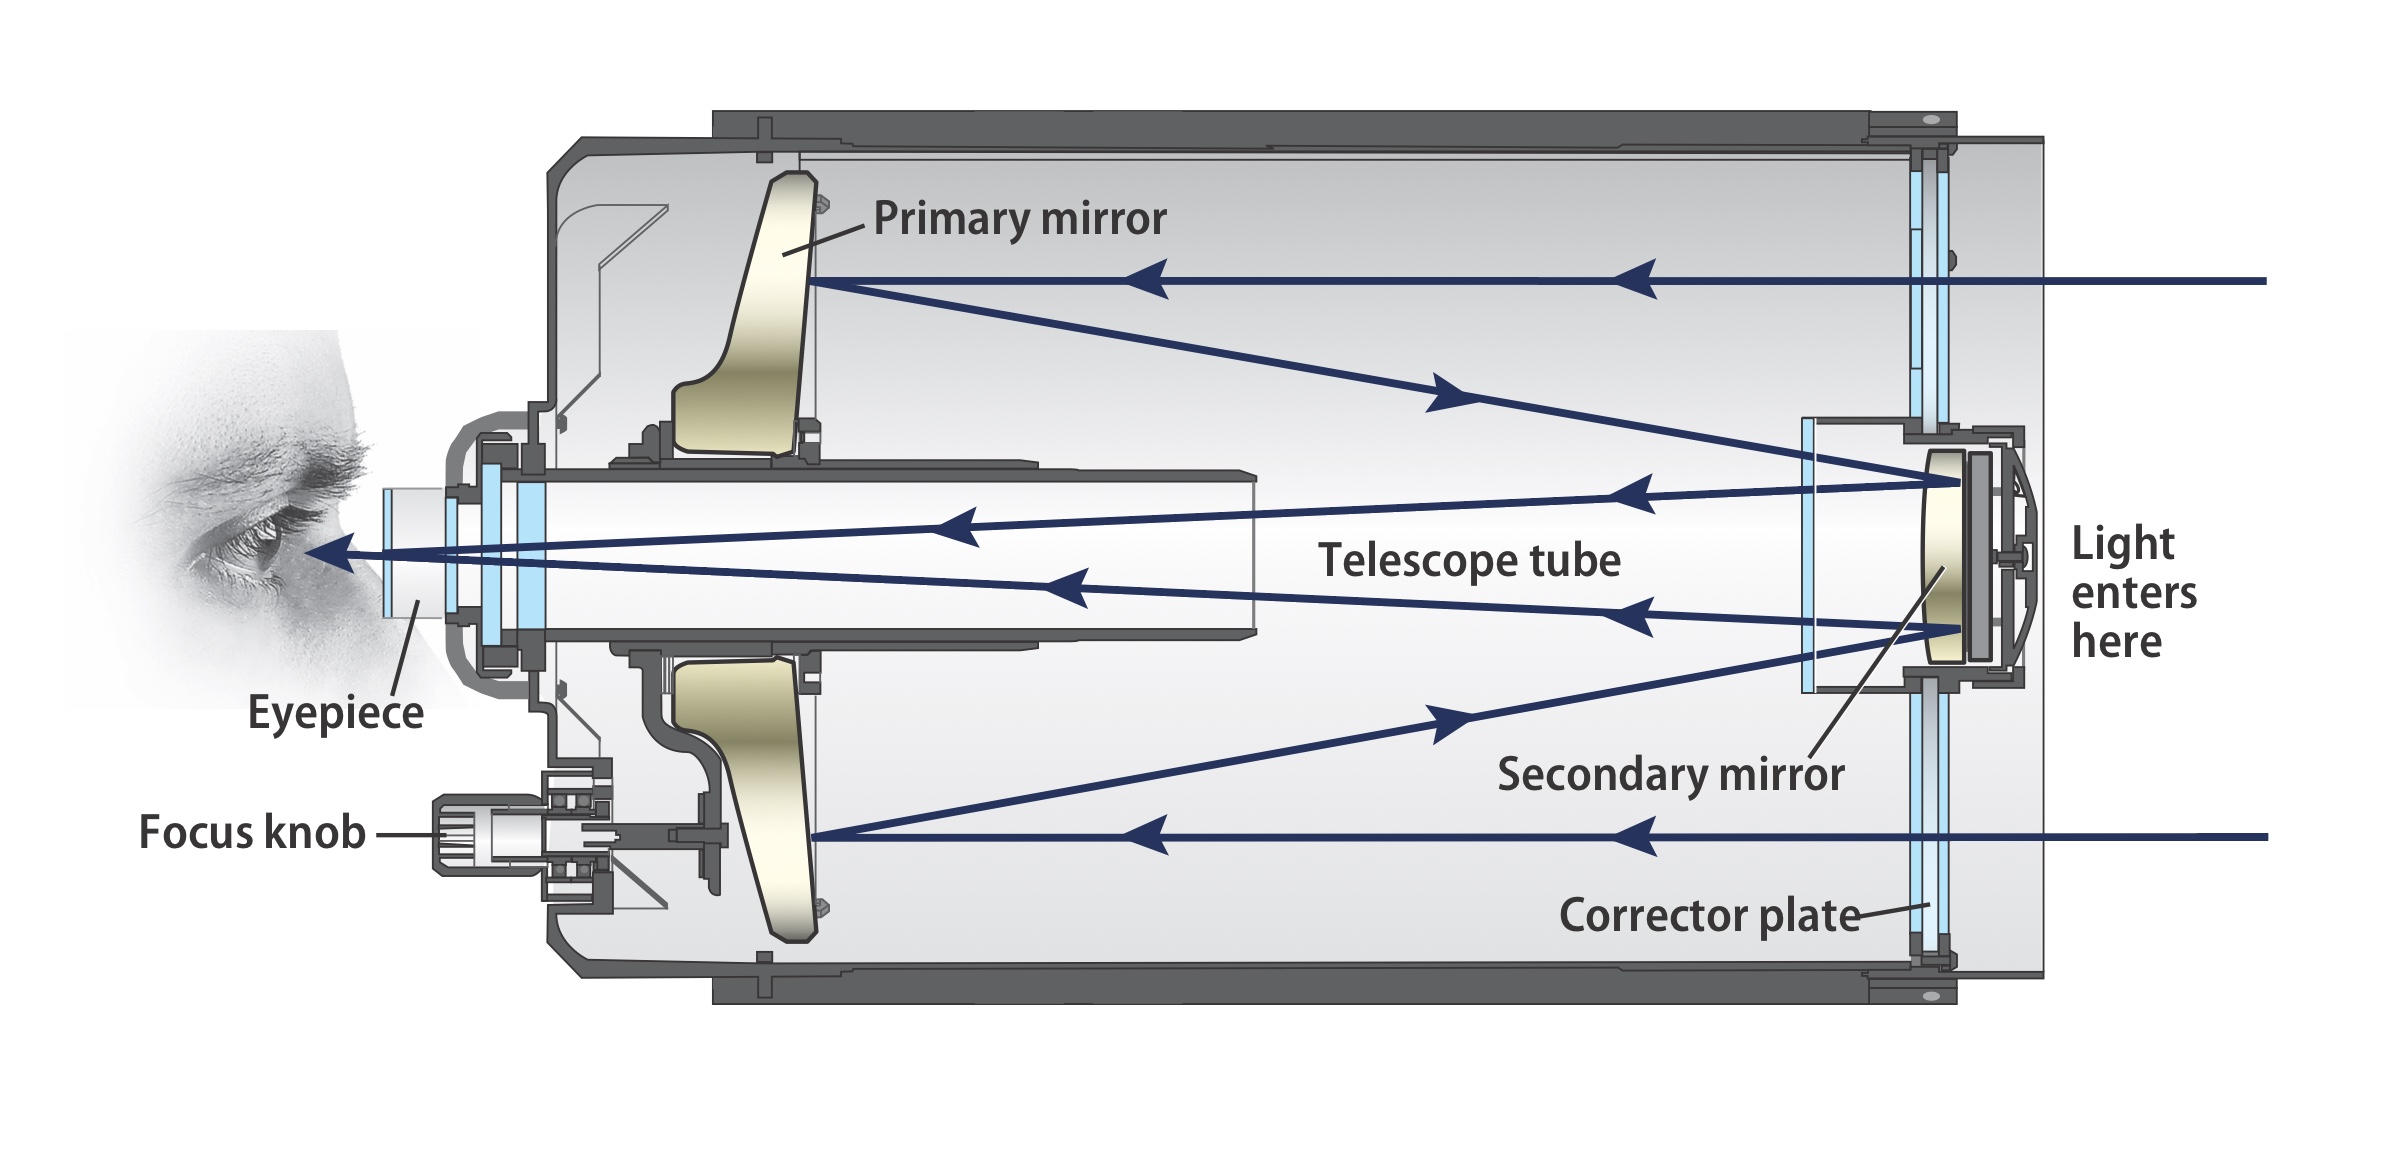
All about compound telescopes
With regard to telescopes, catadioptric means “due to both the reflection and refraction of light.” These instruments also are known as compound telescopes and are hybrids that have a mix of refractor and reflector elements in their design.
German astronomer Bernhard Schmidt made the first compound telescope in 1930. The Schmidt telescope had a spherical primary mirror at the back of the telescope and a glass corrector plate in the front.
The Schmidt telescope was the precursor to today’s most popular design, the Schmidt-Cassegrain telescope, or SCT. (It also incorporated elements by French priest and science professor Laurent Cassegrain.) In the SCT, light enters the tube through a corrector plate and then hits the primary mirror at the tube’s base, which reflects the light to a secondary mirror mounted on the corrector. The secondary reflects light through a hole in the primary mirror to the eyepiece, which sits at the back of the scope.
3 things you should know
- Compound telescopes employ a combination of lenses and mirrors to produce images.
- They have the most compact design.
- Manufacturers usually sell them as complete systems.
What to consider
- The No. 1 advantage of a compound telescope is its compact design. Such instruments are often only one-quarter as long as comparably sized reflectors and much shorter than refractors with half their aperture. This feature makes the compound telescope a great grab-and-go instrument.
- Like refractors, compound telescopes also have a closed tube. Adjusting to the outside temperature, therefore, takes longer than with an open-tube reflector with the same size mirror. To speed cooling, Celestron installs filtered cooling vents behind the primary mirror of its top-end Schmidt-Cassegrain telescopes.
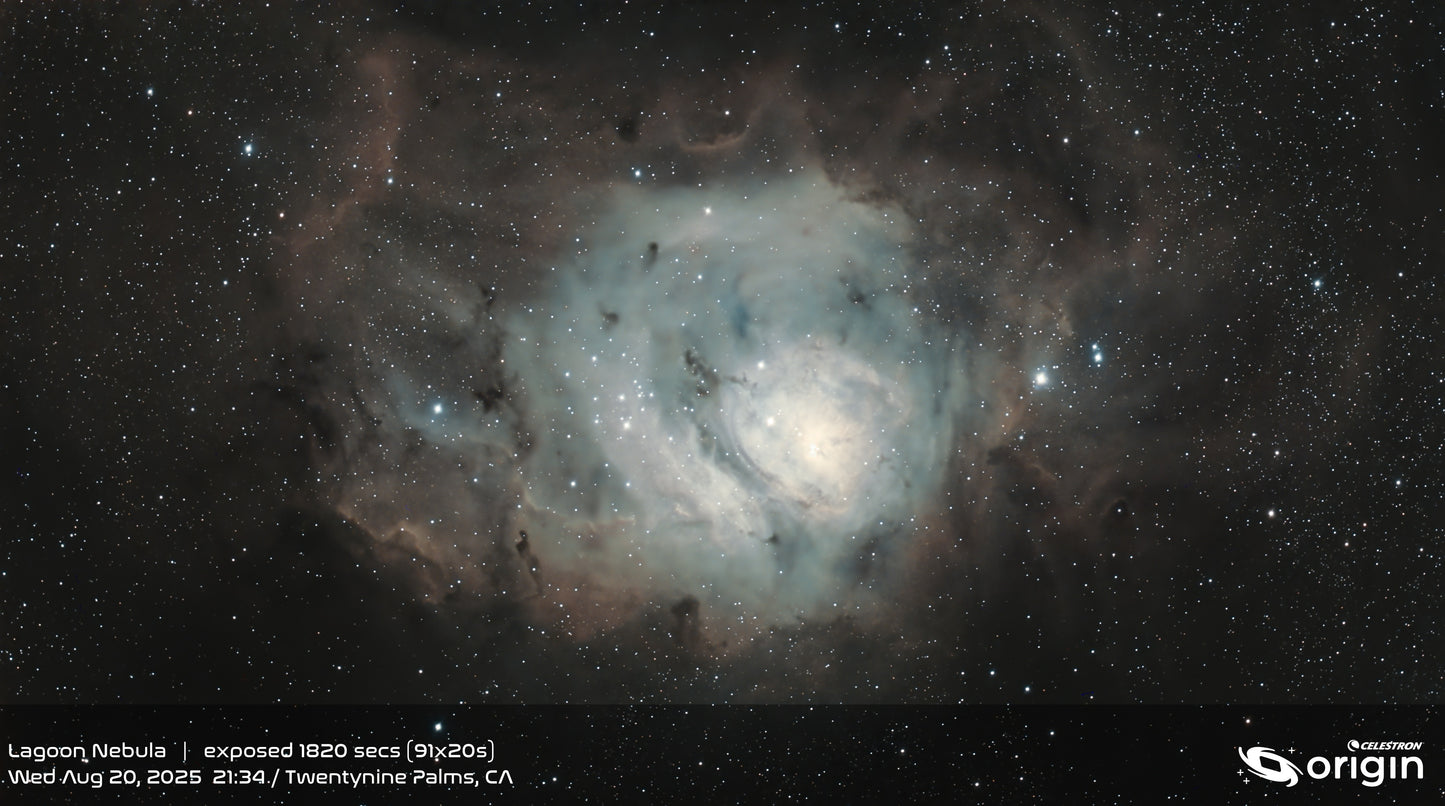
All about smart telescopes
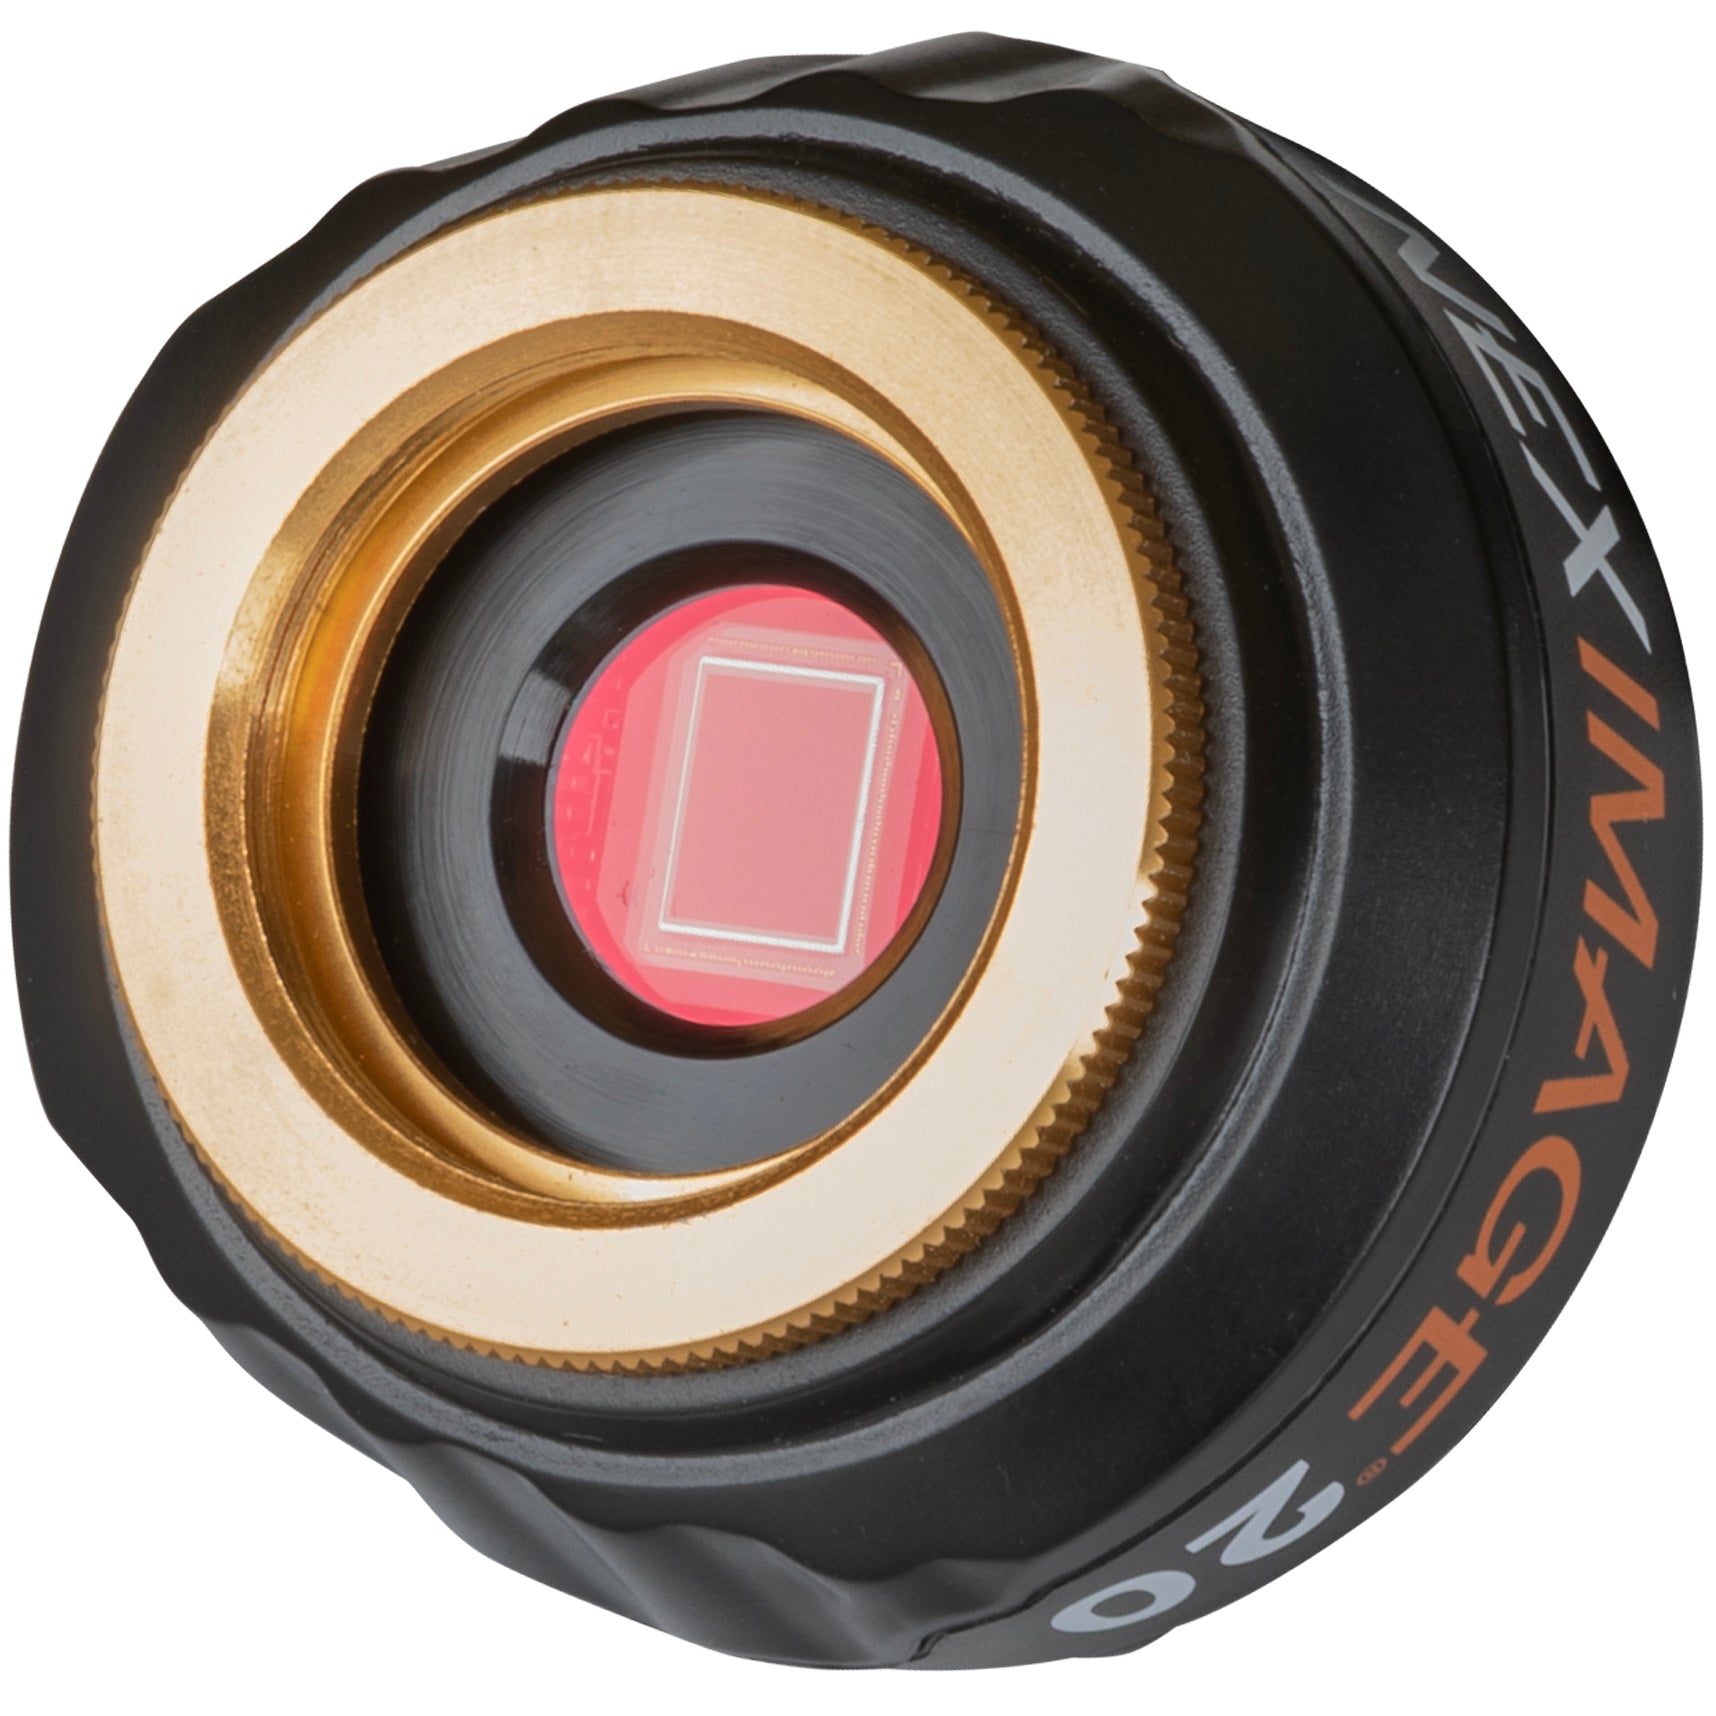
With the introduction of the Origin Mark II Intelligent Home Observatory — one of the new generation of so-called smart telescopes — Celestron now allows every backyard observer to become an astroimager. At the heart of this system is the company’s Rowe-Ackermann Schmidt Astrograph (RASA). In this design, the imaging sensor is at the front of the telescope tube. This creates a fast f/2.2 system with a wide field of view.

Of course, you’re not an imager without a camera. And the one in the Origin Mark II is the company’s Origin 678C Camera, which incorporates Sony’s Starvis 2 CMOS technology. The chip contains 8.4 megapixels and a 16:9 aspect ratio.
Unlike other telescopes, setup is a snap. Once you have the telescope outside, connect it to the Celestron Origin Powered by SkySafari app. In less than two minutes, the telescope focuses itself, scans the sky, and aligns itself by matching star patterns with its internal database. You’re ready to go.
The free-to-download app features a planetarium-like interface. When you choose a target to image, the telescope will center it in its field of view. Then press “Start Imaging,” and the camera will begin taking and stacking 10-second exposures. You’ll watch the image increase in detail in real time.
While it’s shooting, the telescope tracks the sky and, if necessary, uses its built-in dew prevention system. Through the app, you can adjust the brightness, contrast, and color saturation of the image.
Sharing your images is easy. Multiple people can connect to the Origin to stream the view. Or you can send a live feed to any smart TV.
Indeed, smart telescopes may be the wave of the future. They’re a complete automated imaging system that locates, tracks, and stacks exposures of whatever target you choose. They’re not cheap, but the savings in time and effort may make them well worth the price.
3 things you should know
- Smart telescopes find and track targets the user designates.
- They take and stack short exposures.
- You’ll see the results in real time.
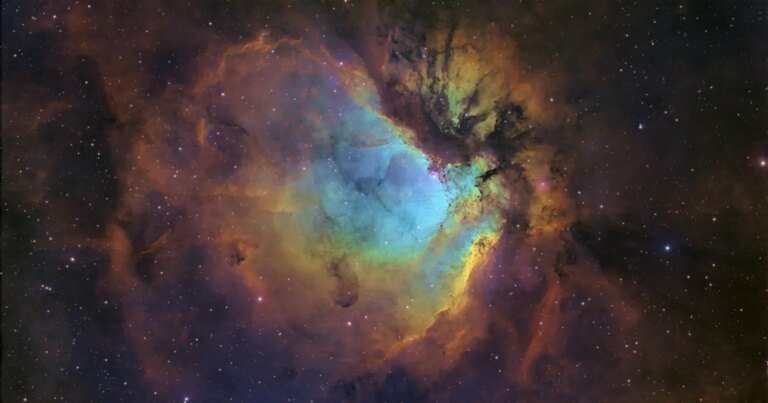
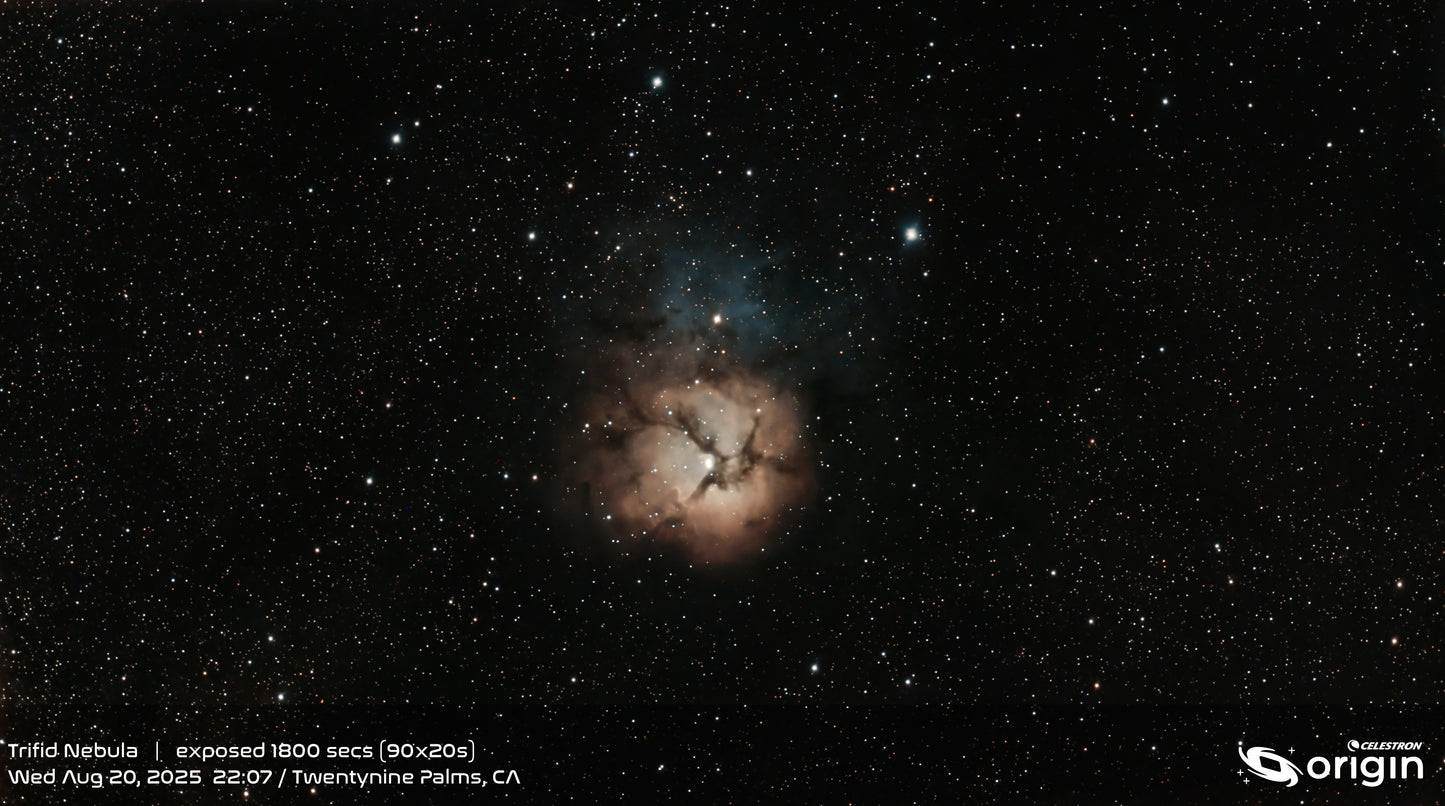
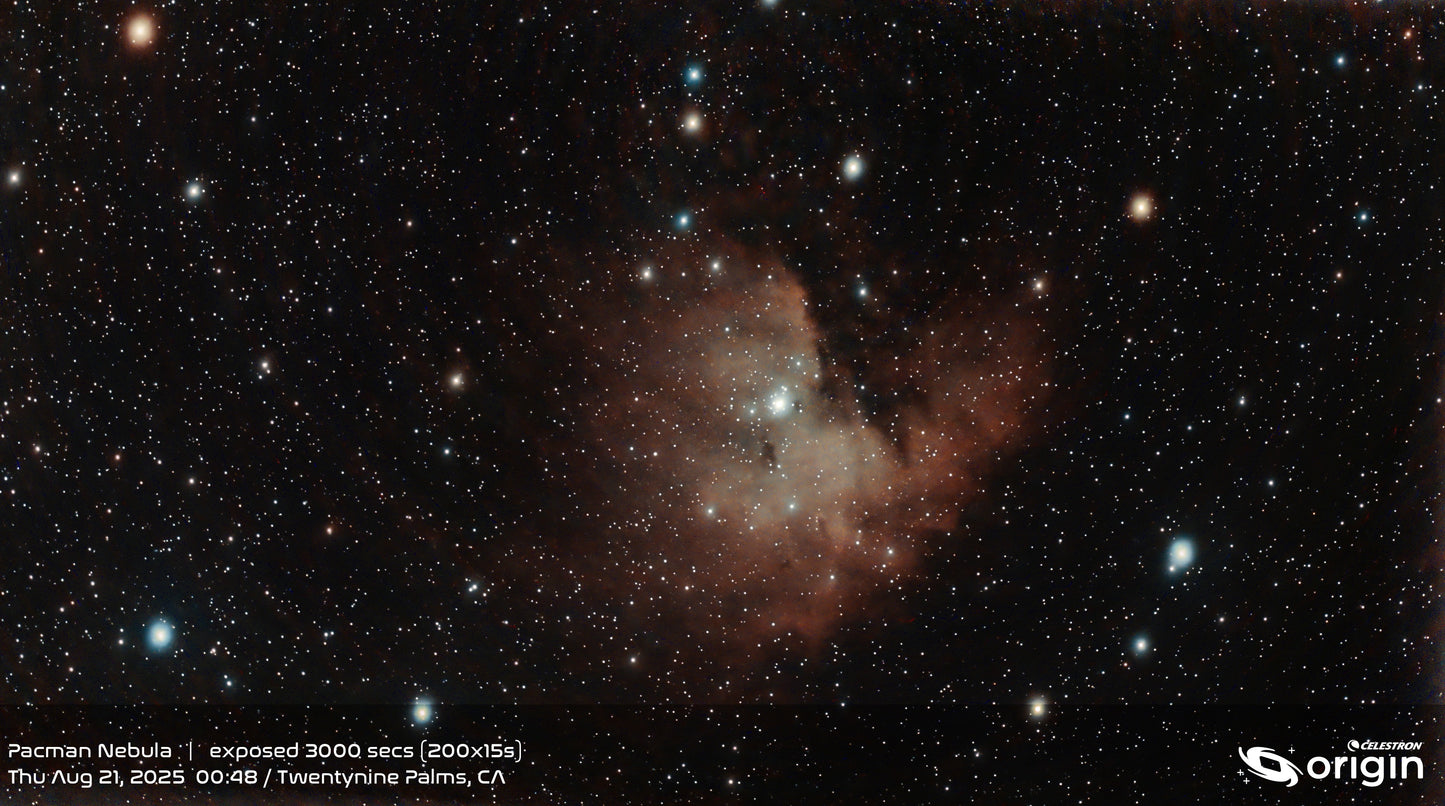
Sample images from the Celestron Origin Mark II
All about mounts and drives
When we talk about telescopes, we often focus on the tube with the mirrors or lenses. But that’s only half of any telescope system. Equally important is the mount.
An unstable mount will not let even the best telescope deliver quality images. If the mount is too light, wind will be only one of your enemies. Your images will bounce even when you are focusing.
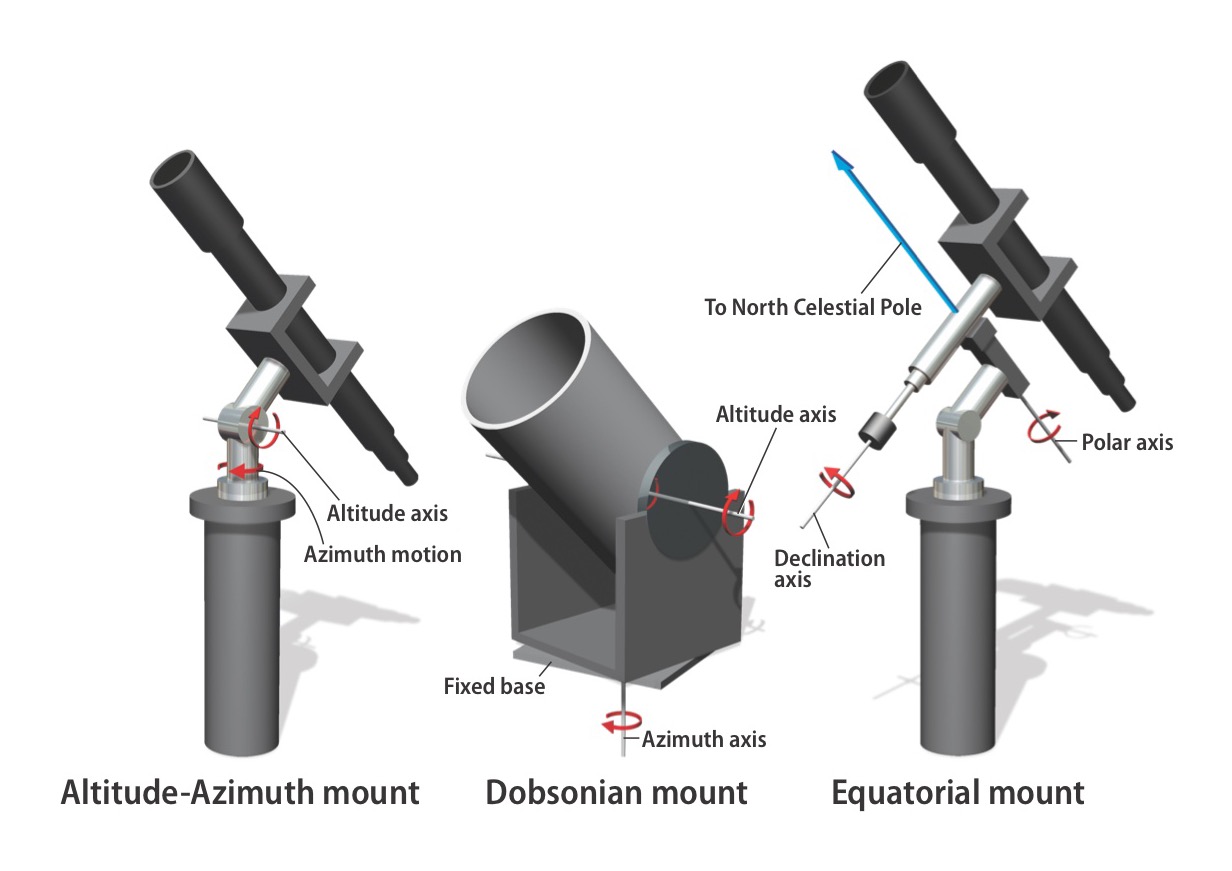
Alt-azimuth mounts
An alt-azimuth mount is the simplest type of telescope mount. The name is a combination of “altitude” and “azimuth.” This type of mount moves up and down (altitude), and left and right (azimuth).
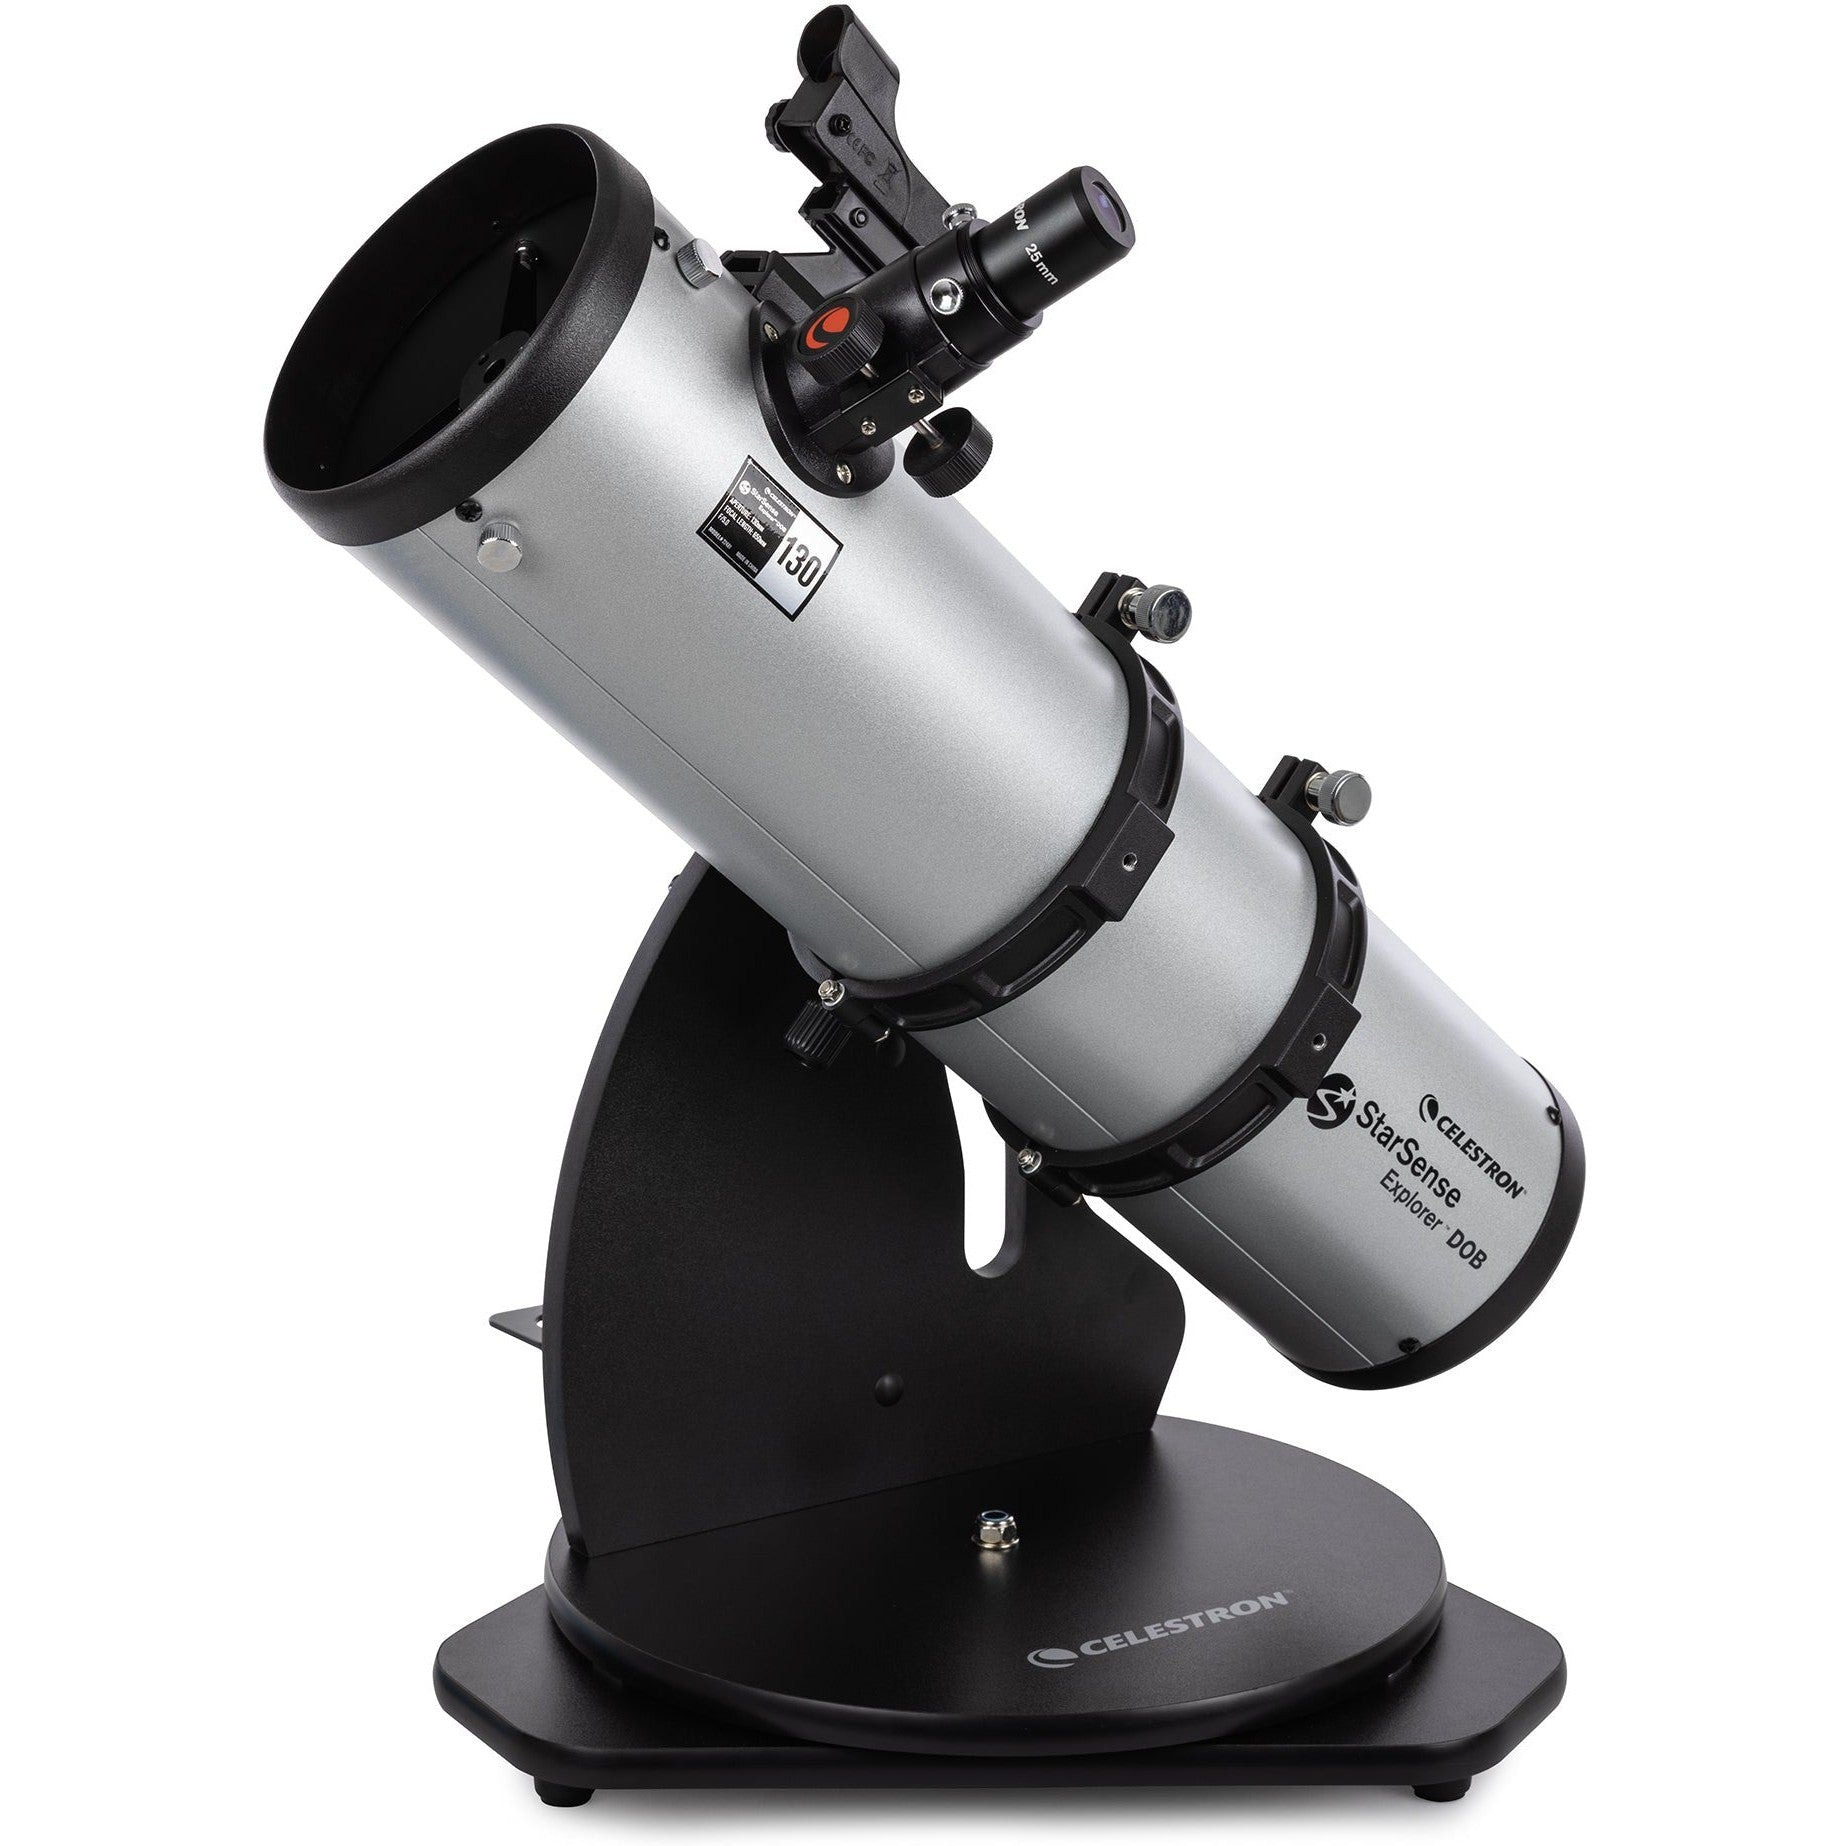
Dobsonian mounts
In the 1960s, amateur astronomer John Dobson invented a type of alt-azimuth mount that now bears his name. The Dobsonian mount is the least expensive mount, and manufacturers always combine it with a reflector. Because the tube sits loosely in the mount, you can carry the two parts quite easily. But these scopes also can be large. Every amateur telescope that has a mirror more than 16 inches across sits in a Dobsonian mount.
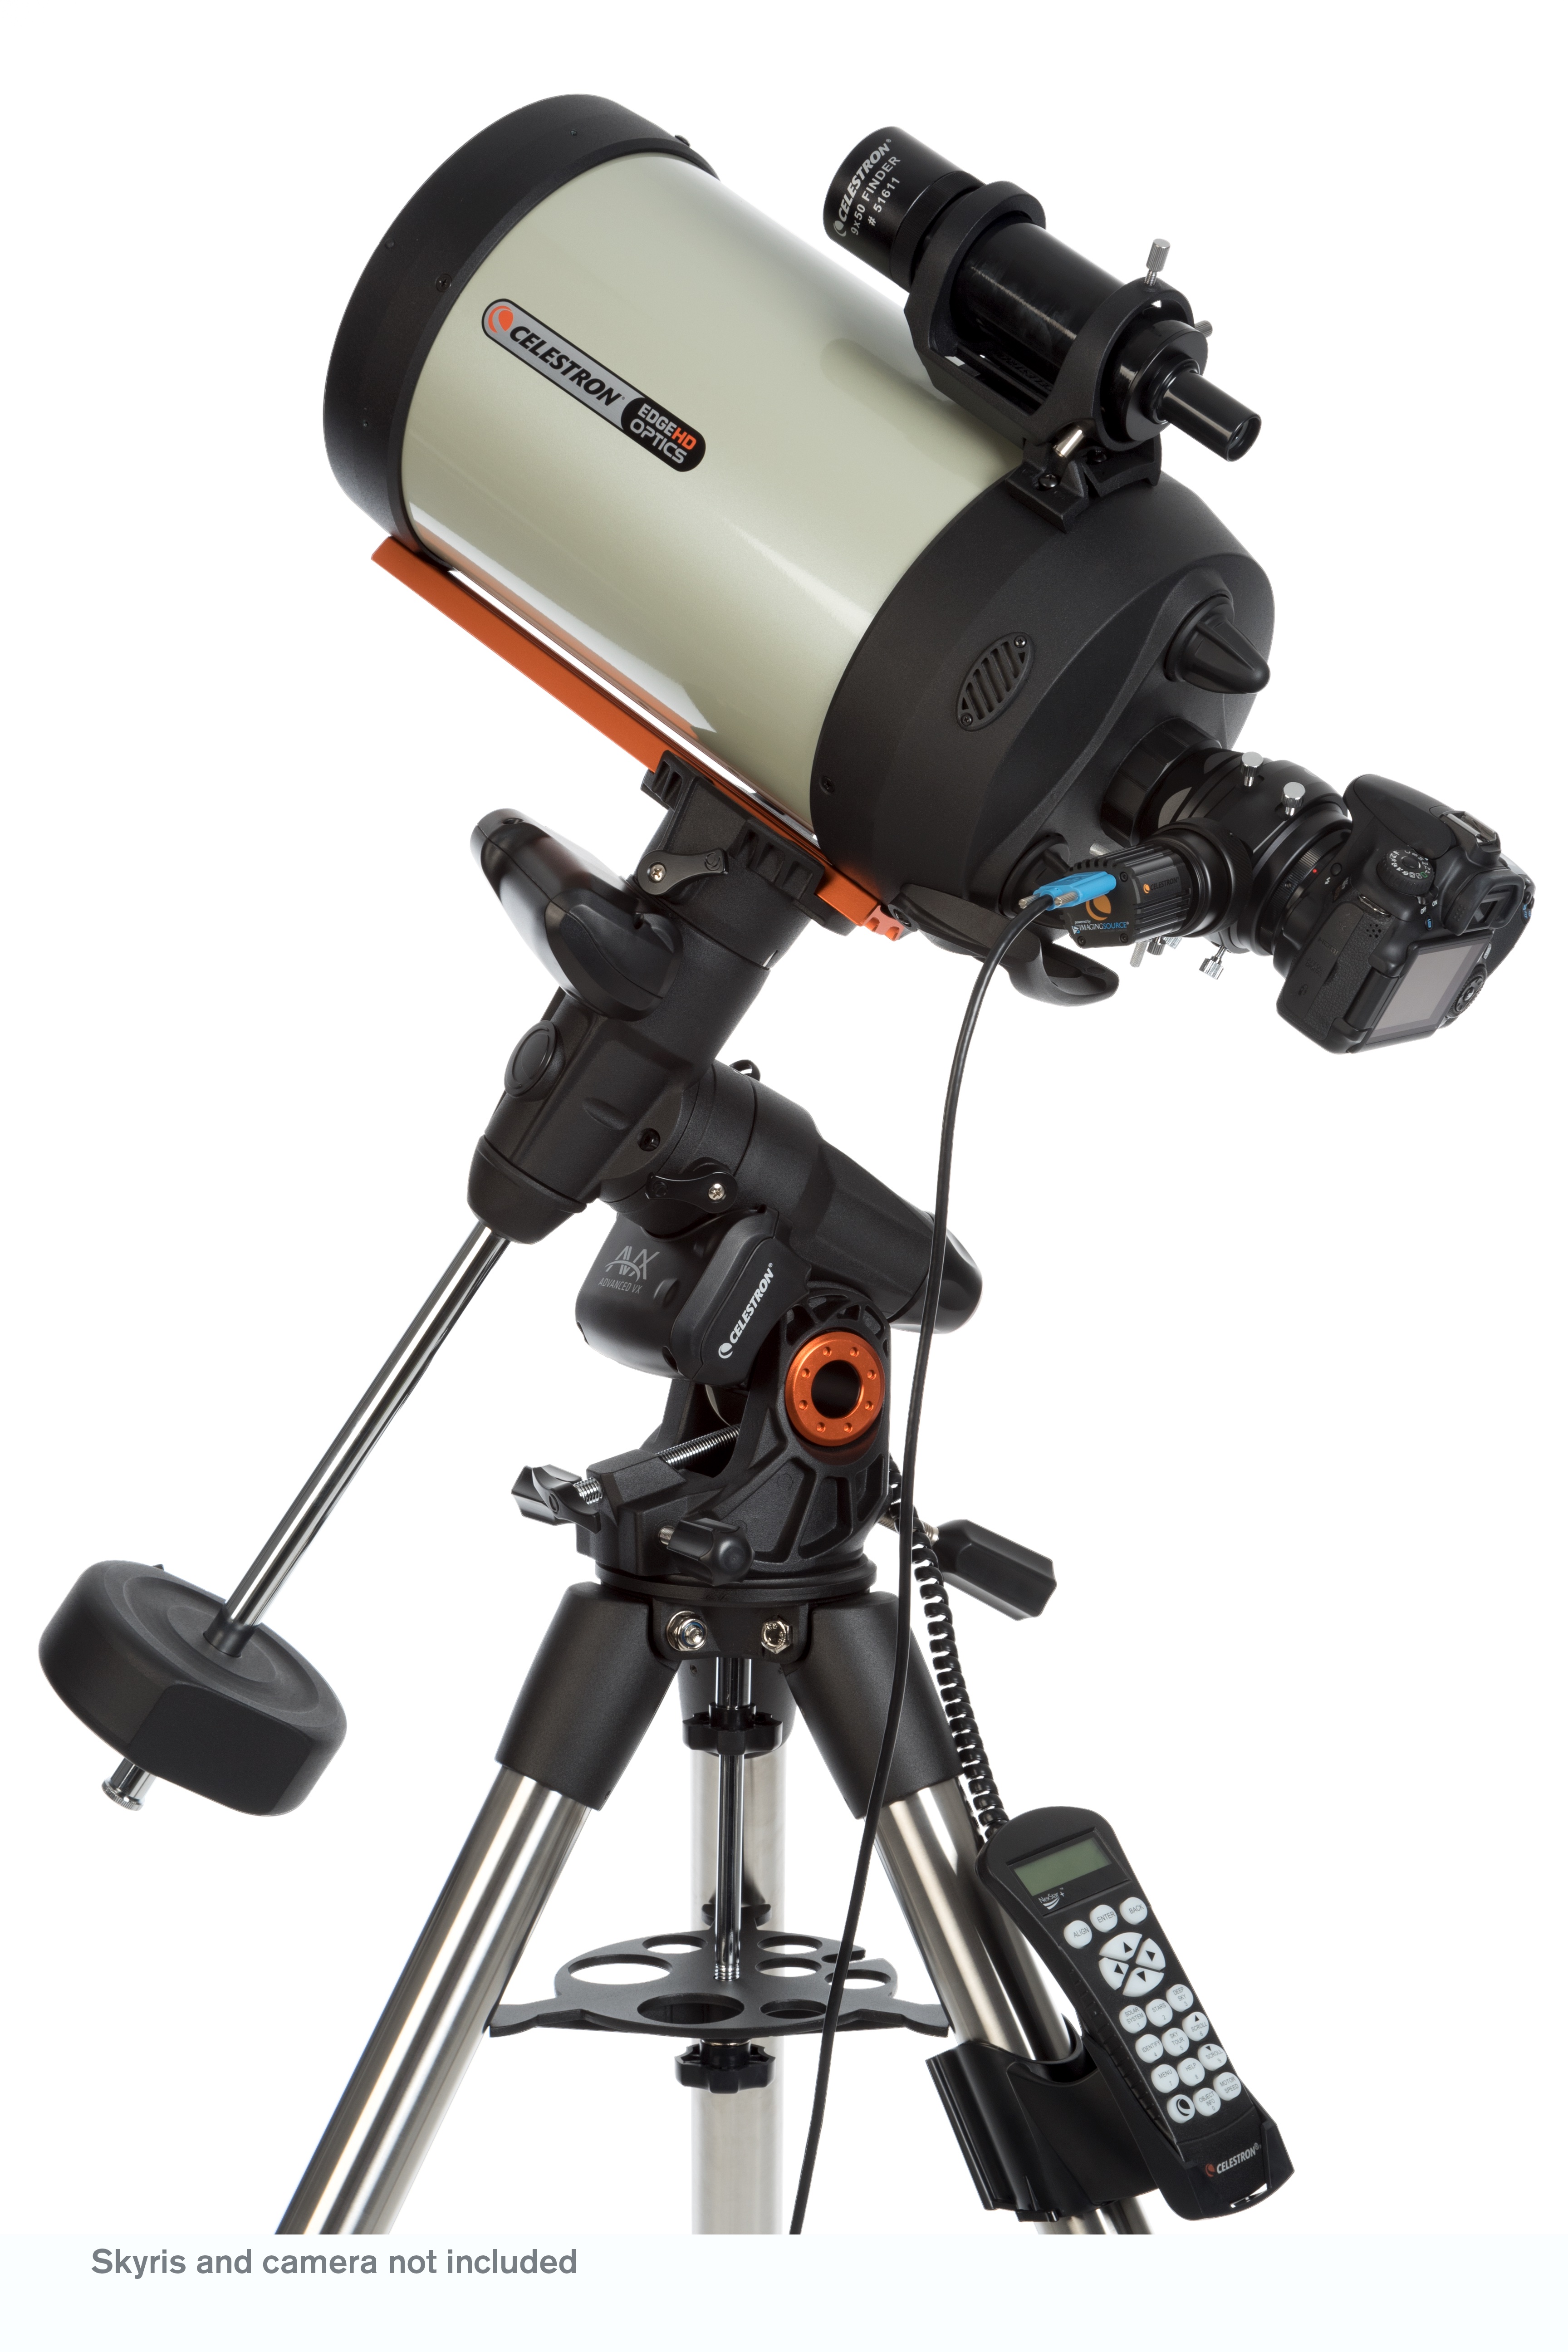
Equatorial mounts
If Earth did not move, a nonmotorized alt-azimuth mount would be all that any of us would ever need. But our planet does spin, and we must deal with it. Luckily, in the early 19th century, German optician Joseph von Fraunhofer invented the equatorial mount to track the stars. He aligned one of the mount’s axes parallel to Earth’s axis and moved the mount (with a weight-driven clock drive) at the same rate as our planet’s spin. By doing so, the telescope follows the stars as they move through the sky. Today, many equatorial mounts incorporate a motor to move them.
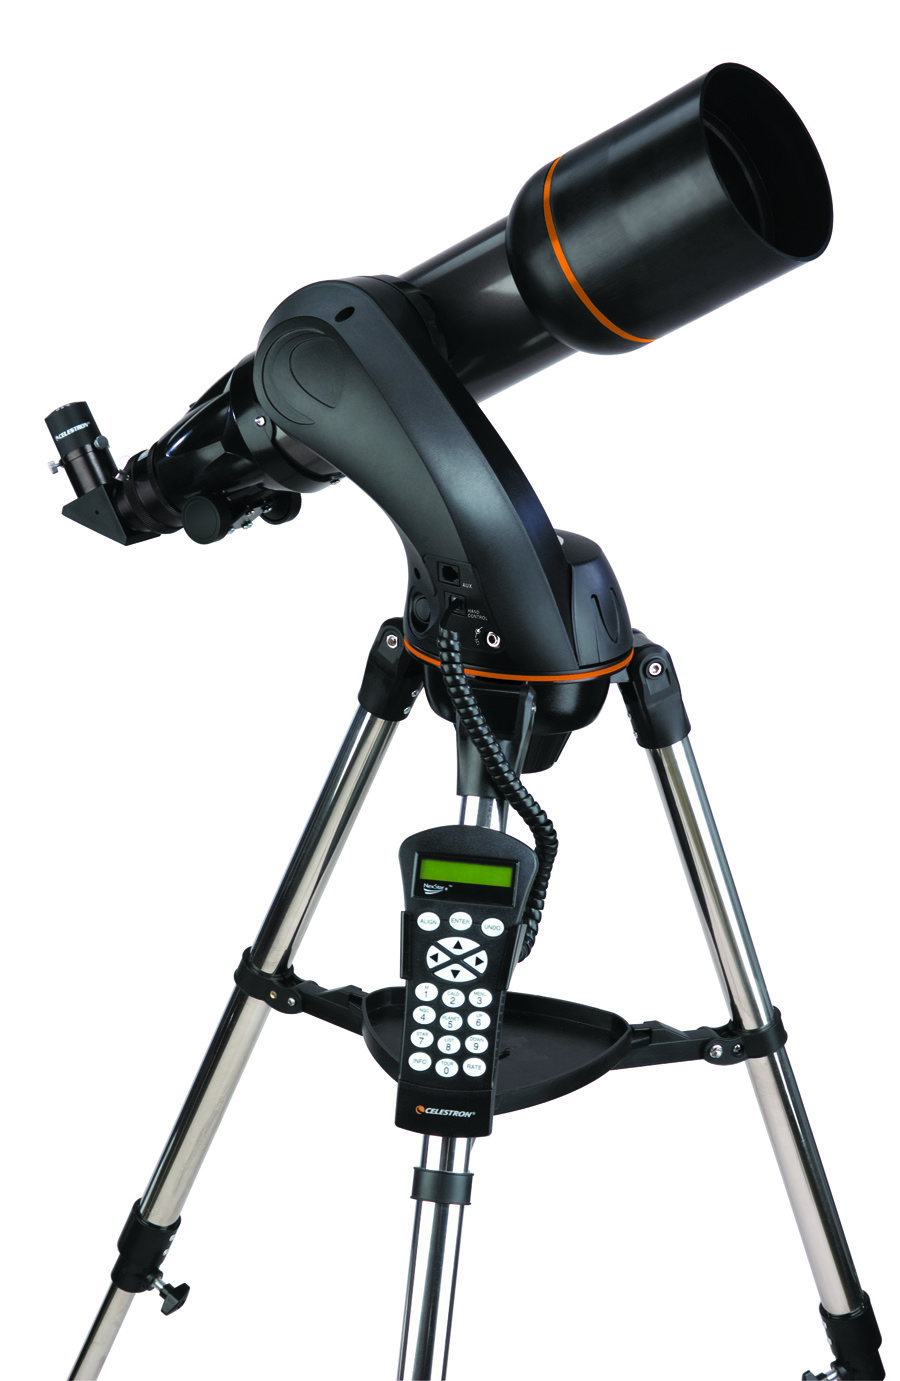
Go-to mounts
A development from the past few decades is the proliferation of the go-to mount. Manufacturers attach motors to both the altitude and azimuth axes, controlled by an onboard computer. Once you run through a simple setup procedure, the go-to drive will find and then track your celestial target.
Mounts using this system are highly accurate. Once the drive locates an object, it will follow it as it moves across the sky without you moving the telescope. Go-to scopes manufactured today have databases with thousands of objects.
3 things you should know
- A mount holds a telescope and also defines how it moves.
- It is every bit as important as the telescope’s optical tube.
- You can enhance your observing with a go-to mount.
Which accessories are right for you?
Enhance your observing fun by adding some well-thought-out extras.
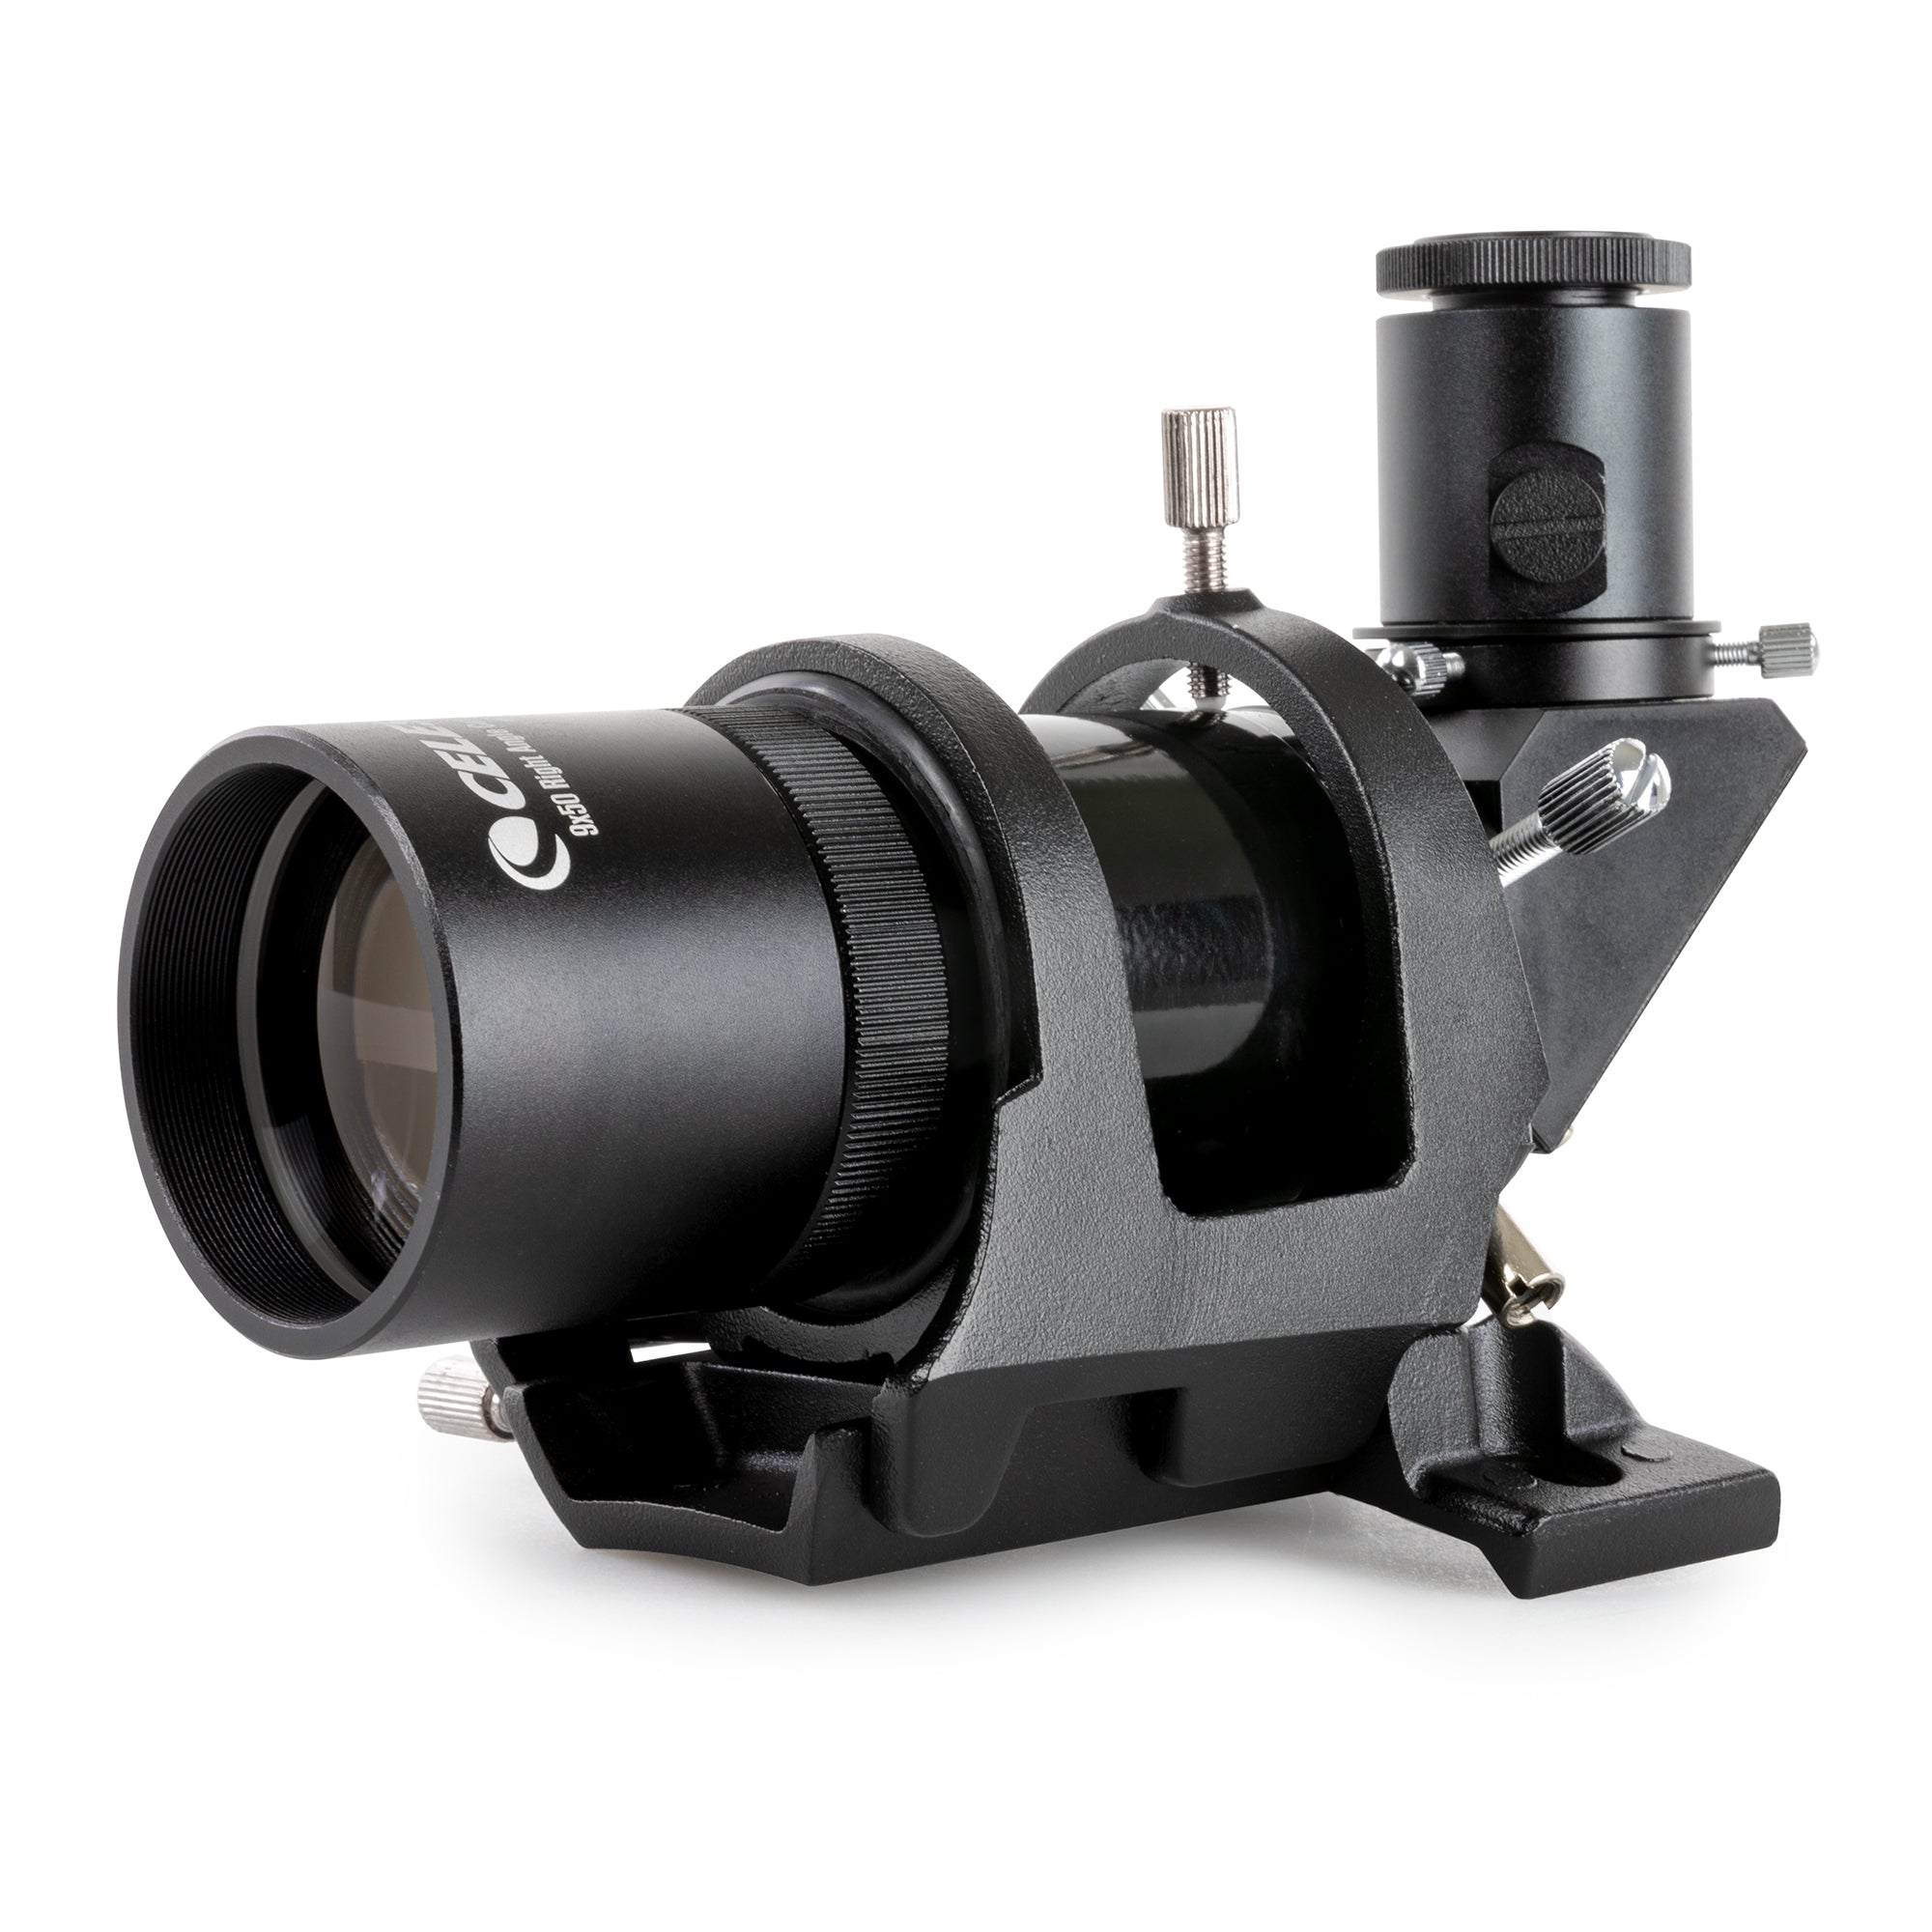
Finder scopes
The world’s best telescope is useless if you can’t find anything with it; its high magnification limits the field of view. Even with a go-to drive, you’ll need a quality low-power finder scope. Most are tubes you view straight through. They flip the image but let you look toward the object, a position that’s intuitive for most people.
Your finder should have a front lens at least 2 inches (50 mm) in diameter. That size will let enough light in so you won’t get frustrated trying to find faint objects. The finder’s magnification also should be between 7x and 9x.
Once you install your finder scope, align it with your telescope. Do this when it’s still light outside using a distant object like the top of a telephone pole. It’s easier then because the objects you’ll use to align your finder won’t be moving (like the stars do).
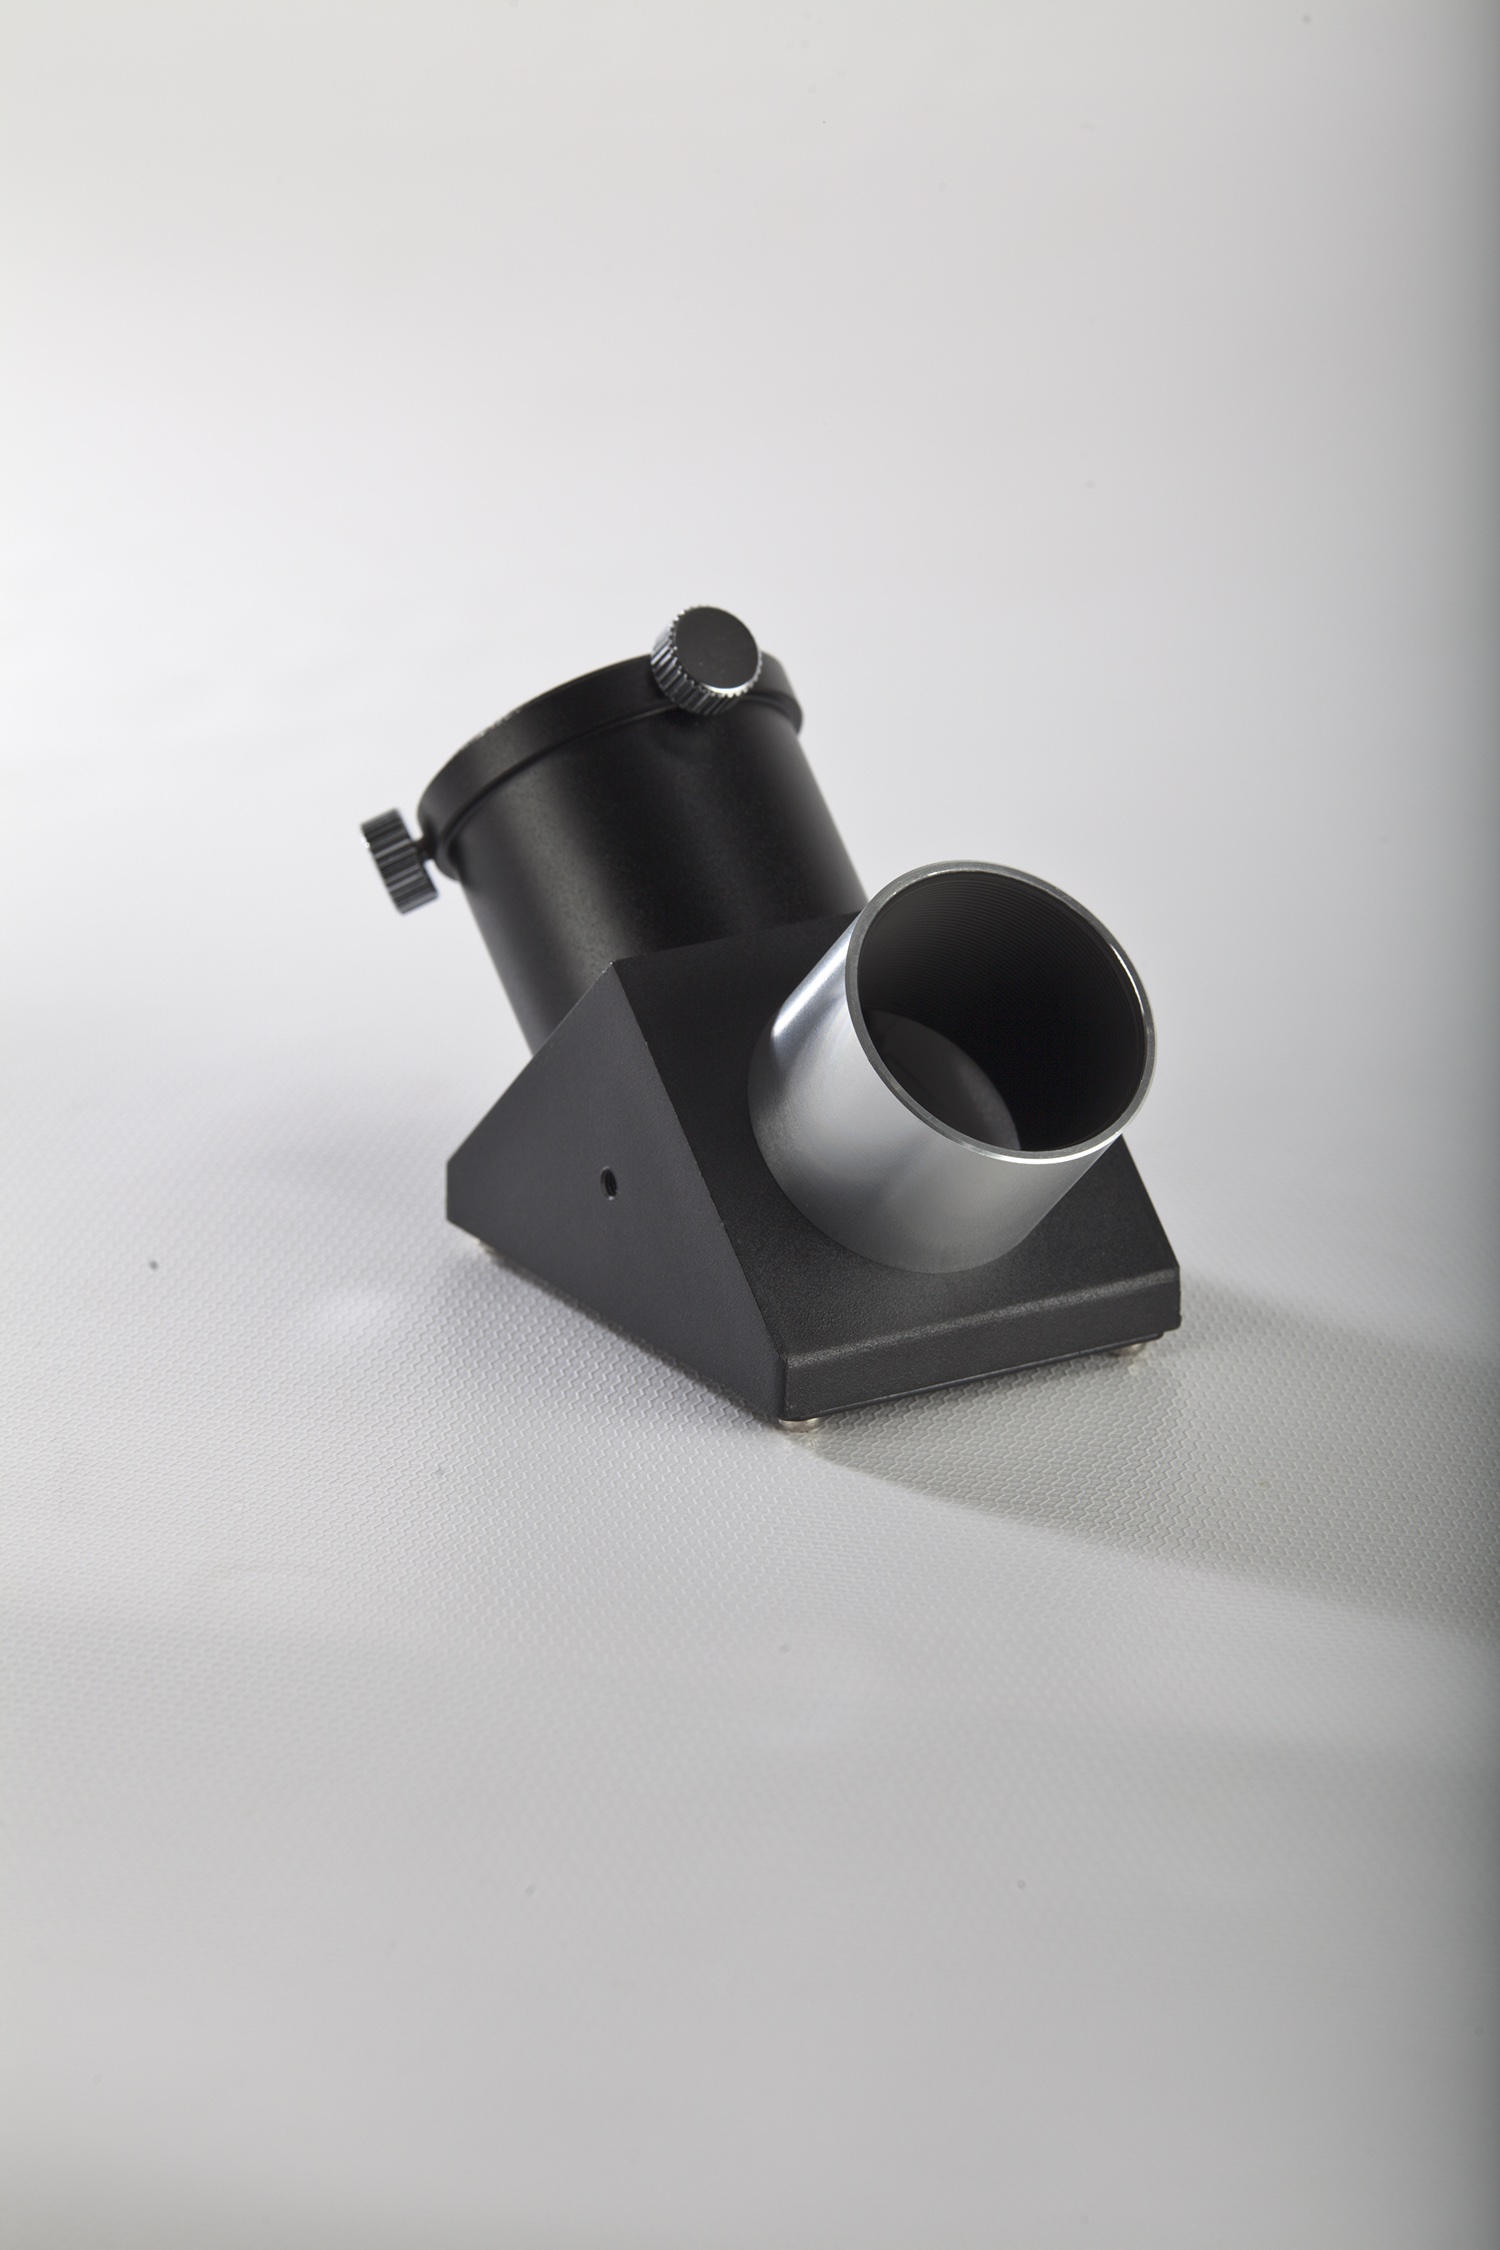
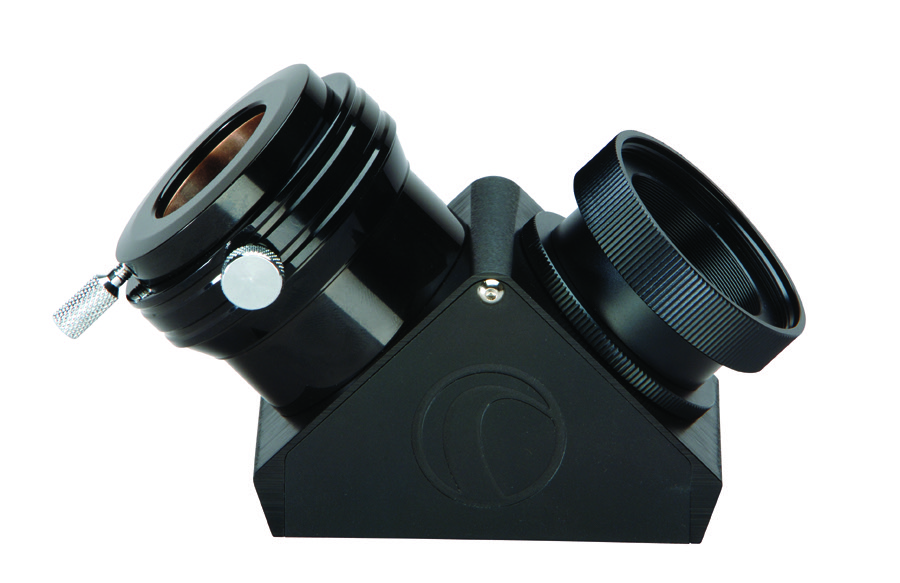
Star diagonals
Refractors usually need a star diagonal because of their design. A star diagonal bends the light from your target 90° into the eyepiece. Without a star diagonal, you’ll find yourself in some awkward physical positions when you’re observing objects high in the sky. The star diagonal fits into the telescope’s focuser, and the eyepiece fits into the star diagonal.
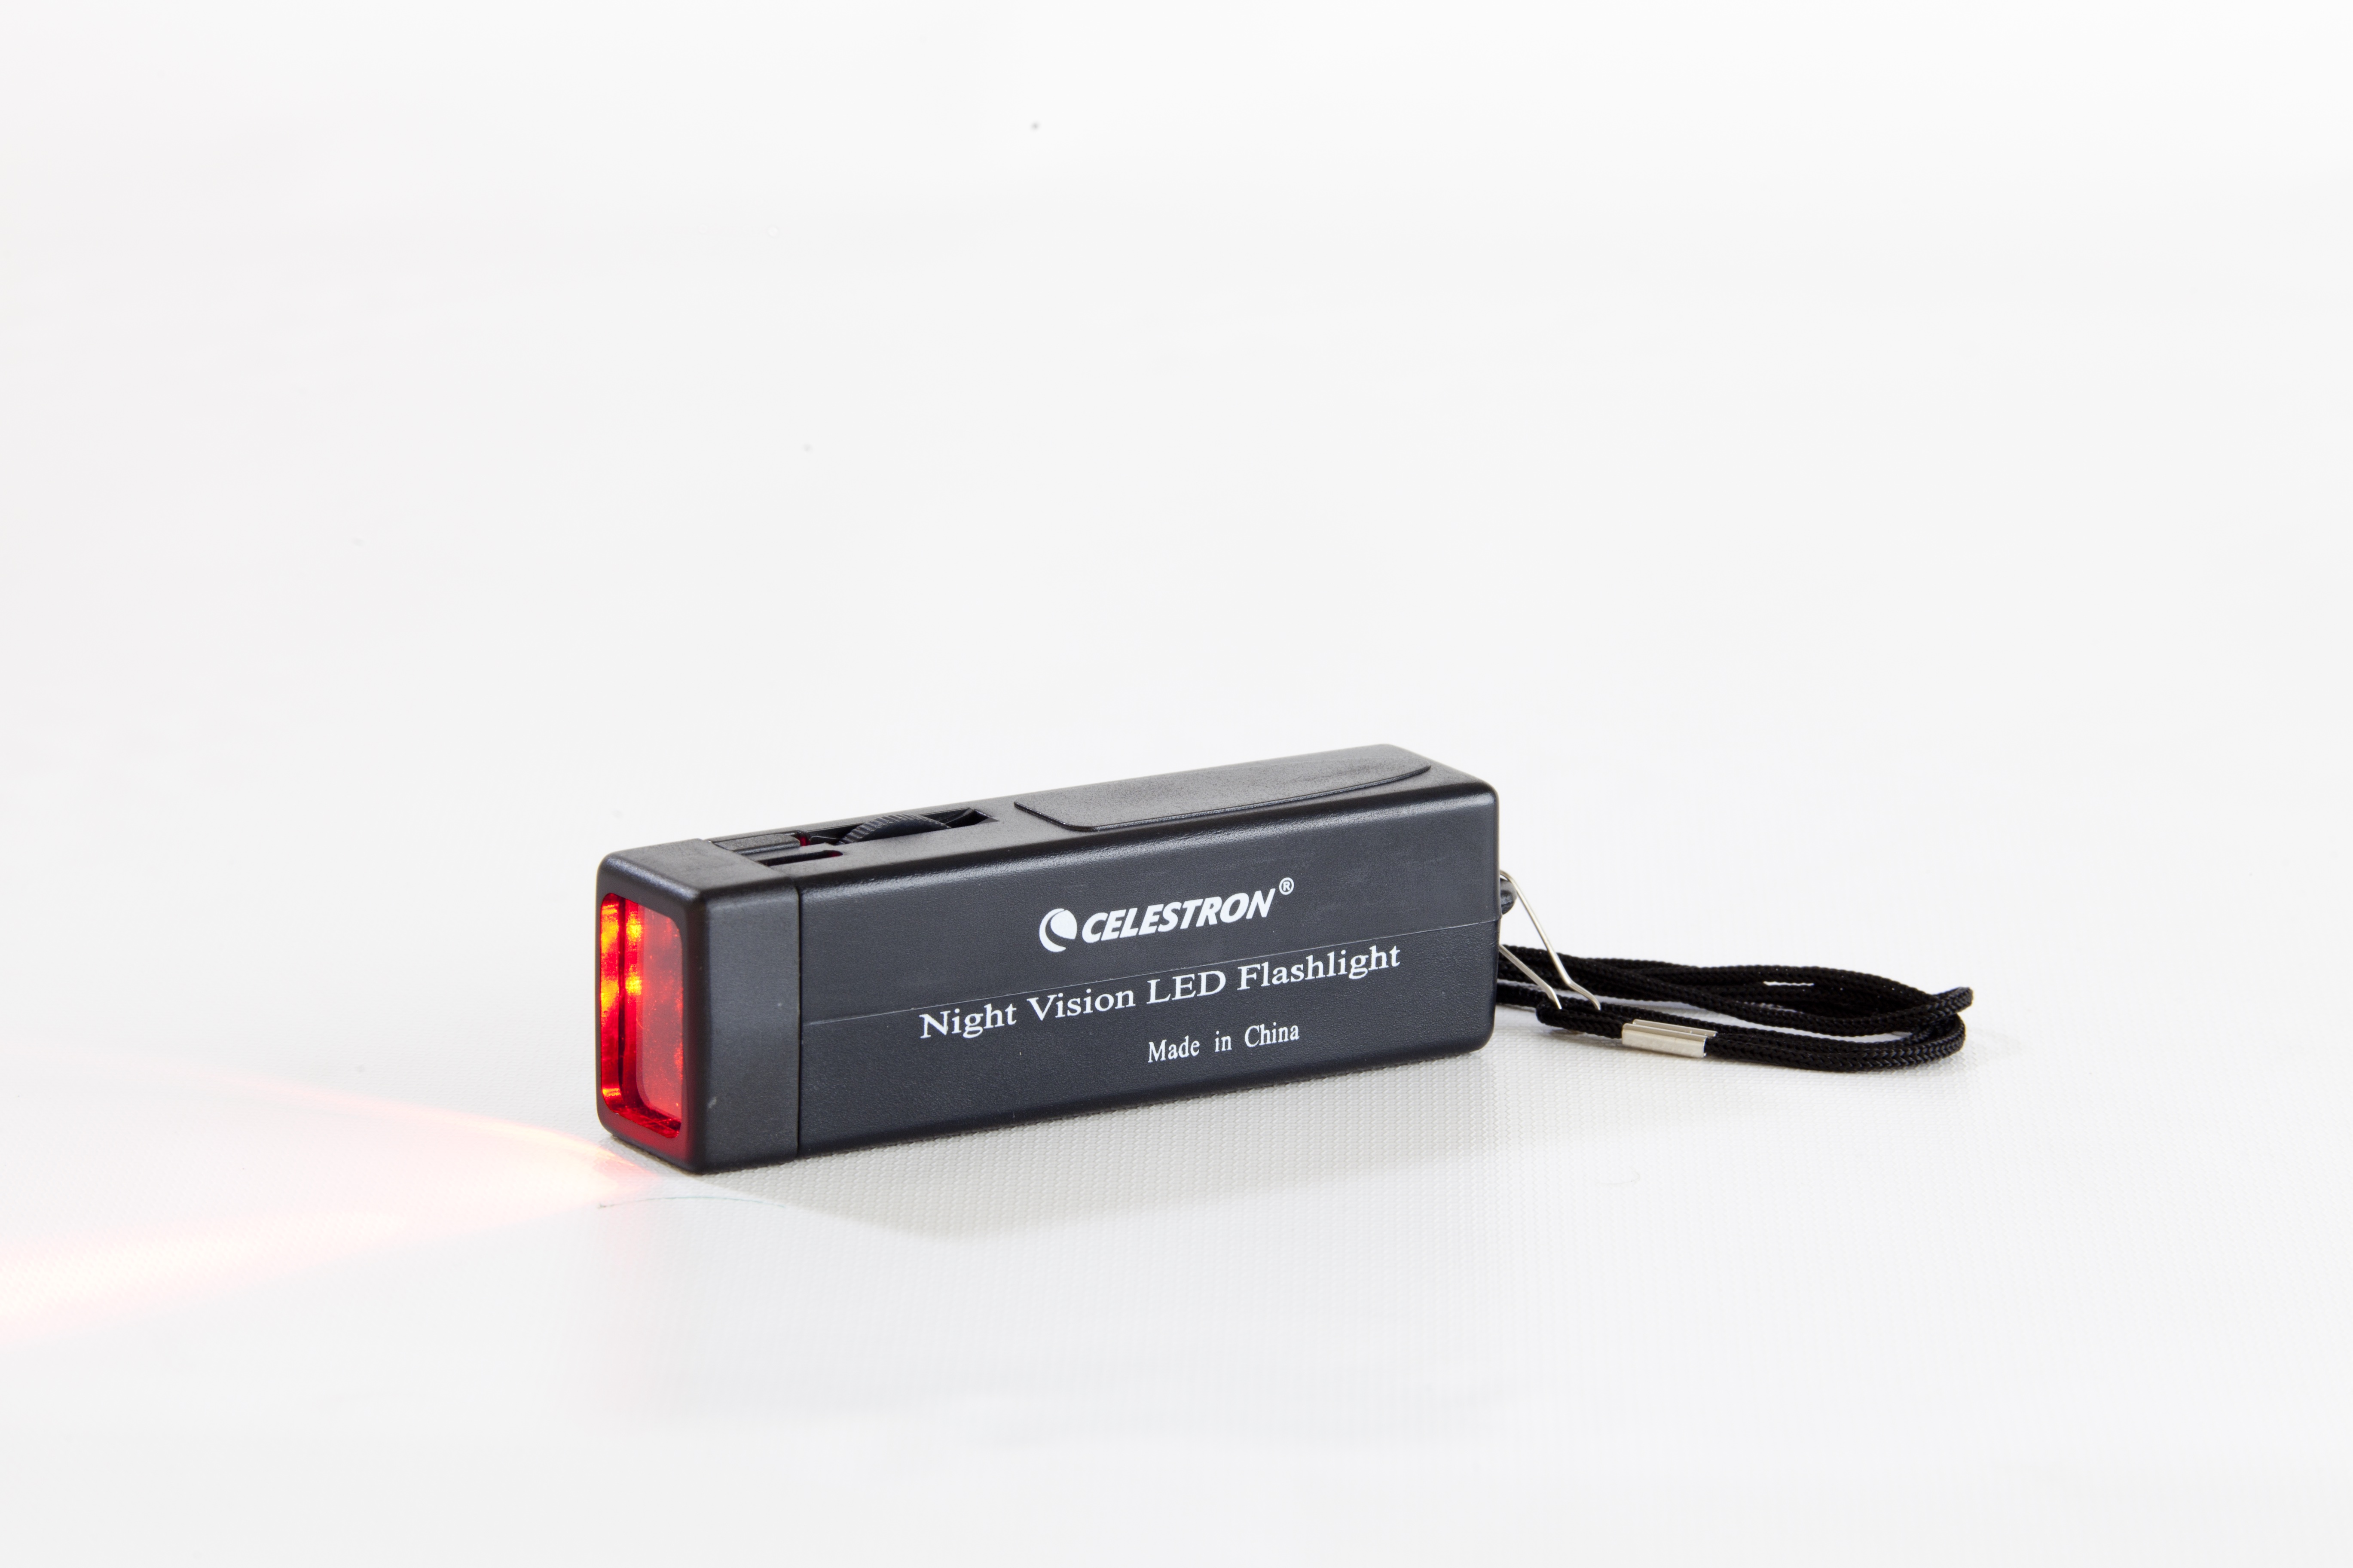
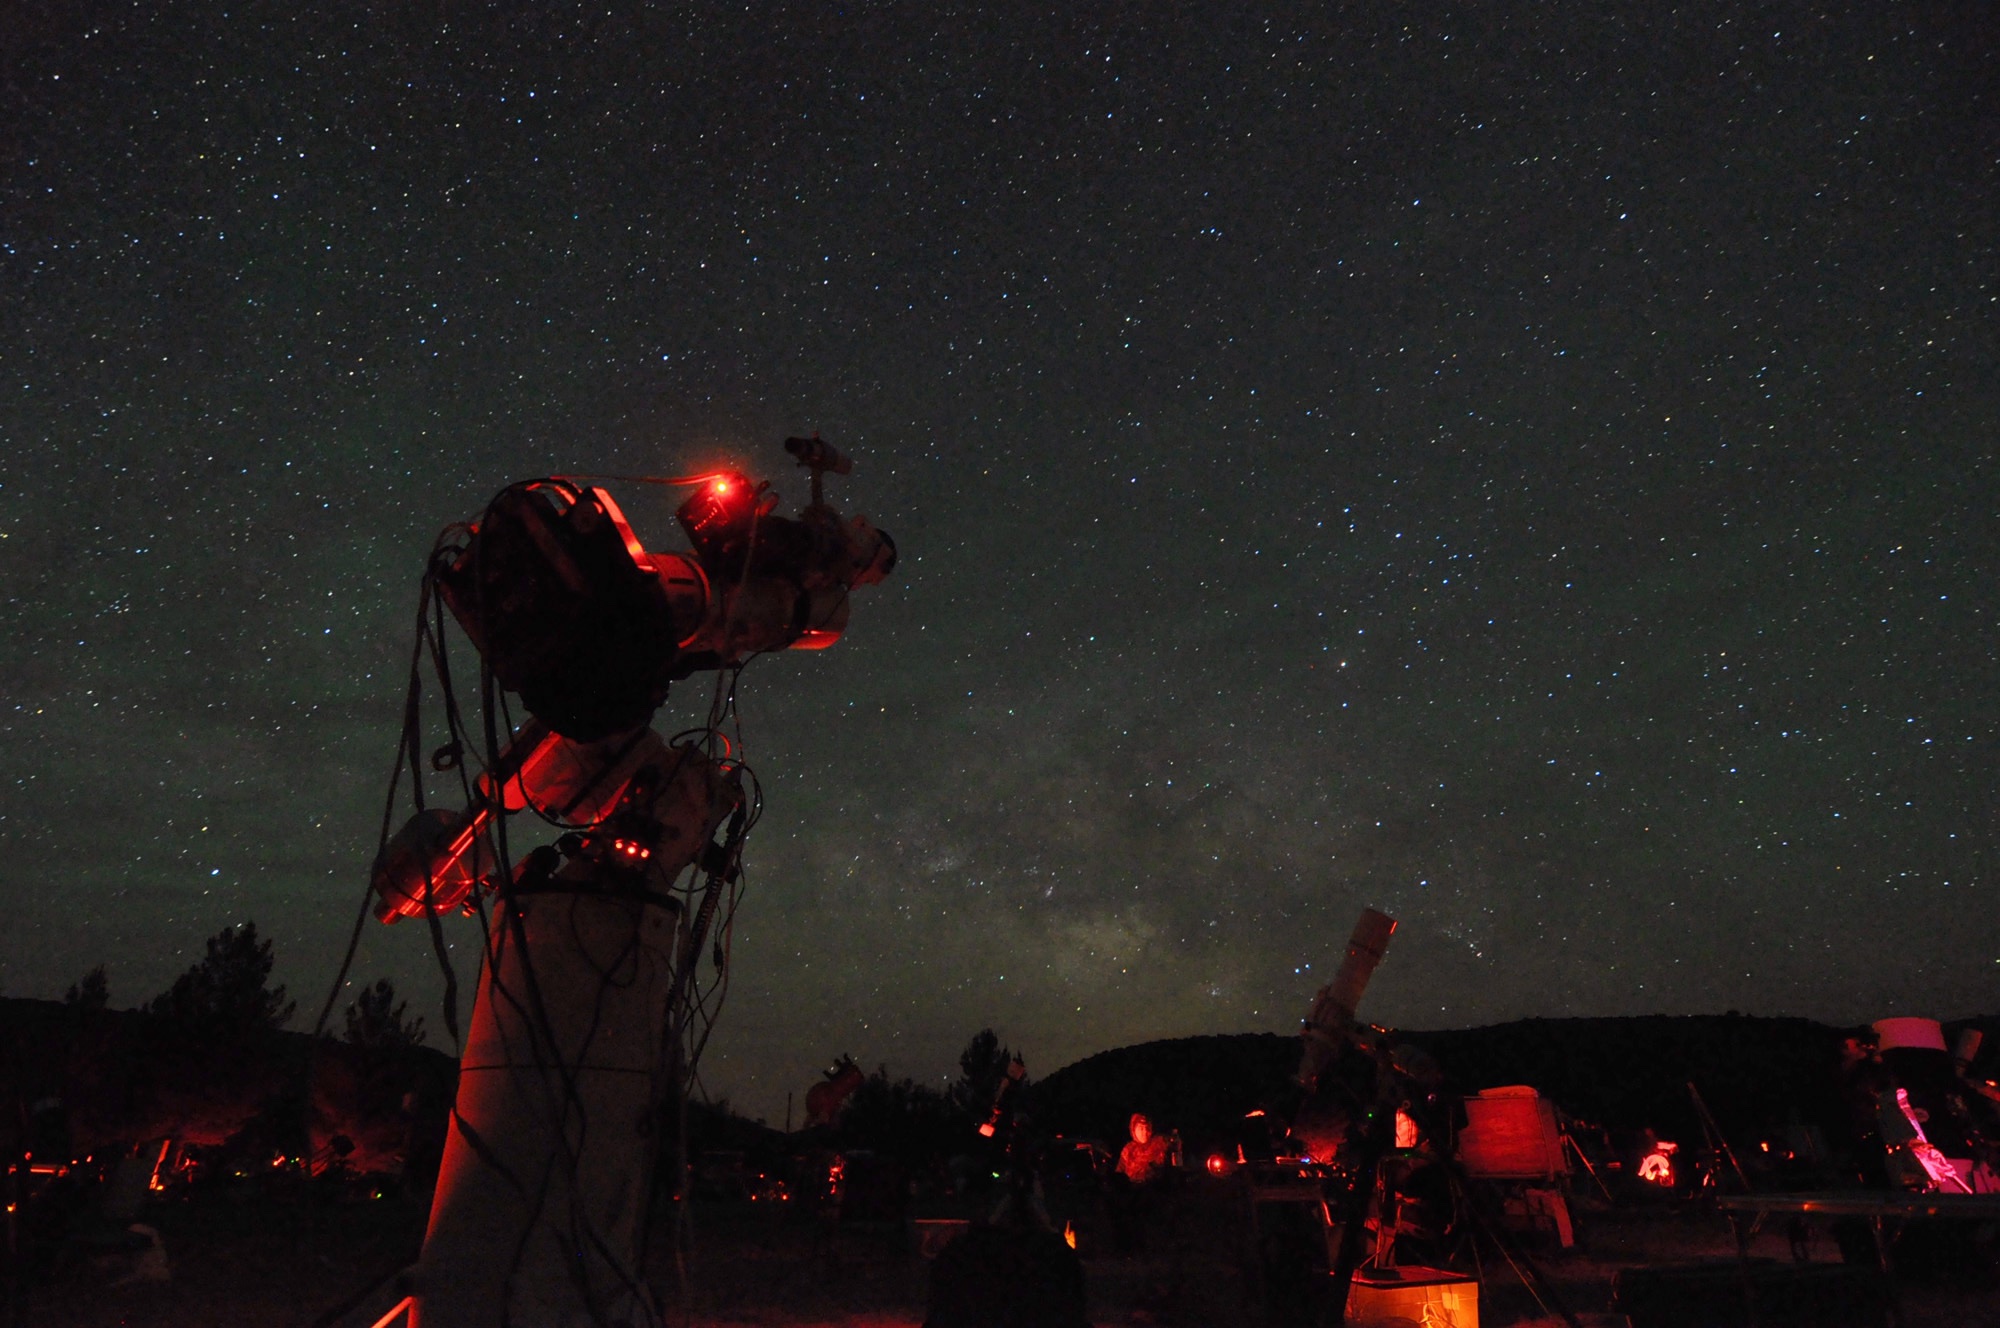
Lights
If you plan to use Astronomy magazine or a star chart while observing at night, you’ll need light. Red light is best because it affects your night vision (the way your eyes adapt to the dark) least. But a bright light (even red) means you’ll see less through the telescope because your eyes will have to re-adapt to the darkness. So, the best flashlight is one that lets you adjust its brightness.
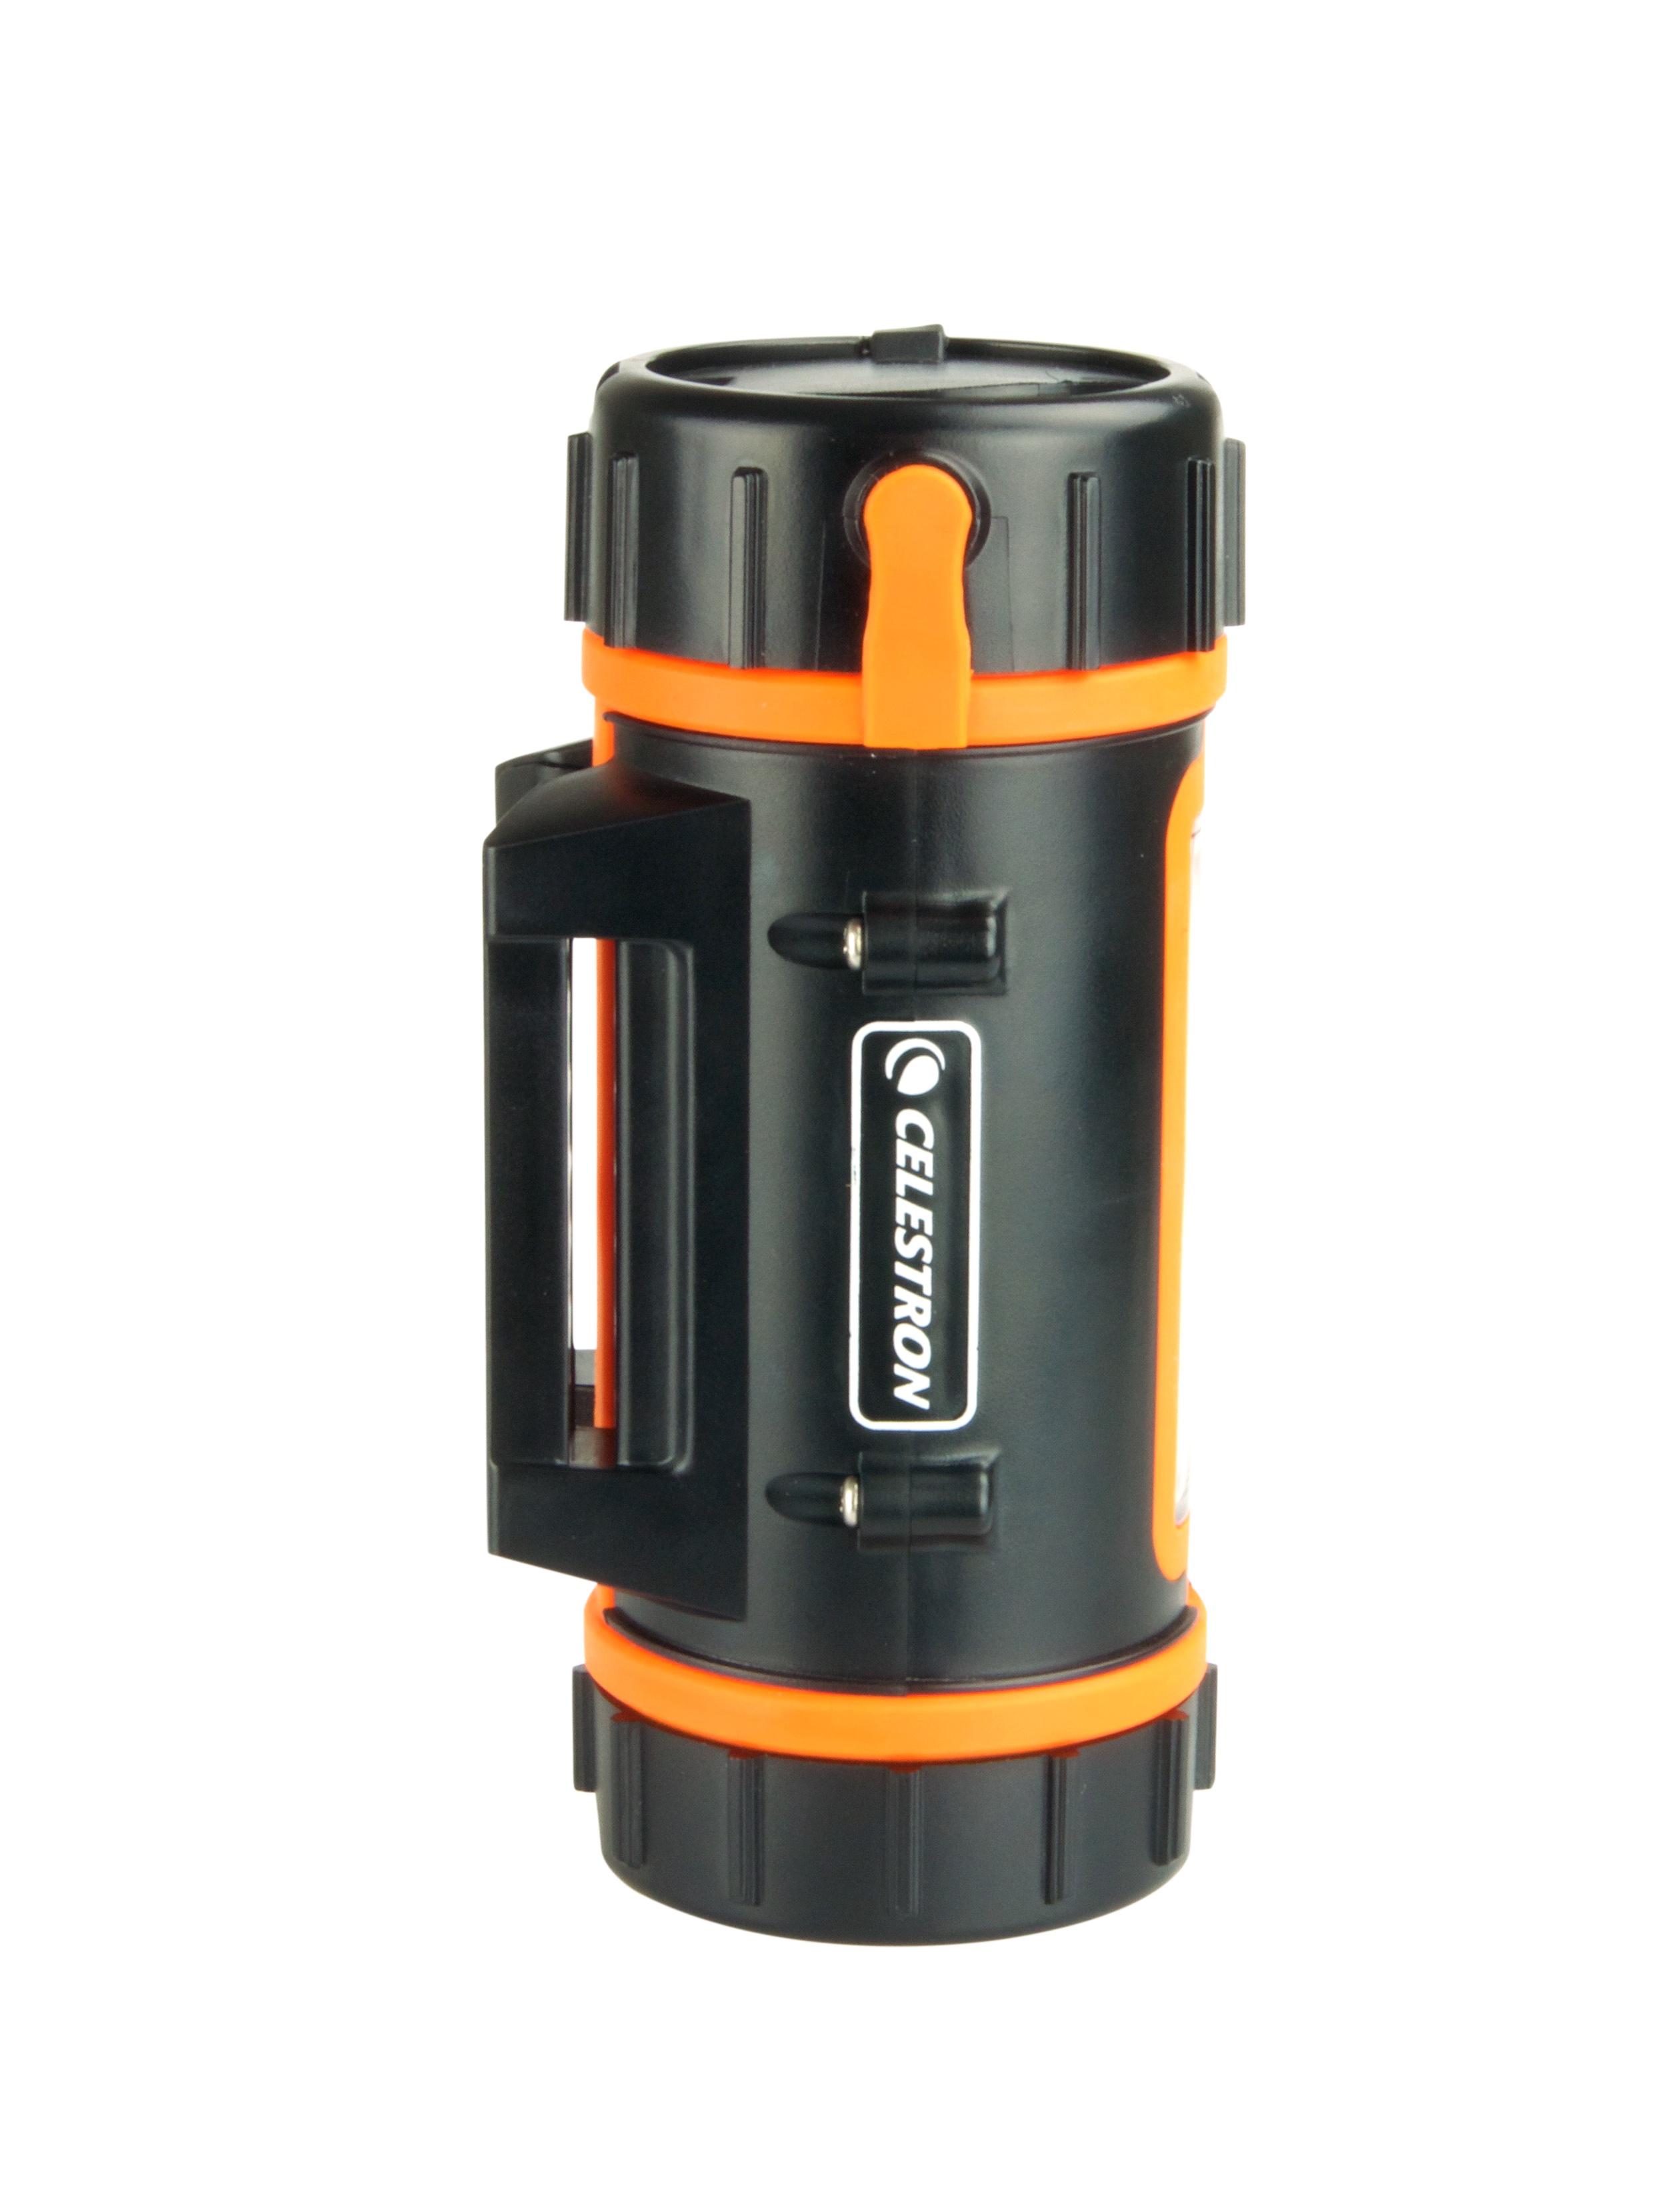
Power supplies
If you observe from a location with alternating-current power, consider yourself lucky. The rest of us need some form of portable power. With the right adapter, you can use your car’s battery.
Another option is a dedicated power supply. Celestron’s PowerTank 17, for example, has plenty of power for several all-night sessions. It also includes a 17 amp-hour battery, two 12-volt DC car-style outlets, an AM/FM radio, a siren, a removable red-filtered flashlight, and a white spotlight.
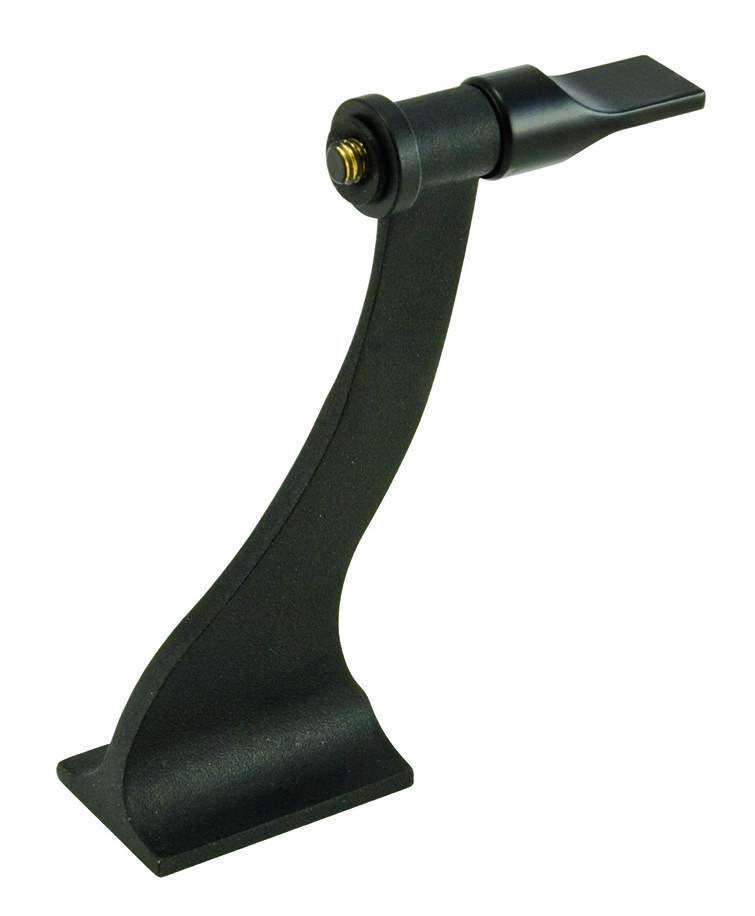
Binocular tripod adapters
This handy device will let you mount your binoculars onto a standard camera tripod. This offers two advantages. First, it relieves you of holding your binoculars for long periods. Second, you can show someone else what you’re looking at without giving any directions except “look through here.”
Phone adapters
In days gone by, astrophotography (or astroimaging) required specialized equipment even to mount a DSLR camera to a telescope. But now astroimaging can be as simple as holding your phone’s camera up to the eyepiece. However, achieving correct focus while handholding your phone can be tricky.
Celestron makes an array of smartphone adapters you can use to mount your phone in front of your eyepiece, making it dead easy to share what you’re seeing with your friends and family.
Star charts
This handy accessory not only lets you find your way around the sky and to your next target, but it also helps you plan upcoming observing sessions. For example, inside each monthly issue of Astronomy magazine, you’ll find a pullout star chart for that month along with descriptions and graphics showing all important current celestial events. You’ll also discover stories that focus on observing the Sun, the Moon, planets, meteor showers, nebulae, star clusters, galaxies, and more.
Celestron also produces a set of star charts. Celestron Sky Maps plots more than a thousand stars and deep-sky objects. The illustrated reference section provides basic information and the visual characteristics of individual stars, star clusters, nebulae, and galaxies. The maps measure 13¼ by 11¼ inches (33.7 by 28.6 cm) and are printed on a heavyweight, moisture-resistant card stock. The pages have a special comb binding so they can lay flat. The front cover even features a specially designed luminous planisphere that rotates to simulate the seasonal progression of celestial objects through the sky. Expose the planisphere to light, and its stars will glow against a dark background.
Filters
As you observe through your telescope, filters will help you see more details. Astronomical filters come in two main varieties: light-pollution reduction (LPR) filters, which reduce artificial light so you can see nebulae better, and color filters, which enhance viewing the planets. All filters screw into the threads manufacturers put in the barrels of eyepieces.
Light pollution reduction (LPR) filters
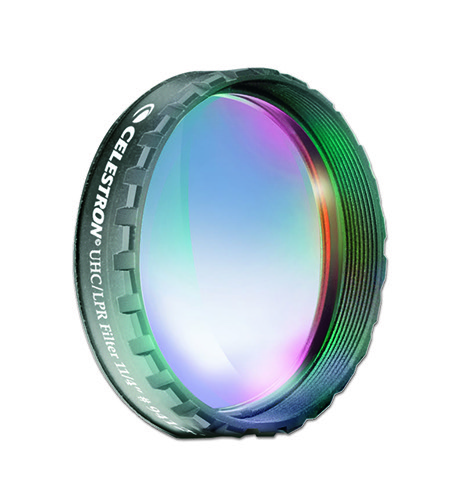
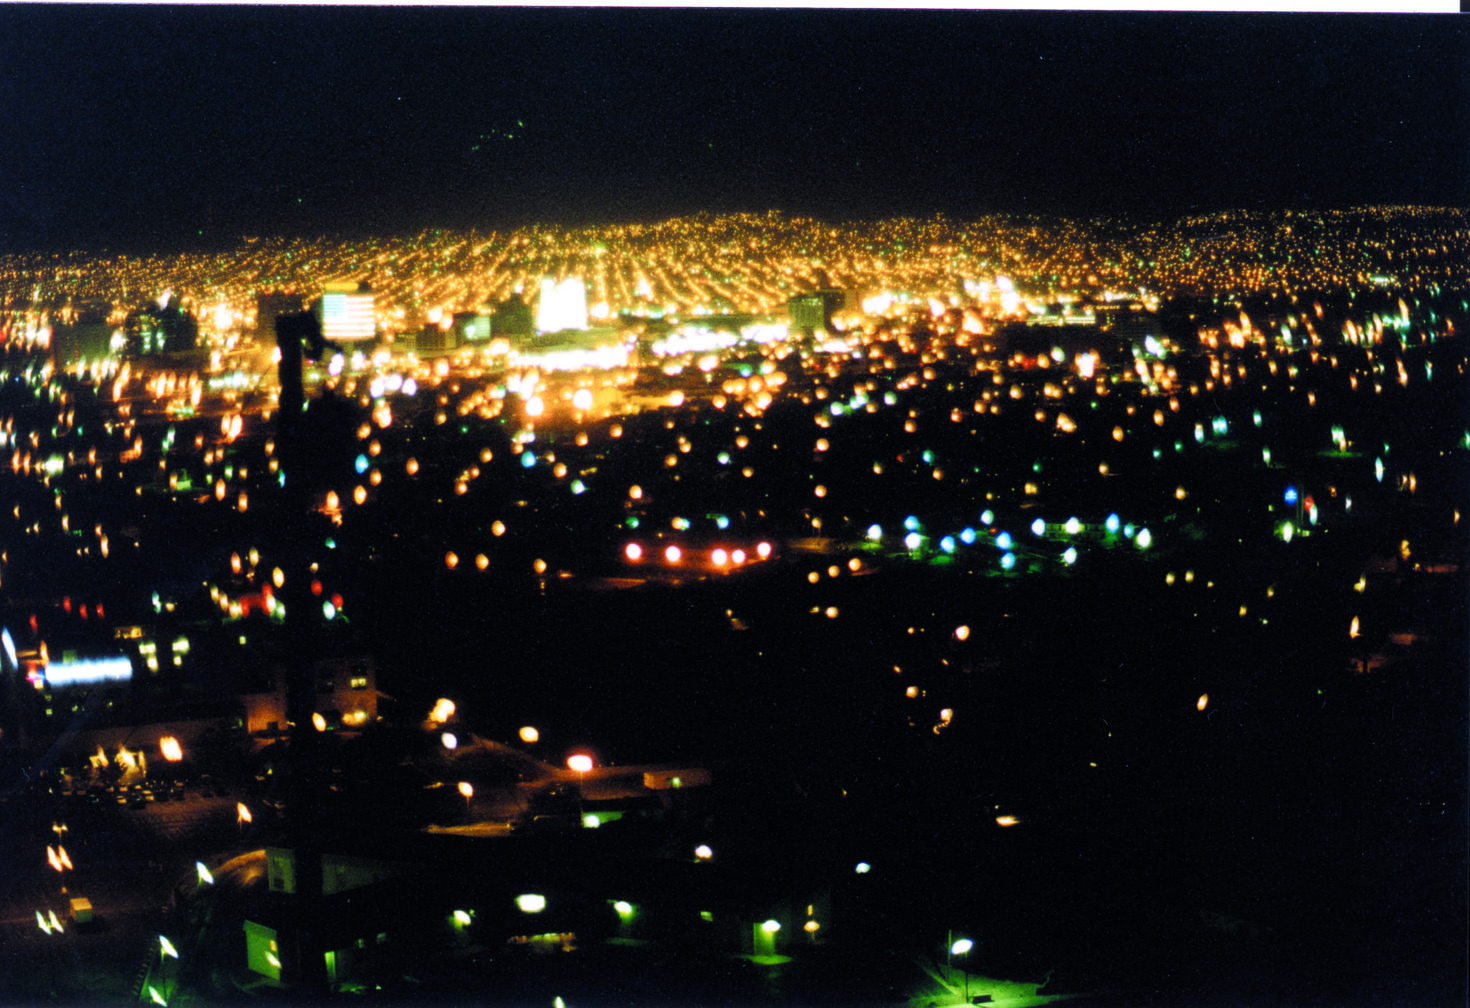
LPR filters work because many outdoor lights produce only a few distinct colors (that blend to create white or yellow light). For instance, a high-pressure sodium-vapor streetlight shines mainly yellow. Mercury-vapor lamps give off green and blue light. LPR filters block those colors but allow others through.
But they’re not a cure-all. LPR filters do little against incandescent bulbs, and struggle with most modern LEDs, which give off light across much of the visible color range. So you’ll still need to pick your observing site with care.
LPR filters are also used in photography, where long exposure times can reveal details that the eye can’t see. Many smart-scopes come with built-in narrowband filters, making it possible to take pictures of nebulae that emit at those specific wavelengths even from light-polluted urban skies.
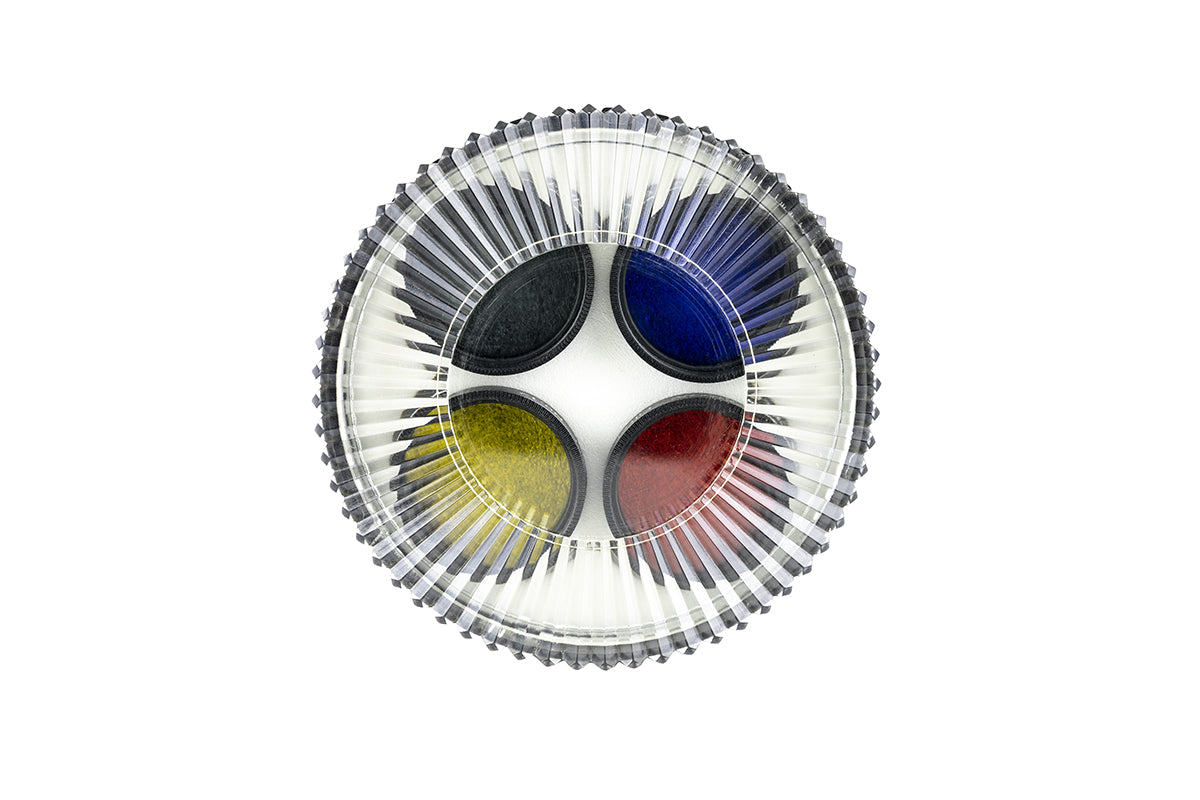
Color filters
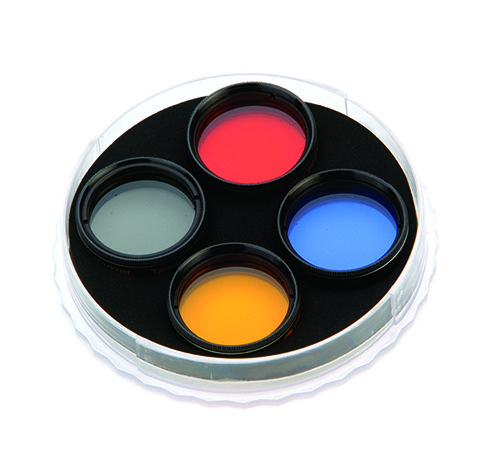
Color filters made for astronomy improve the view through even a low-quality telescope because they boost the contrast between areas on a planet’s surface or in its atmosphere that have different colors. Manufacturers label color filters along their edges, but you can tell what light a filter lets through either by looking at or through it. A red filter, for example, looks red.
Color filters work better with larger telescopes, but some colors are easier to work with than others. It’s all about how much light is available. A violet filter lets through only 3 percent of the light hitting it, so you’ll need a large scope to capture enough light to see details on any object you view. If you have a small scope, try a light blue filter, which lets 73 percent of the light through. Its effect won’t be as dramatic as the darker filters’, but the object you’re observing will look a lot brighter.
Moon filters
This specialty filter sometimes goes by the name “neutral density filter.” It reduces the amount of light (by absorbing it), but doesn’t filter or change any of the colors. Neutral density filters let as much as 80 percent, and as little as 1 percent, of the light through. In general, lighter neutral density filters are used for the planets and darker ones for the Moon, which reflects much more of the Sun’s light.
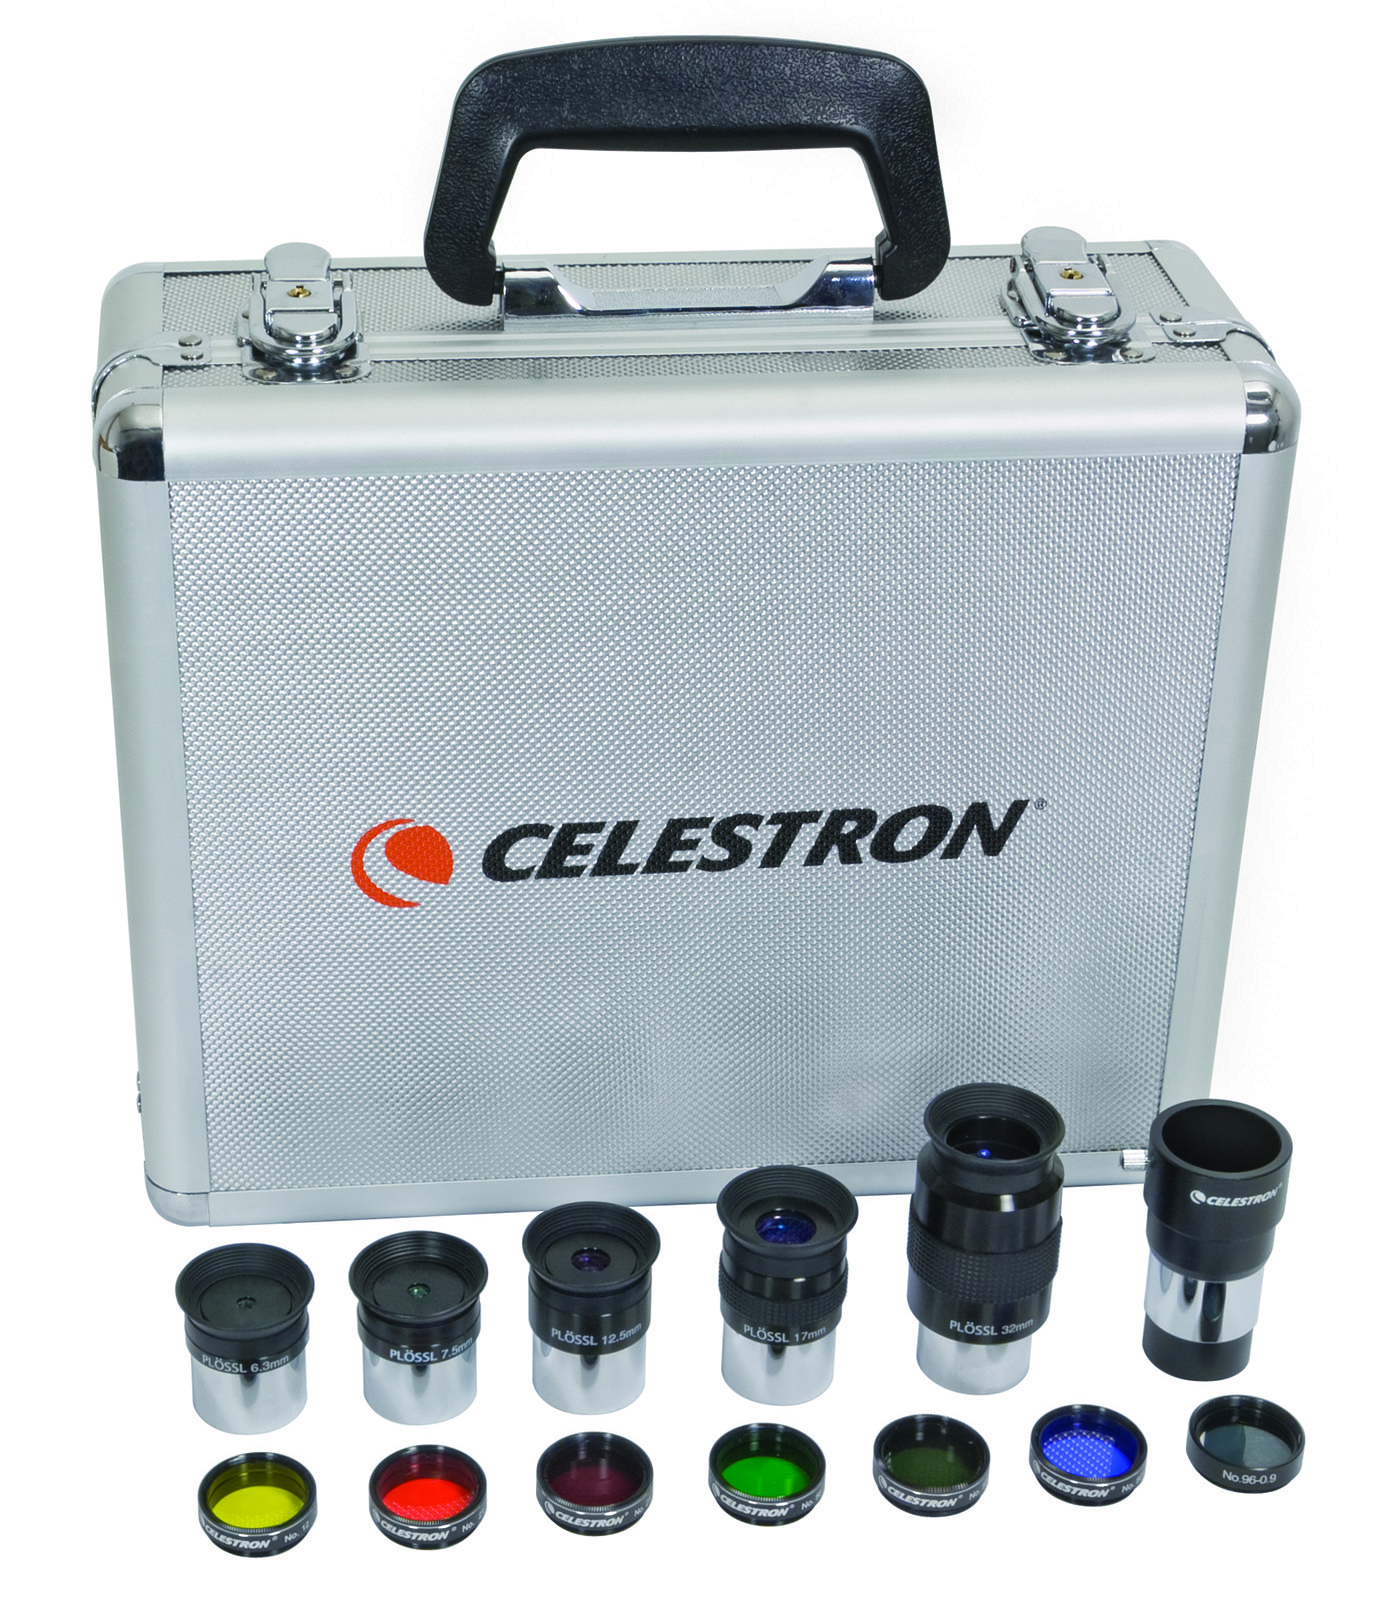
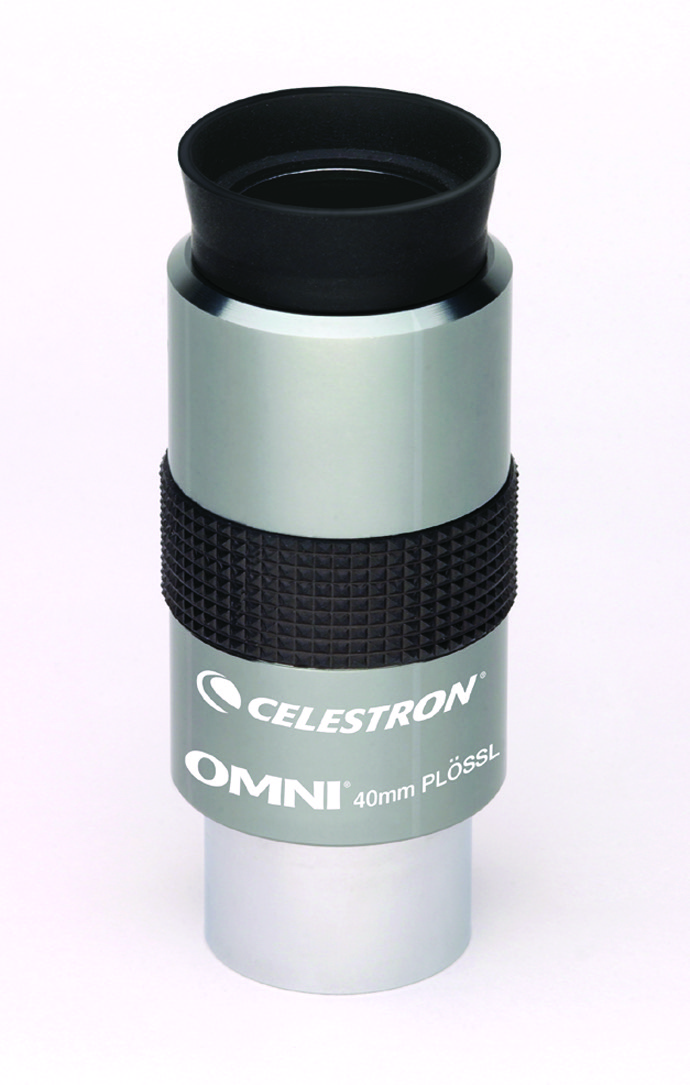
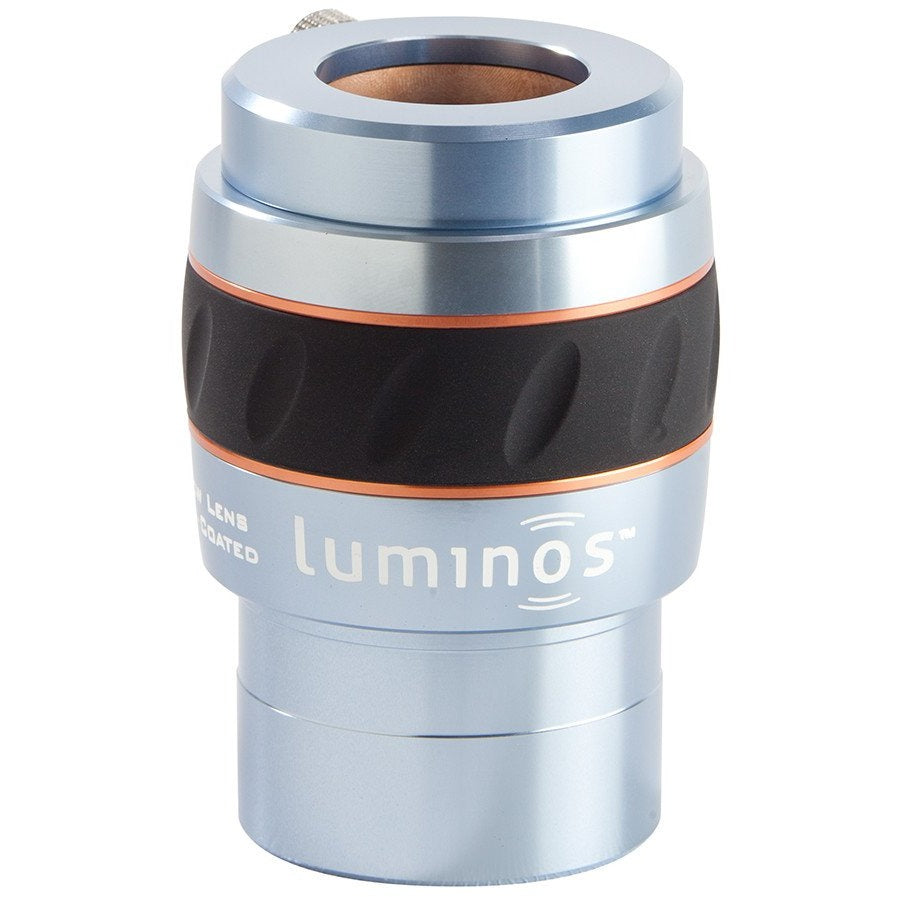
Understanding eyepieces
3 things you should know
- Eyepieces change the magnification of any telescope.
- They come in two sizes: 1¼” and 2″.
- Their bodies show the focal lengths.
Eyepieces are like stereo equipment. You want a sound system that faithfully reproduces music as closely to the original as possible. And yet, when listening to a familiar piece of music, each of us perceives something a little bit different about it. You may hear some nuance meaningful to you that I didn’t catch. The result is that we don’t all end up with the same stereo equipment … or eyepieces.
Sometimes this is due to cost and the quality of workmanship. The best eyepieces contain multiple highly polished and coated lenses made from exotic glass, so they are not cheap. (Coatings are ultra-thin layers that manufacturers apply to lenses to reduce the amount of stray light reflected and increase the amount that passes through.)
Some hobbyists find it tough to justify spending as much on a few eyepieces as they did on their telescope. Most amateur astronomers, however, look at the investment over the long term. If you upgrade your telescope, you don’t need to change your eyepieces.
When choosing which eyepiece to buy, consider its weight. Believe it or not, some tip the scale at more than 2 pounds (0.9 kilogram) — as heavy as some binoculars. If you purchase a small- or medium-sized telescope, you’ll want to choose lighter eyepieces.
Another thing to keep in mind is the eyepiece’s field of view. You’ll see two numbers used: the apparent field of view and the true field of view. The apparent field of view of an eyepiece just tells the angle of light that enters the eyepiece. Eyepiece apparent fields range from 25° to 84°. Much more important is an eyepiece’s true field — the amount of sky you actually see when you look through the eyepiece. This number will change from one telescope to the next.
High-quality eyepieces deliver high-contrast views and sharp images all the way to the edge of the field of view.
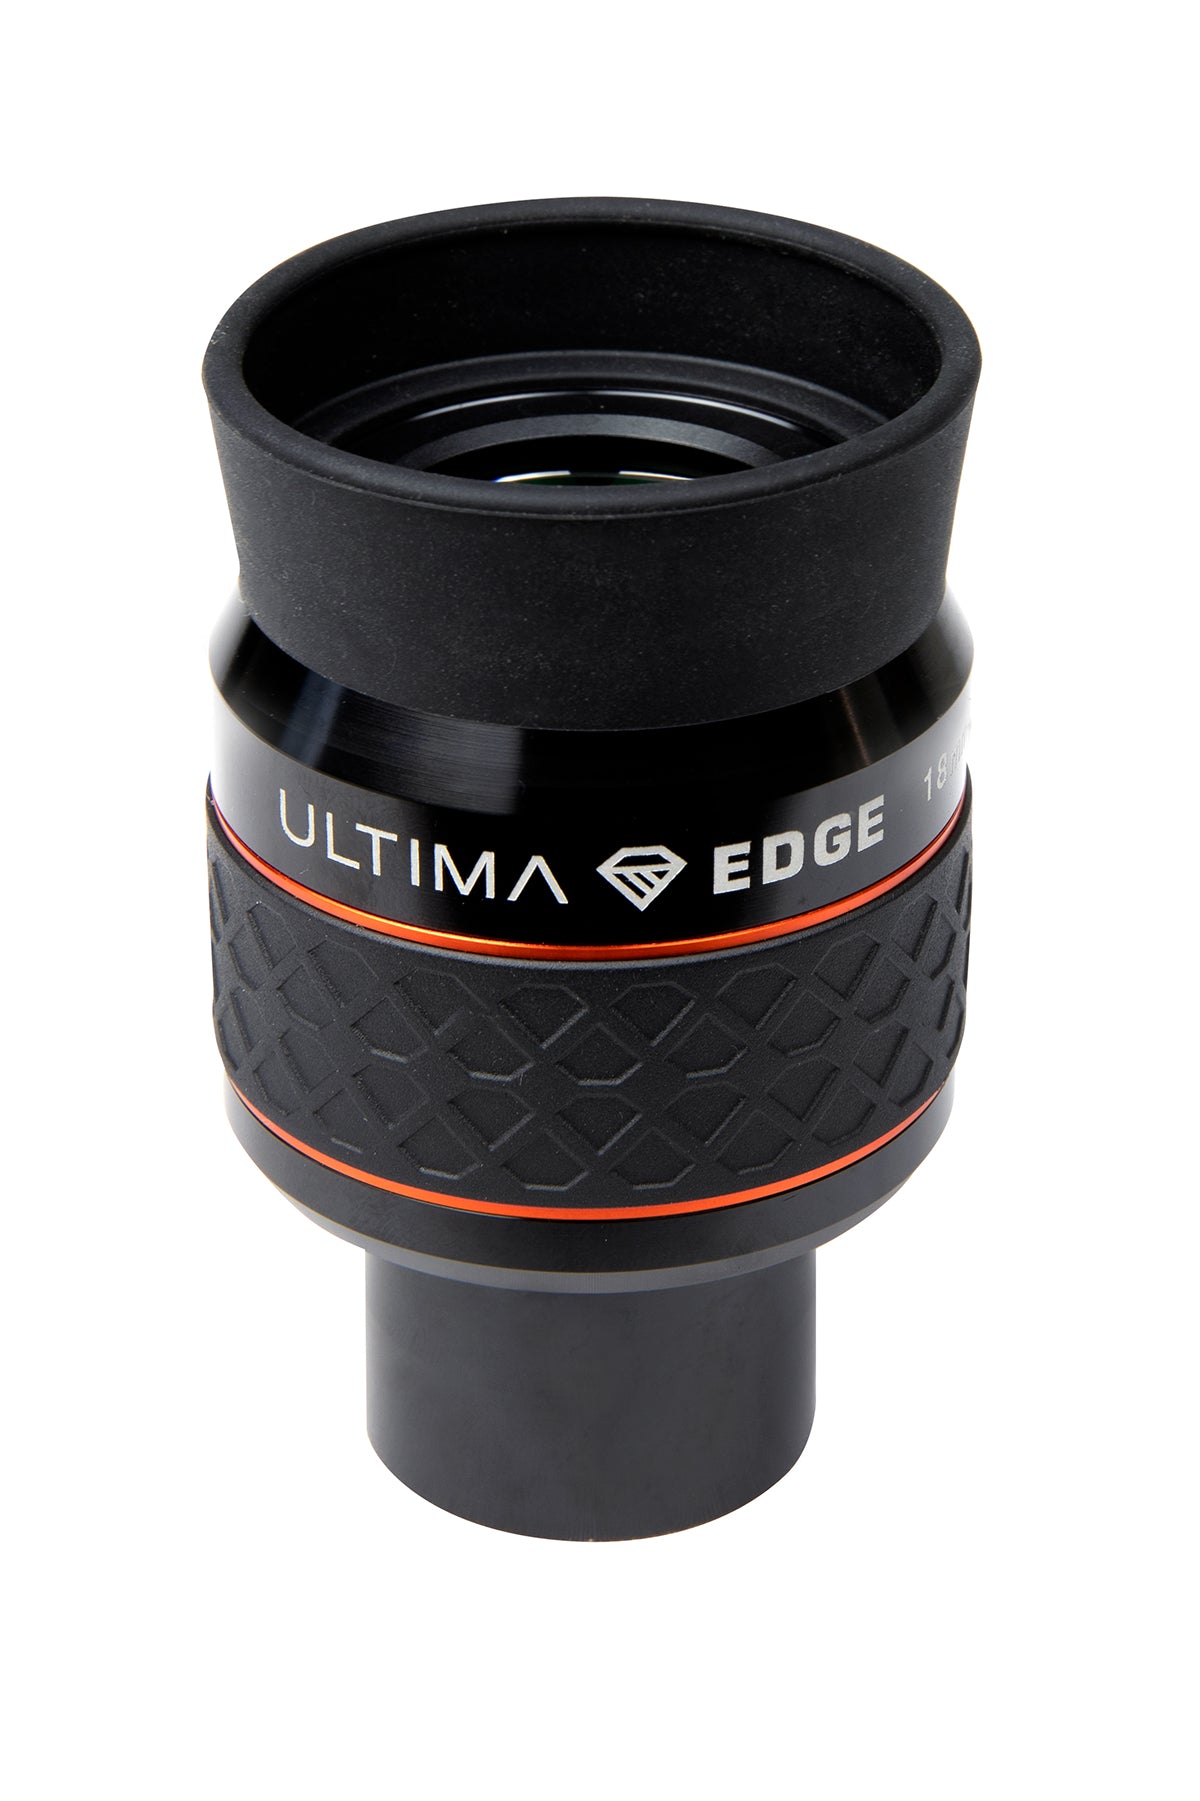
Barlow lenses
A Barlow lens is an optical accessory that increases an eyepiece’s magnification. It goes between the telescope’s focuser — or the star diagonal if you’re using one — and the eyepiece. Some Barlows magnify two times (2x), some are 3x, and so on. So, as an example, let’s say your 18mm eyepiece gives a magnification (you’ll also hear this called “power”) of 100x through your telescope. If you insert a 2x Barlow, the magnification will be 200x.
Roughly 60 years ago, when Barlow lenses first became widespread in the hobby, they were simple units using single lenses. They worked, but they worsened the view. Today’s Barlows contain high-quality coated lenses that transmit nearly all of the light hitting them.
A Barlow lens can effectively double the number of eyepieces in your set, if you select your eyepieces with this in mind. Here’s an example: Let’s say you have 40mm, 32mm, 12mm, and 9mm eyepieces that, in your telescope, magnify 25x, 31x, 83x, and 111x, respectively. Adding a 2x Barlow lens will give you four additional magnifications: 50x, 62x, 166x, and 222x.
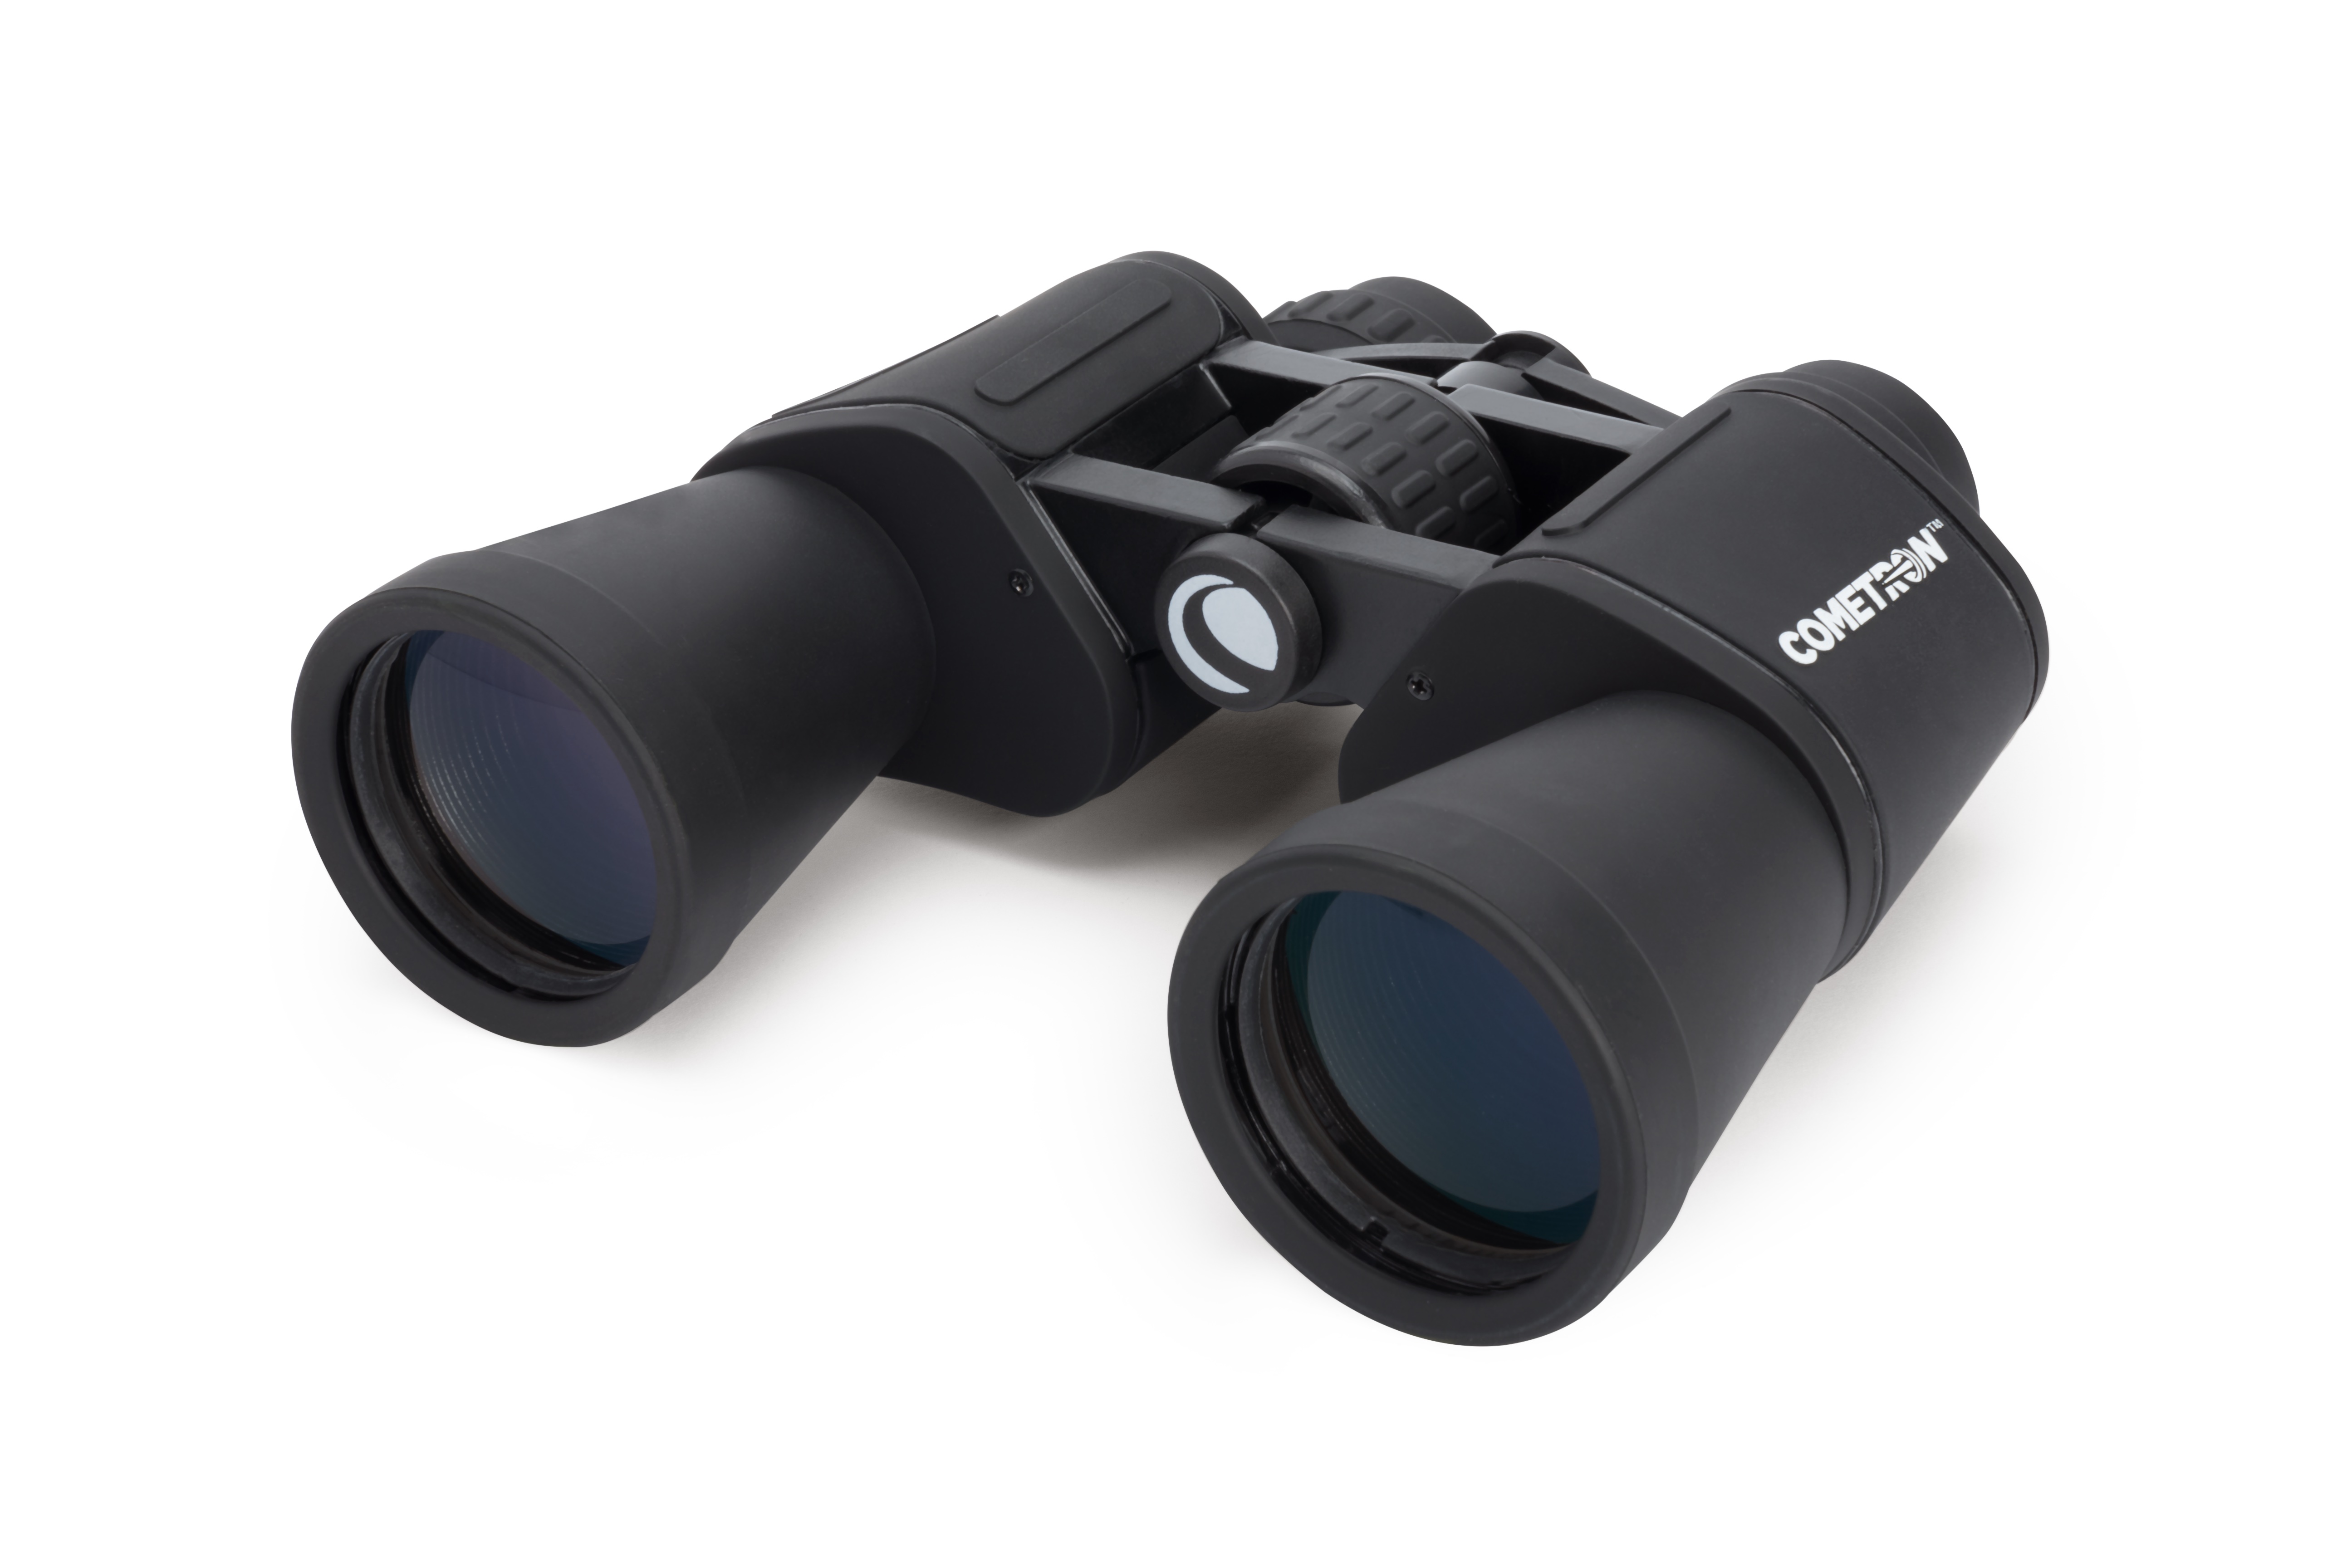
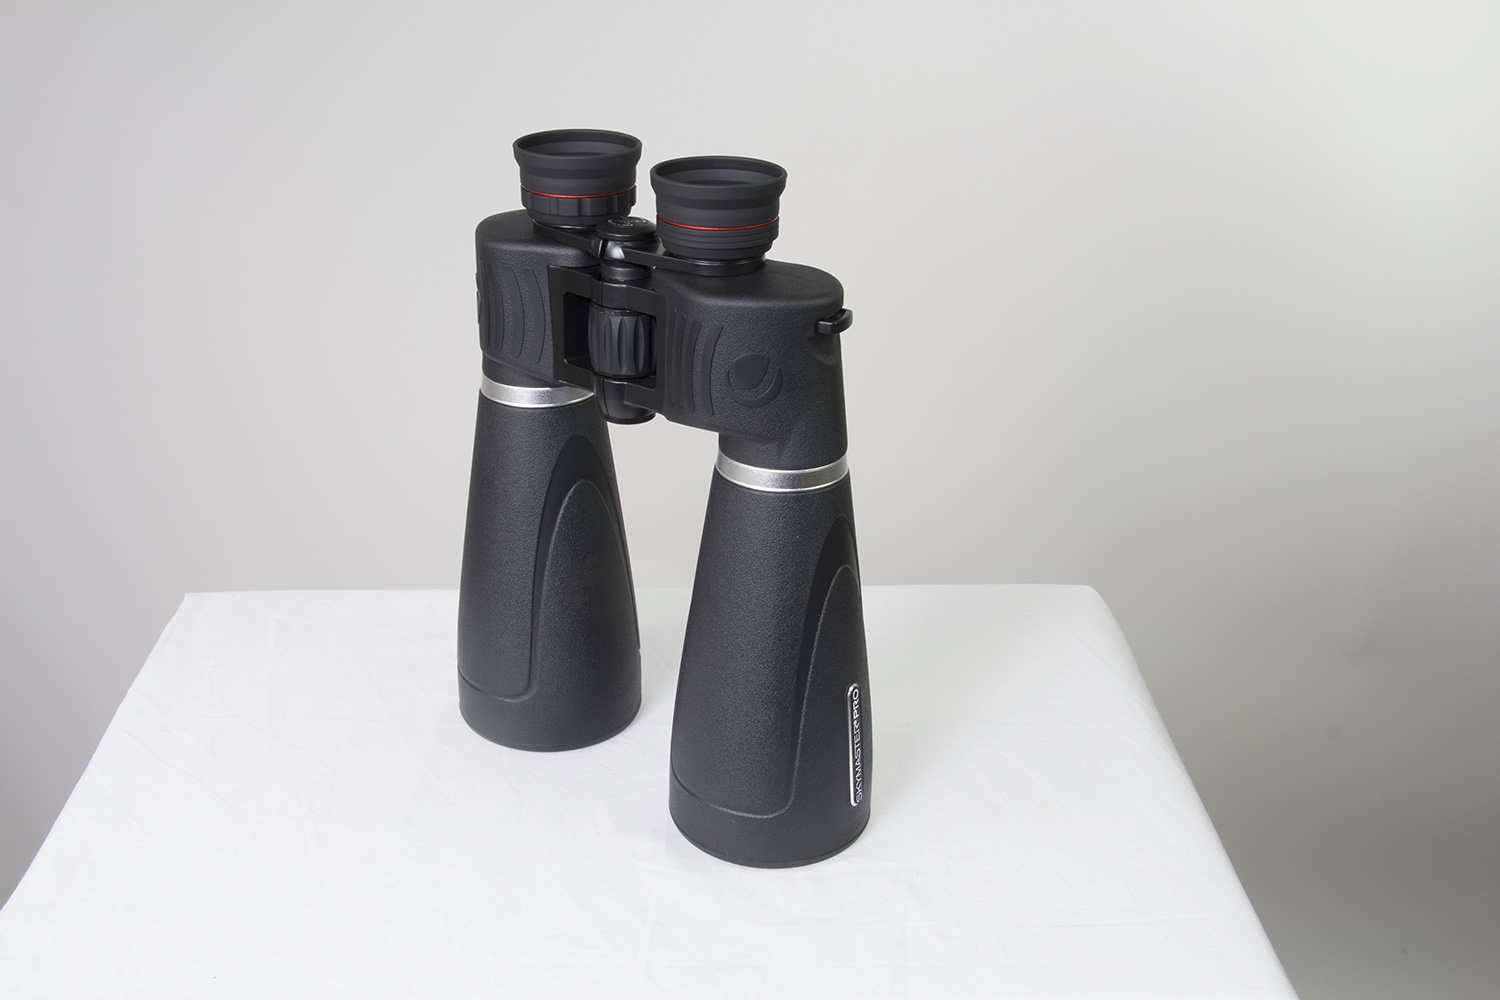
Understanding binoculars
3 things you should know
- Binoculars give a right-side-up image.
- They let you use both eyes to observe.
- The biggest sky objects look best through binoculars.
Binoculars are versatile instruments with many benefits. They have a wide field of view and what you see through them is right-side up, making objects easy to find. They require no expertise to set up — just sling them around your neck and you’re ready to go.
That portability also makes binoculars ideal for nights when you might not have the time to set up a telescope. And for most people, observing with two eyes rather than one is more natural and comfortable. Most binoculars also are relatively inexpensive.
What the numbers mean
For stargazing, the size of the front lenses is the most important thing. Generally, the larger they are, the brighter the image will be. You can find the lens size by looking at the two numbers on every binocular: 7×35 or 10×50, for example. The second of those numbers refers to the size (in millimeters) of each front lens. So the front lenses of 7x35s have a diameter of 35mm, and 10x50s have a 50mm diameter. Binoculars with 50mm lenses gather twice as much light as 35mm binoculars.
Astronomy binoculars should have lenses at least 40 millimeters across. Smaller ones may work in the daytime, but they won’t gather enough light to give good views of most night sky objects.
The other number is the binoculars’ magnification. For astronomy, go for binoculars that magnify at least 7 times. The highest you’ll want for hand-held binoculars is about 10x. If the magnification is higher than that, you likely won’t be able to hold them steady enough to get a sharp image. For those, use a tripod.
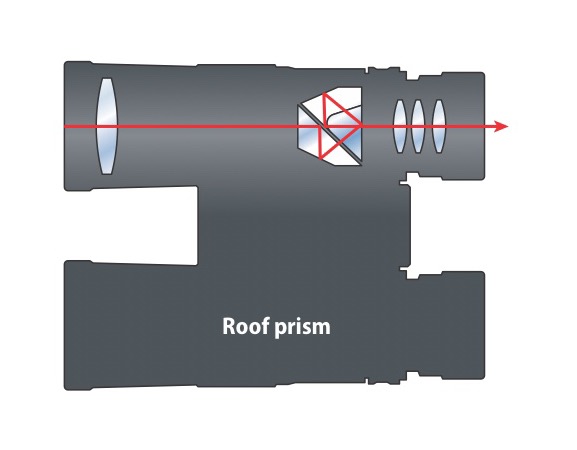
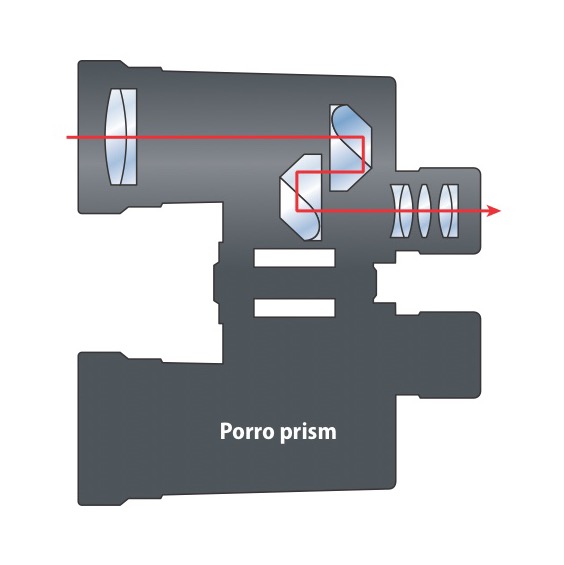
Details to look for
Binoculars contain prisms that make the image appear right-side up. These prisms come in two varieties: roof and Porro. Roof-prism models have straight barrels and are more compact. However, they tend to be more expensive and produce dimmer images, making them less desirable for astronomy. Porro-prism binoculars have a zigzag shape and usually are bigger and heavier than roof-prism models.
Lenses in high-quality binoculars are made of barium crown glass (BaK-4) instead of borosilicate glass (BK7). Also, look for coated optics — the more lens and prism surfaces to which special coatings have been applied, the brighter and higher contrast the images will be.
Most binoculars have a central focusing knob that moves both eyepieces at once. These models also have one eyepiece that you can focus individually. To operate the binoculars, first use the central knob to focus the eyepiece that doesn’t adjust, and then focus the other eyepiece. This type of focusing proves to be more convenient, particularly if you pass the binoculars from person to person. On other binoculars, the eyepieces focus individually. These models tend to be more rugged and better sealed against moisture.
What you’ll see
Binoculars will show the Moon in crisp detail. Watch shadows creep across lunar features as the Moon’s phase changes. Follow the stages of a lunar eclipse as Earth’s shadow covers the Moon. And view a crescent Moon silhouetted against stars low in the western evening sky.
Farther afield, binoculars let you track Jupiter’s four big moons. In addition, they’ll help you pick out Mercury low in the twilight sky and spot objects too faint to see easily, such as the outer gas-giant planets, Uranus and Neptune, as well as the brighter asteroids.
The advantages of binoculars perhaps show up best when viewing a bright comet. Binoculars magnify enough to show detail and have a wide enough field of view that you can see the comet’s head and most or all of its tail at once.

Become an observer in 10 simple steps
Astronomy remains exciting because something’s always making news. When you’re an amateur astronomer, not only can you read about what’s going on, but you can also participate. In essence, the sky is calling. But how do you start observing the sky? What do you need to know?
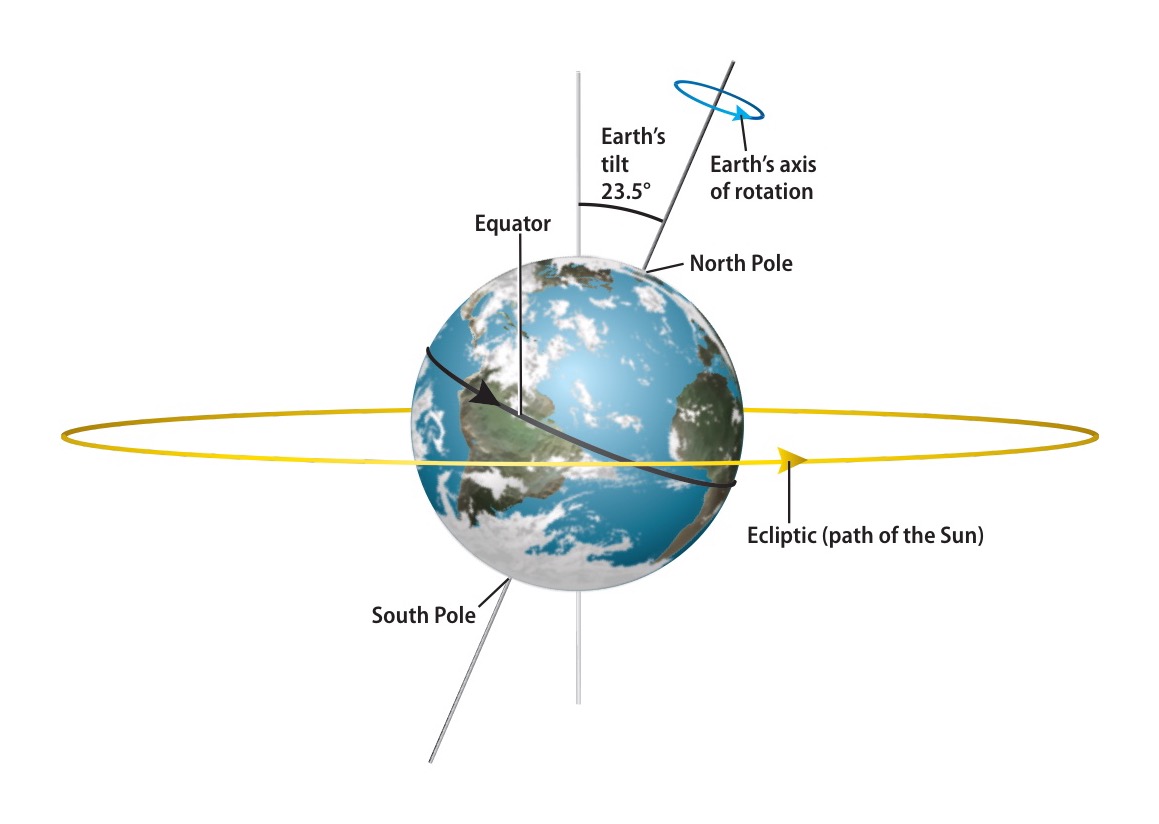
It’s good to know some basics: Earth spins once a day and orbits the Sun once each year. The first motion causes sky objects to move from east to west, and the second causes different constellations to appear in each season’s sky.
Next, imagine the sky as a sphere with north and south poles and an equator. This is how astronomers orient themselves, allowing us to refer to fixed positions on the sky.
Read up on Moon phases. The Moon first becomes visible as a thin crescent low in the western evening sky. Each night thereafter, it appears to grow and move eastward until Full Moon, after which its lit part shrinks to invisibility (New Moon). When you again spot the thin crescent low in the west, roughly 30 days have passed. You’ll want to know the Moon’s phase because its light can prevent you from seeing faint objects.
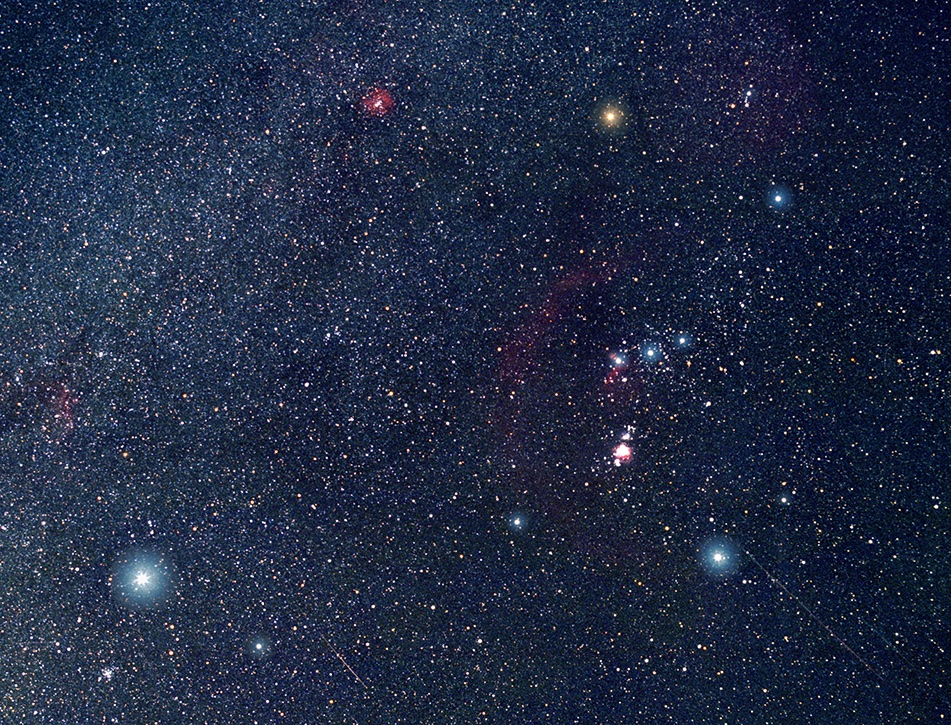
Finally, become familiar with bright seasonal constellations. Start with just a couple per season: Taurus the Bull and Orion the Hunter in winter; Scorpius the Scorpion and Cygnus the Swan in summer; and so on. Don’t worry about the faint ones. If you haven’t heard of them — for example, Lacerta and Serpens — there’s probably a good reason why.
You’ve made a good start toward becoming an observer. But there’s a lot more out there than this article, your favorite astronomy magazine, and the websites of Astronomy magazine (Astronomy.com) and Celestron (Celestron.com).
Your public library and bookshops offer many other star charts, observing guides, and texts on all facets of our wonderful hobby. Except for where you’ll find the planets on certain dates, such materials won’t go out of date quickly. Local astronomy clubs can be great resources, too. Make friends and you’ll quickly learn many tips.

Some astronomy shops — especially the ones in major cities — occasionally will set up equipment for potential customers to use. At those times, staff will be on hand to explain how everything operates.
Another way to test-drive a scope is to attend an observing session or a regional star party hosted by an astronomy club. Take your time and ask lots of questions. Amateur astronomers love showing off their equipment to beginners.
If you’ll be content with the Moon, planets, and double stars, pretty much any location will do. To see faint, diffuse objects like nebulae and galaxies, however, you’ll need to travel to a dark site.
Some things to consider are how light-polluted the location is, the driving distance, how portable your telescope is, safety (including if you’ll get cellphone service), and weather factors. The last point includes how generally clear the sky is and how steady the air is.

If you want to move past simple visual observing but aren’t ready to commit to capturing objects with a camera, do some sketching. Drawing what you see through the eyepiece lets you record your observations. Sketching is also fun, and you’ll become a better observer as your ability to pick out faint details in objects improves.
You won’t need much in the way of supplies. A sketchpad, a #2 pencil, a good eraser, and a red flashlight will be enough to get you started. You might also want to add a drafting compass because most of what you’ll be sketching is round and any noncircular objects will lie in the circular field of view of your telescope’s eyepiece.
Comfort means a lot more than just staying warm during the winter. Many observers use various gyrations while looking through an eyepiece. Holding a squat is pretty hard on the back and requires keeping several muscles tense to keep your eye at the eyepiece.
So, sit. When you are seated comfortably at the eyepiece, you’ll spend more time observing (and see a great deal more) than while standing.
Here’s the good news: You can take pictures of astronomical objects. Here’s the other side: Astroimaging takes practice, and there is a learning curve. The higher the quality of the final image, the steeper the curve. Remember that producing a high-quality picture involves two stages. First you acquire the data through your camera, and then you process that image with the right software.
Lots of resources exist to help you learn the art of astrophotography. Read all you can, take lots of images, and eventually you’ll proudly show off your results to family and friends.
You will want to remember what you’ve seen. A simple log contains the date and time of your observation, what object(s) you looked at, and a brief description, like, “Saw spiral arms!” or “Really blue, but no details visible.”
More-detailed logs might contain information about the telescope you used, what eyepiece(s) and magnification(s), and sky conditions (percent of cloud cover, amount of light pollution, steadiness of stars, etc.).
Visit a planetarium and take in a program. Attend a star party in your area. Observe with others. Get online and chat in one of Celestron.com’s or Astronomy.com’s forum areas.
Without question, the best step you can take is to join a local astronomy club. Attend its meetings and observing sessions. This will place you with a group of like-minded people who can either answer your questions or help you figure out where to get them answered.
Most astronomy clubs have members who look for opportunities to share information about the hobby we all love. Get involved, volunteer to help at events, and before too long you’ll be the one answering the questions.
I’ve heard it a million times. “I’m a planetary observer,” or “I only observe galaxies.” Really? Are these amateur astronomers in fact saying they’d pass up watching a total lunar eclipse, a bright comet, or a rich meteor shower?
While your telescope may be best suited for a particular type of object, you can view anything through any scope. So why not try viewing them all?
The Moon has hundreds of targets on its ever-changing face, and even a small scope will show most of them. The planets spend lots of time in the early evening sky, which makes viewing them convenient. A short drive each month during the dark of the Moon may yield dozens of galaxies. While you take them all in, you’ll surely marvel at the magnificent universe above and the richness of the hobby you have chosen.
Start exploring the sky
Congratulations on your telescope purchase. Here are some suggested objects to observe.
Scan the Milky Way
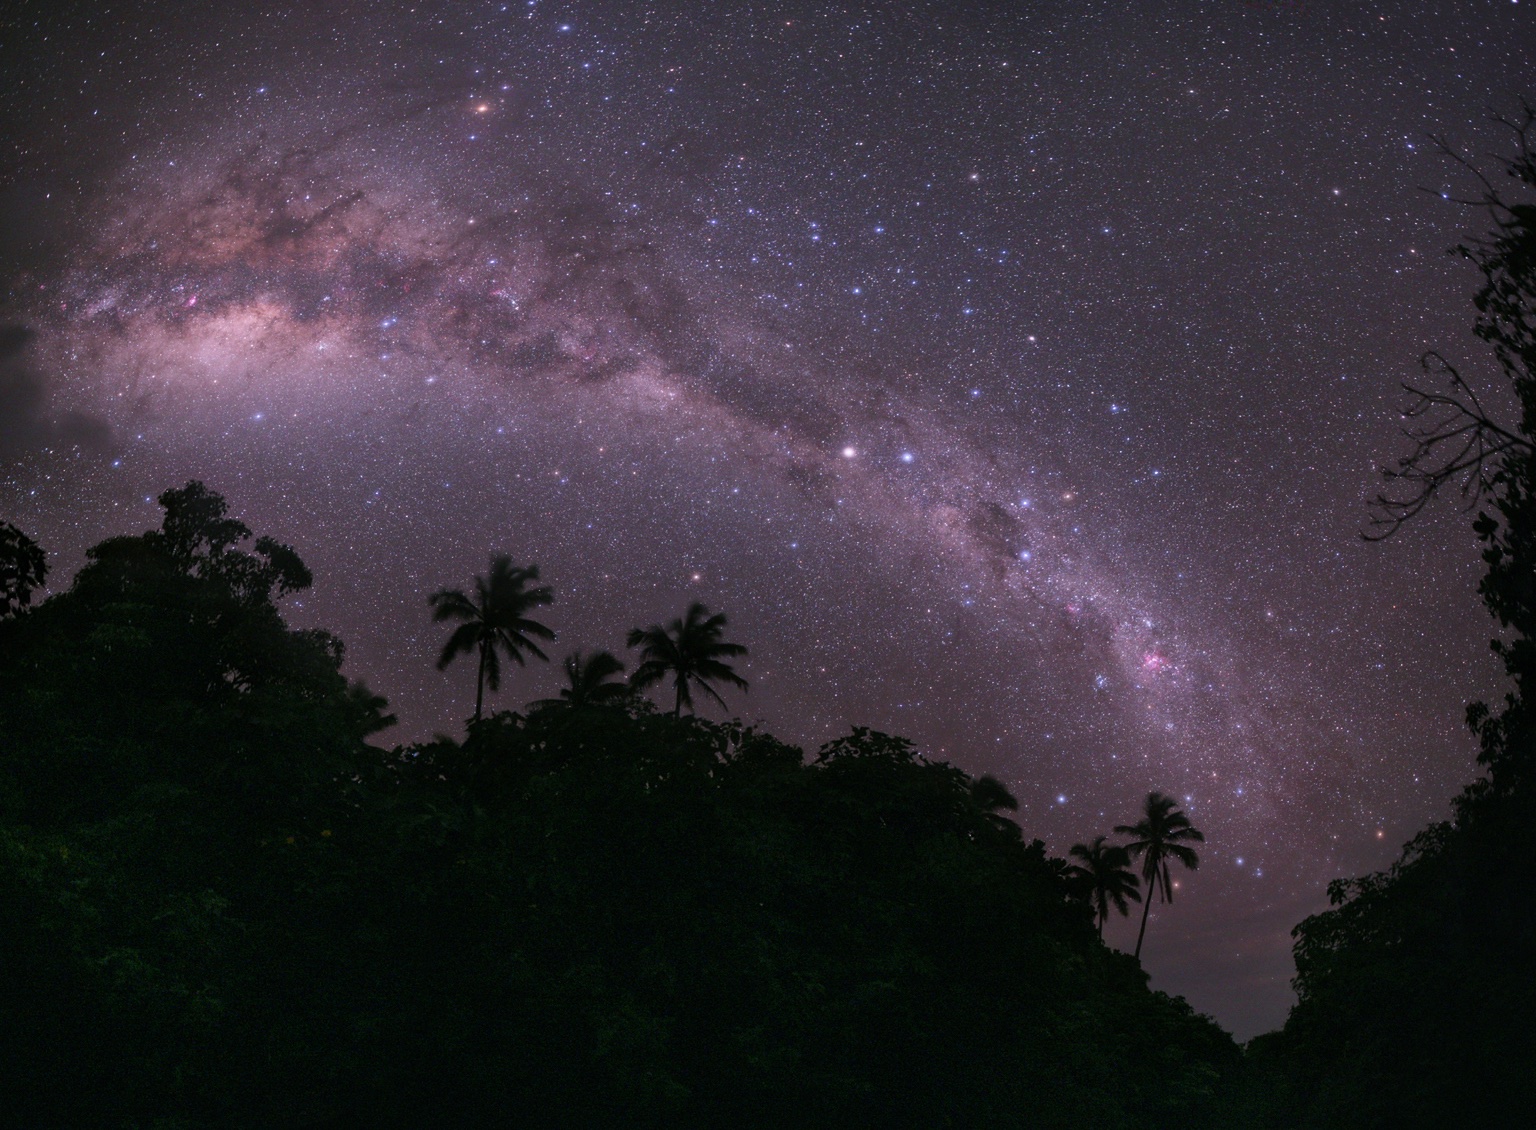
One of the most pleasurable observing experiences you can have under the summer or winter sky is simply scanning the Milky Way through your telescope. It’s so simple — just insert an eyepiece that gives a wide field of view (one with a large number on it), put away your phone, ignore your observing guides, turn off your go-to drive, and move your scope to and fro by hand.
Observe the Sun
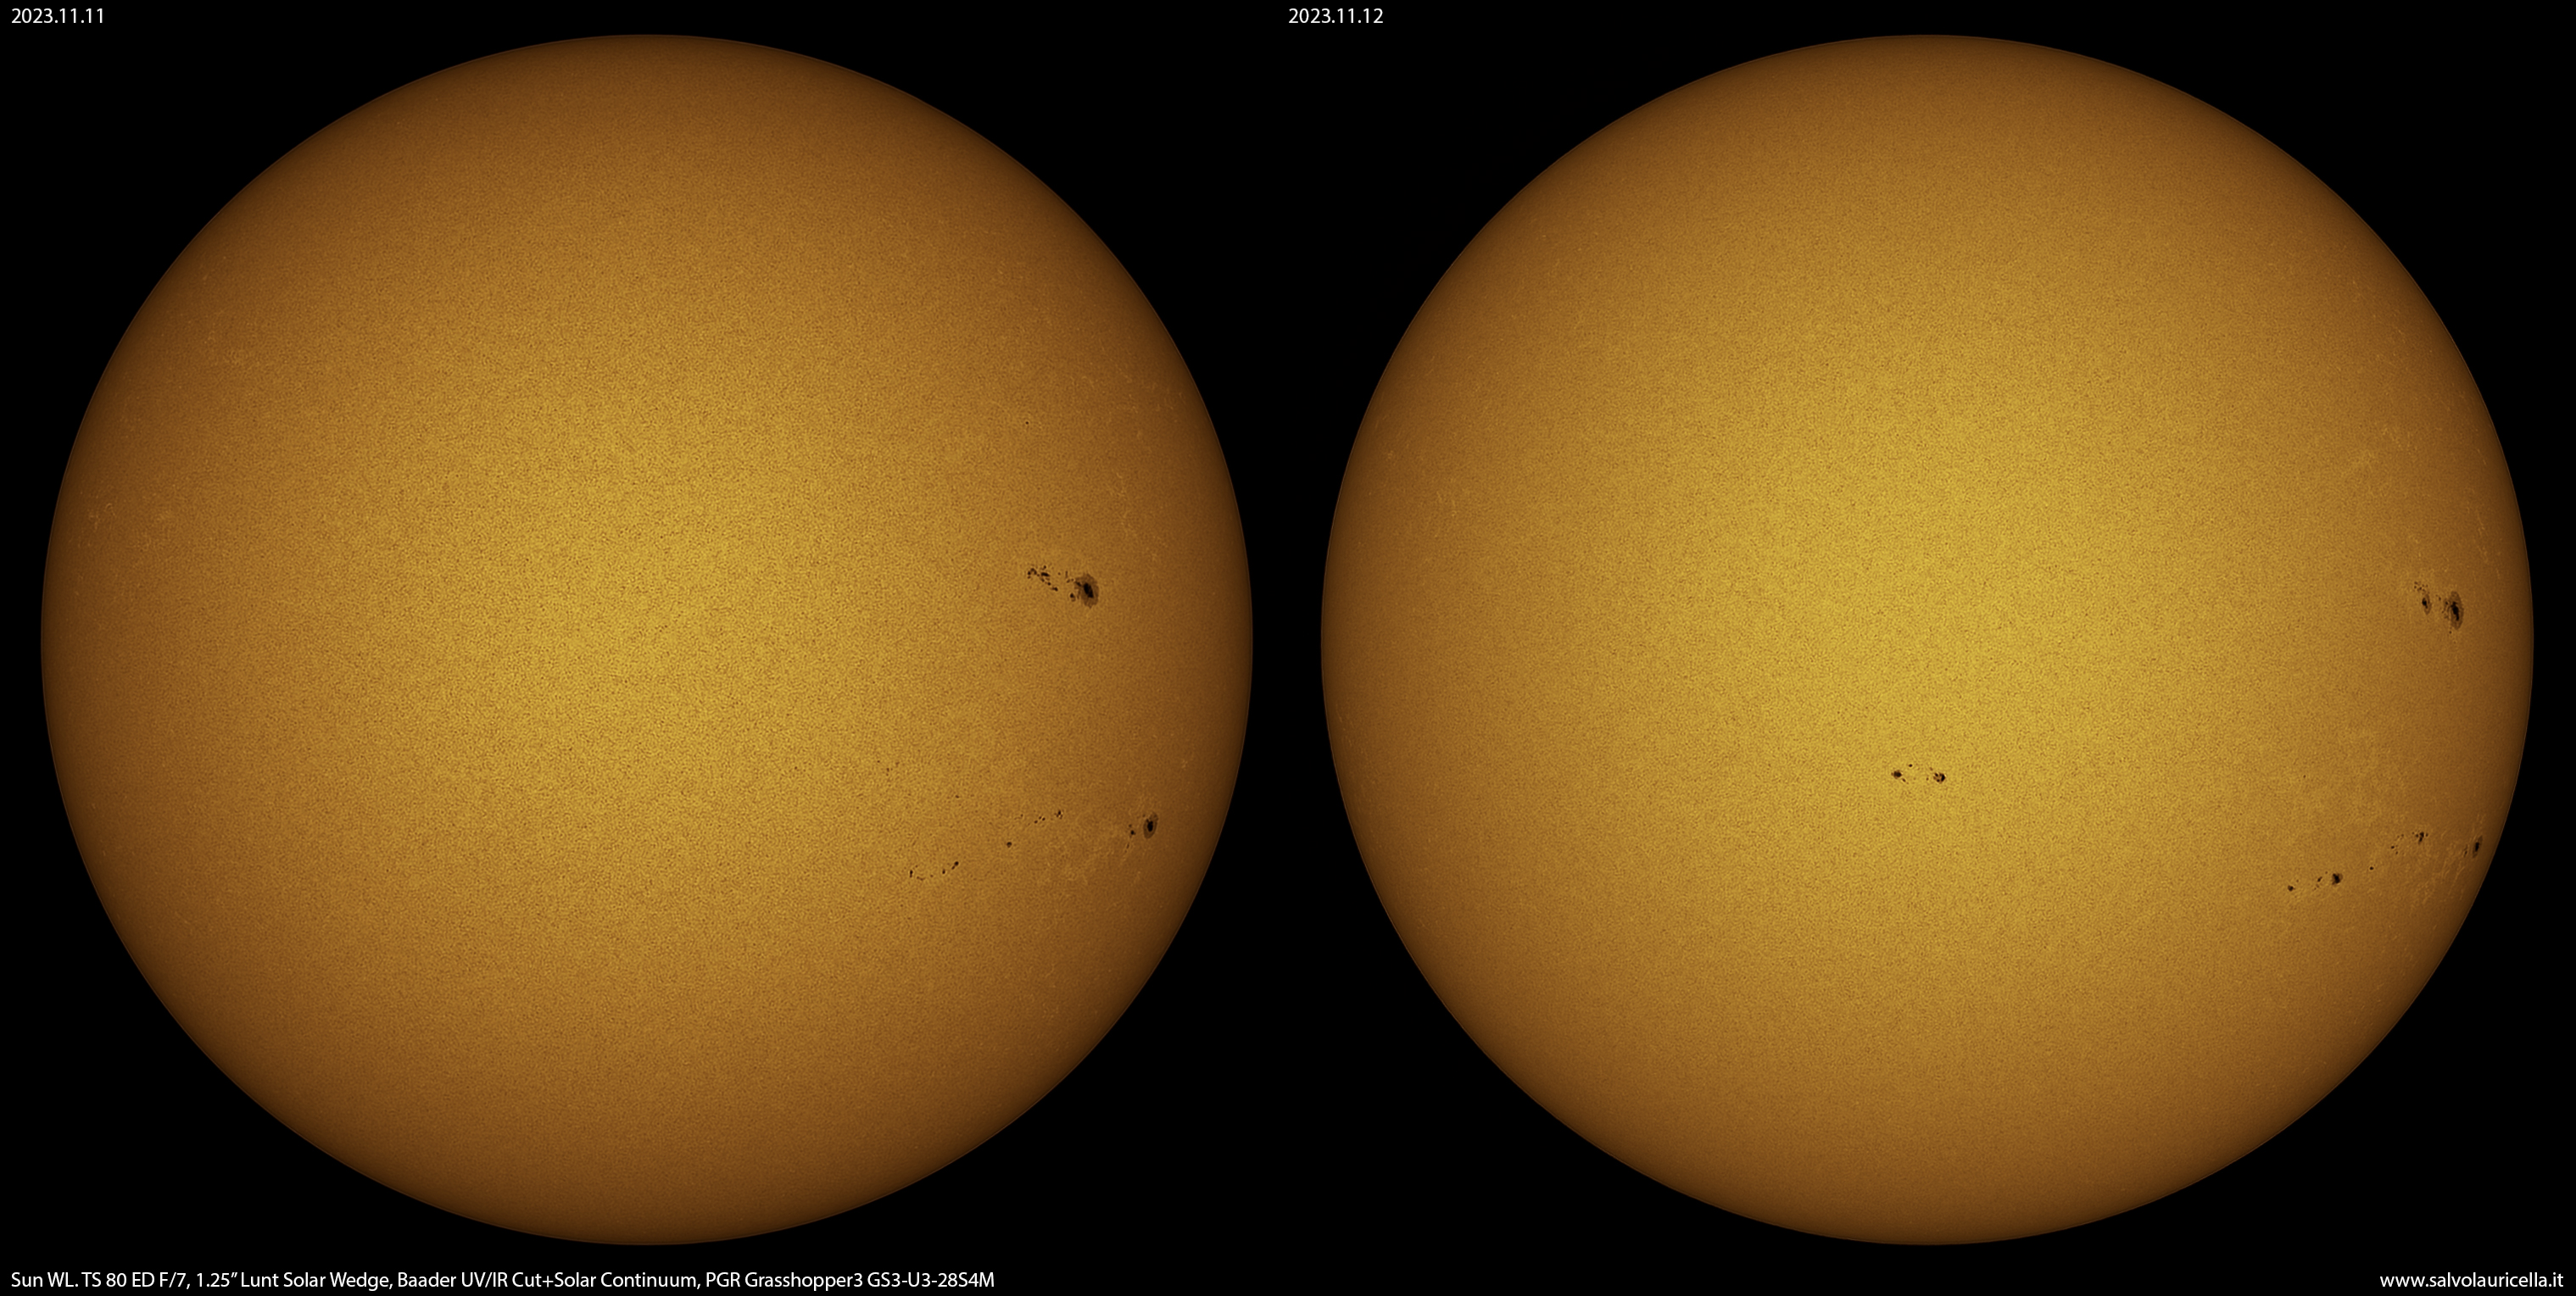
You can double your observing fun with a safe solar filter. A filter that fits over the front of your telescope is the only kind to use. Never look directly at the Sun with your eye or through any unfiltered telescope.
You can start your solar observing by counting or sketching sunspots. It’s fun, it’s easy, and sunspot counts let you know just how active the Sun is. People have been recording sunspot numbers daily since 1749.
Observe the Moon
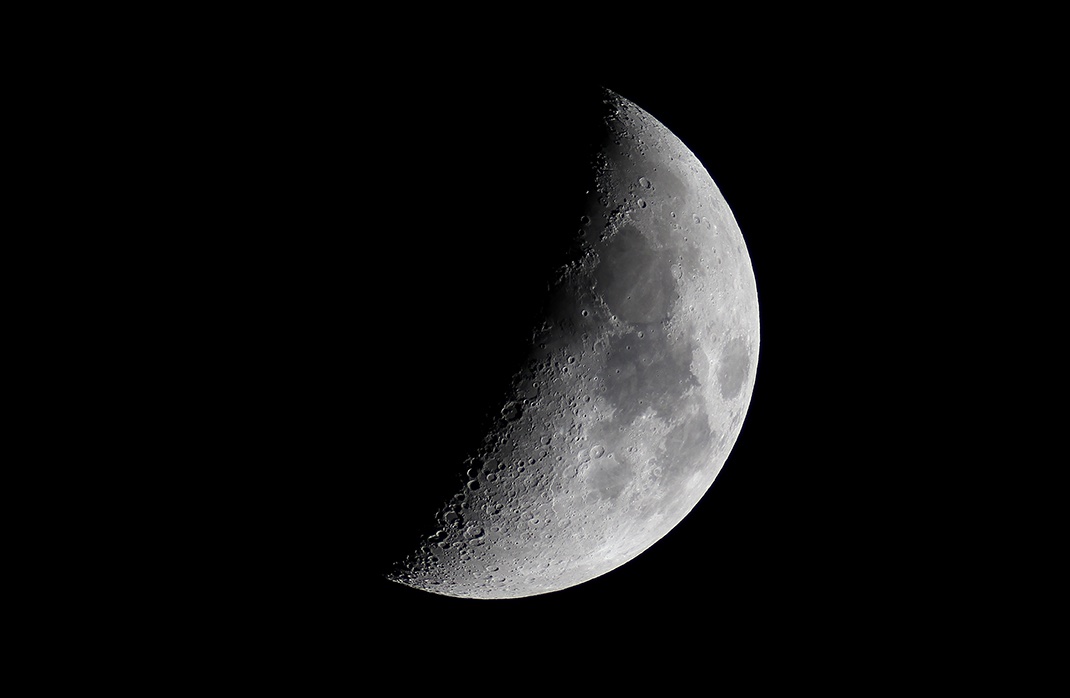
The Moon has a face that’s always changing. But Full Moon is not the best time to view it. That’s when there are few shadows, so you’ll see little detail. The best evening views are between New Moon and two days after First Quarter. In the morning before sunrise, view from about two days before Last Quarter to just before New Moon. Shadows are longer at these times, and lunar features really stand out.
Mainly look along the line dividing the light and dark portions, called the terminator. There, you’ll see mountaintops high enough to catch sunlight while dark lower terrain surrounds them. On large crater floors, you can follow “wall shadows” cast by the sides of craters hundreds of feet high. All these features change in real time, and the differences you can see in just one night are striking.
Observe Jupiter
Next to the Sun and Moon, Jupiter has the most detail. The planet’s four largest moons look like bright stars generally in a line on either side of Jupiter.
Along with the moons, two dark stripes — the North and South Equatorial Belts — are easy to see. If the atmosphere above your site is steady, use higher magnifications (eyepieces with lower numbers printed on them). You’ll see that Jupiter looks a bit oblong because it spins fast and is not a solid planet.
Observe double stars
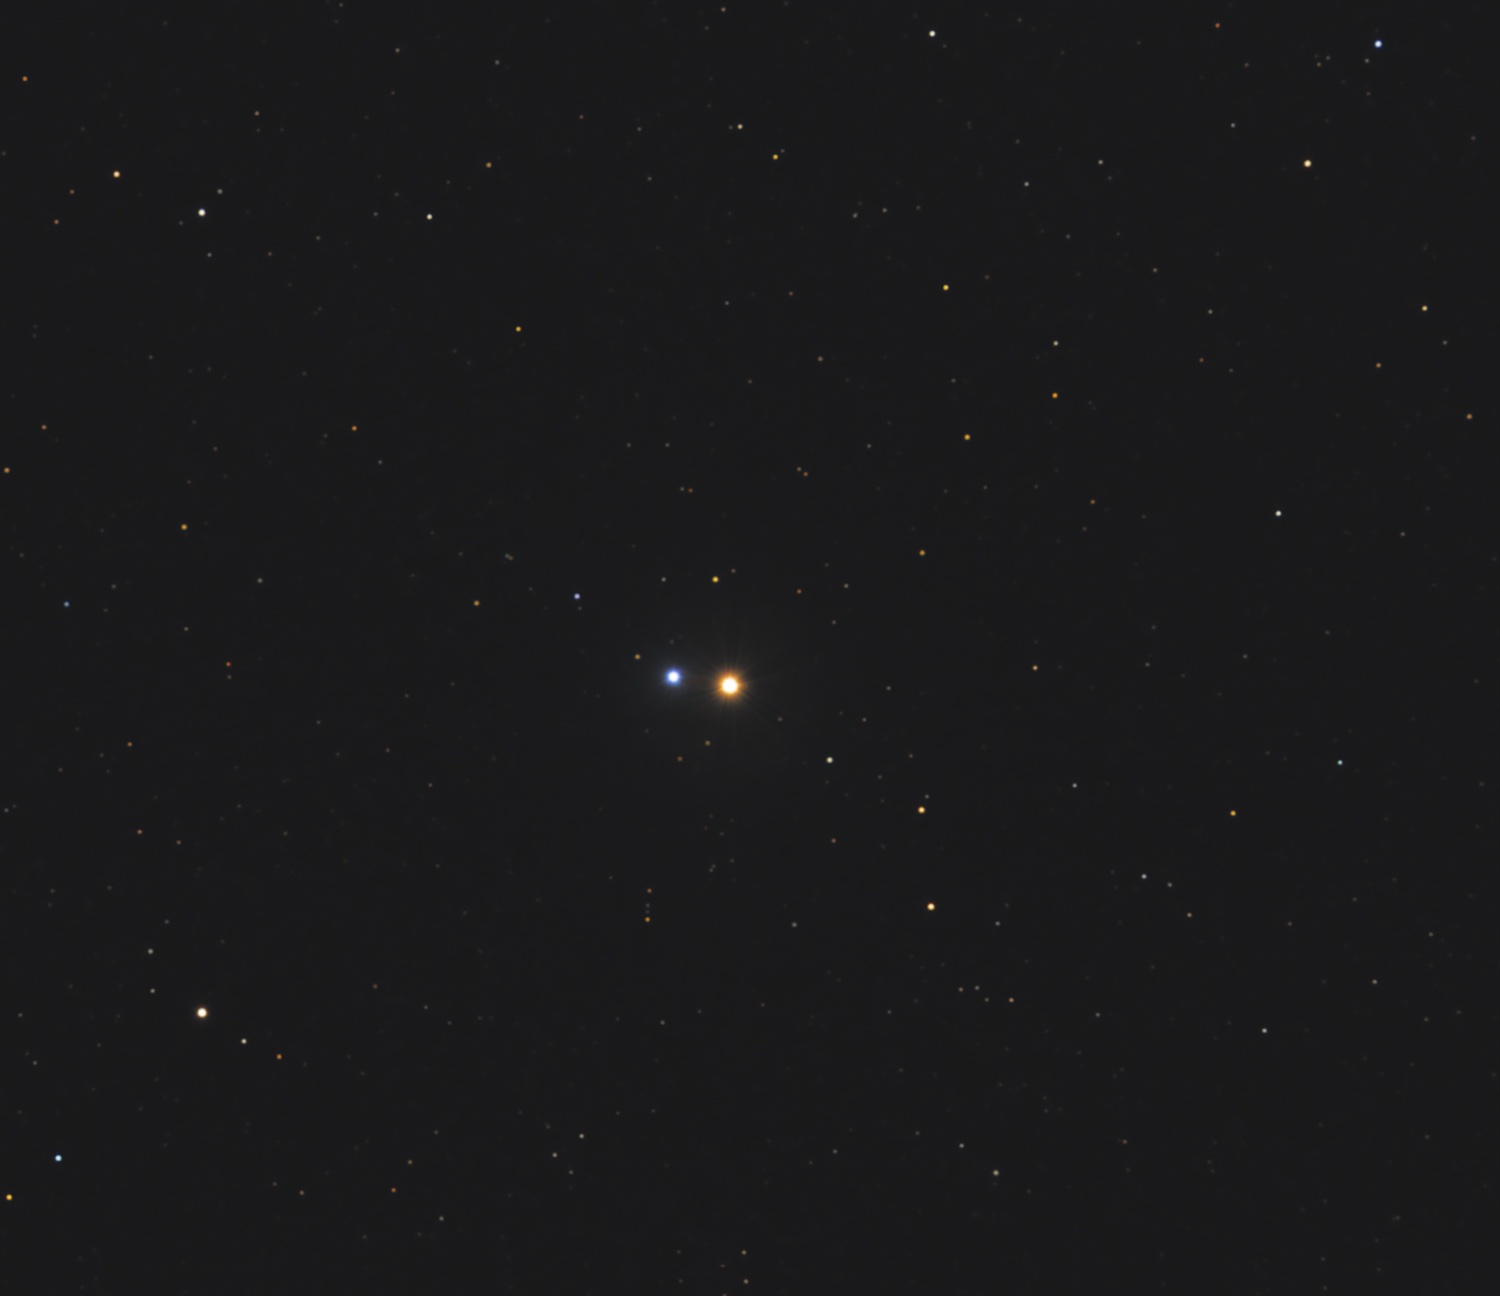
Although stars look like a single point of light to the naked eye, your telescope will split many of them into pairs. Observing double stars is easy, it doesn’t take a complicated setup, you can observe from a city, and targets exist for every size telescope. Plus, you’ll see lots of colors.
In addition to how bright each component of the double star is, one number will let you know if your telescope can split it. It’s the pair’s “separation” — the visual distance between the two stars. It’s given in arcseconds, noted by the symbol “. One arcsecond (1”) equals 1/3,600 of 1°. See the table below for the double star separation your telescope can split.
Observe Messier’s list
Charles Messier (1730–1817) was a French comet-hunter. During his searches, he encountered dozens of objects that looked like comets but didn’t move against the starry background.
In 1758, he discovered what he thought was a comet. This object became the first entry — M1 — in his famous catalog of comet “imposters.” Working your way through Messier’s list will introduce you to some of the best and brightest star clusters, nebulae, and galaxies.